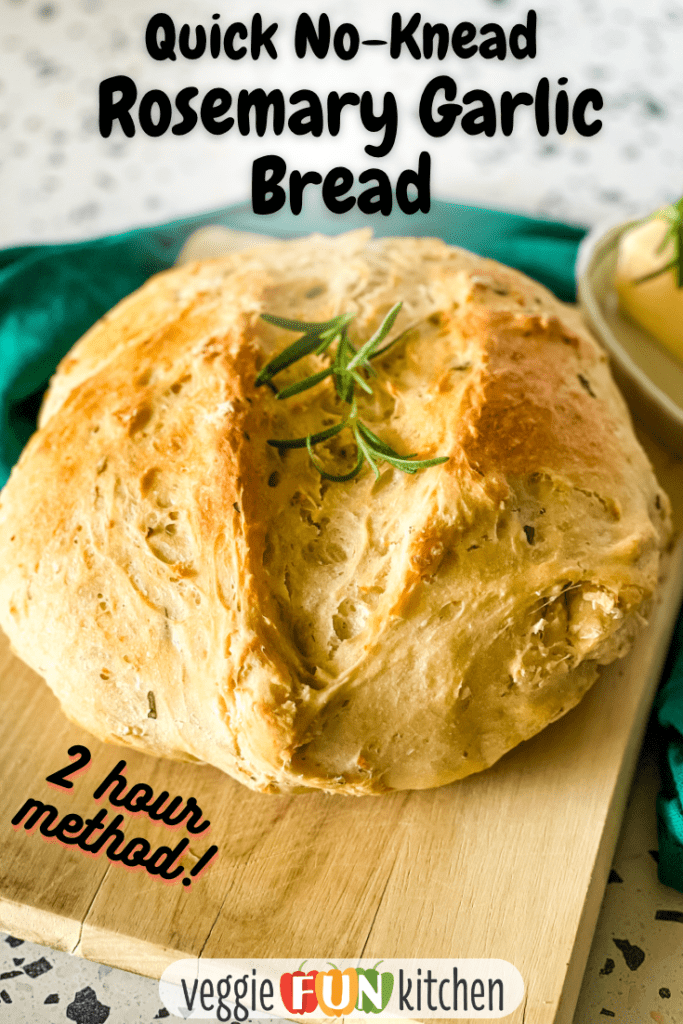
Rosemary garlic no-knead bread is bread-making done easy! This yeast-based no-knead bread recipe uses fresh rosemary leaves and chopped garlic for all of the flavors without the fuss of a more complicated yeast bread that requires kneading.

Baking bread is a delicious endeavor. I love a fresh warm loaf of crusty soft homemade bread fresh from the oven slathered with (vegan) butter! What I don’t love is the time and effort spent when bread making…This no-knead rosemary garlic bread is everything you’re looking for with a (relatively) quick and easy loaf of flavorful yeast bread.
Served with Italian Bow Tie Pasta Salad with Easy Instant Pot Minestrone Soup or seasonal pumpkin chili, this easy no-knead herbed bread is to die for!
Baking bread the no-knead quick and easy way
Just like with my Two Hour Cinnamon Rasin No-Knead bread, this flavorful bread takes just a little over two hours from start to finish. Also, like my no-knead cinnamon raisin bread, this bread will NOT give you the exact results of the typical “artisan” no-knead or peasant bread that takes 24 hours to make from start to finish.
The longer 24-hour method will indeed give you a more crusty chewy loaf with a loftier airier crumb. But this longer method will also give you almost a full day of anxiety while waiting to devour your fresh warm loaf. And I don’t know about you, but I don’t have the time or patience for that! (I will give directions for the longer method after I perfect them. You do end up using less yeast, so unless you are a seasoned bread maker, just wait!)
Other quick and savory herby easy bread recipes to try: my Olive Oil Herb made in the bread maker and my Beer Bread with Garlic and Herbs.
Pin now to save for later
Ingredients (and substitutions) to make your own easy loaf of rosemary garlic bread
- active dry yeast – Make sure it’s super fresh! I use instant yeast or “quick yeast” when I made my bread machine bread recipes. For this type of bread, make sure to use regular active dry yeast.
- hot water – You don’t want your water to be room temperature warm, but hottish to the touch. I use hot tap water which is about 115-120°. You absolutely don’t want your water to be as hot as 130° which will kill the yeast. You should check with a cooking thermometer if you aren’t sure.
- Bread flour – I have also used all-purpose flour for this recipe and while I do like the results better when using bread flour (chewier crust), all-purpose flour works well too if that is what you have on hand.
- salt
- fresh chopped rosemary – Since this is “rosemary” bread, I like to use fresh rosemary. Plus, it smells so yummy when I chop it! But yes, you can substitute dried chopped rosemary if that is what you have. But don’t do a one-to-one sub or you will end up with extra rosemary flavor. Instead, according to Spruce Eats, use about one-third the amount of dried chopped herbs that you would fresh herbs – so one teaspoon of dried chopped rosemary for this recipe.
- minced garlic – For this recipe, I have no problem using jarred pre-minced garlic!
- (optional), a shake of pepper – If You enjoy the peppery flavor then go ahead and add a shake with the salt.
- You’ll also need a dutch oven pot or a cast iron skillet/cast iron dutch oven, or a bread-baking bowl with a lid for best results.
- You will need parchment paper as well for working on and parchment paper, especially for baking.

How to make rosemary garlic homemade bread in a dutch oven the two-hour method:
The exact ingredients with measurements can be found in the recipe card below along with more concise abbreviated instructions. Read on for more details, tips, and tricks so that you will feel confident making this recipe.
Step one: Prep the hot water and yeast
You will be using active dry yeast and hot water for this recipe. According to America’s Test Kitchen, you don’t want to use water that is hotter than 120°. My hot sink water runs between 115-120 degrees and so is pretty perfect for this recipe. Use a thermometer if you are not sure.
Sprinkle the yeast on top and within five minutes it should have started to get a little bit foamy. If the yeast just sinks to the bottom like it is dead…well then, it probably is. Either your yeast was too old or your hot water was too hot. Don’t proceed with the recipe because you’ll just be wasting your time and ingredients.
Step two: Prep the rosemary and garlic
For this recipe, I use fresh rosemary, mainly because I love the smell of freshly chopped rosemary. You can substitute dried chopped rosemary at a 1:3 ratio – so one teaspoon of dried chopped rosemary to one TABLESPOON chopped fresh rosemary. I have made it both ways and can’t tell the difference.
Prep the rosemary by removing the leaves from 2-3 stems of fresh rosemary. Finely dice/chop the rosemary and set it aside.

For this recipe, you can use either fresh minced garlic or prepared jarred minced garlic. I honestly don’t have the patience to peel and mince my own garlic when the prepared garlic will do just fine and so that’s what I use. Either mince fresh garlic or measure out prechopped/minced garlic. Set it aside with the rosemary.
Step three: Measure out the bread flour
I have tried it both ways and do enjoy the texture of my no-knead loaf when I use bread flour rather than all-purpose flour. But honestly, if I didn’t know about bread flour, I’d be just fine with the all-purpose flour. You can read about the difference between bread flour and all-purpose flour in this article by King Arthur Baking.
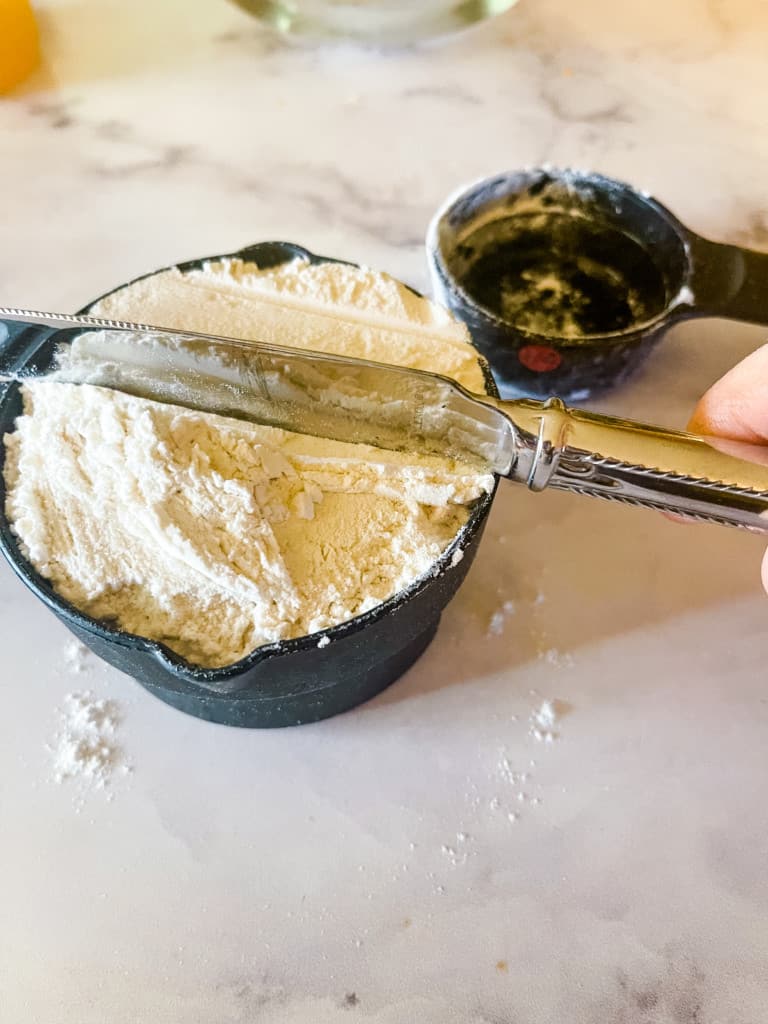
More important than the type of flour you use is the way in which you measure it. Whether you use bread flour or all-purpose flour, when you make homemade bread -or really, any other baked goods that use flour, it is crucial that you measure correctly.
The most precise way to measure flour for your baked bread would be to weigh it. In my neck of the woods, we don’t weigh our flour but measure it in cups. Barbaric, I know! But it’s what we do, so I’m going to teach you the best way to measure flour so that you don’t get a too-heavy loaf of homemade bread.
If you just cram your measuring cup into the bag of flour and pull it out, the flour will be packed down into the measuring cup and you will end up using too much flour and thus, have a heavy loaf of bread.
I’m lucky that I grew up in a home where baking bread was a regular event. My grandmother taught me the “lighten” method for measuring flour for homemade bread. First, take a spoon and stir the flour in the bag or container to loosen or lighten the flour.
Next, with that same spoon or another scoop, scoop out some flour and gently shake it into the measuring cup, insuring that it is not packed down in the cup. You will probably need to do this a couple of times until the measuring cup is full.
It’s best if the flour is a little above the rim of the measuring cup because you next need to take a knife or other flat device and swiftly scoot the extra flour off from the top without packing down the flour into the cup.
By the way, if you are curious about measuring using the weighing method, according to King Arthur Baking’s ingredient and weight chart, both bread flour and all-purpose flour both weigh 120 per cup of flour.
Steps four and five: Add and mix the ingredients together
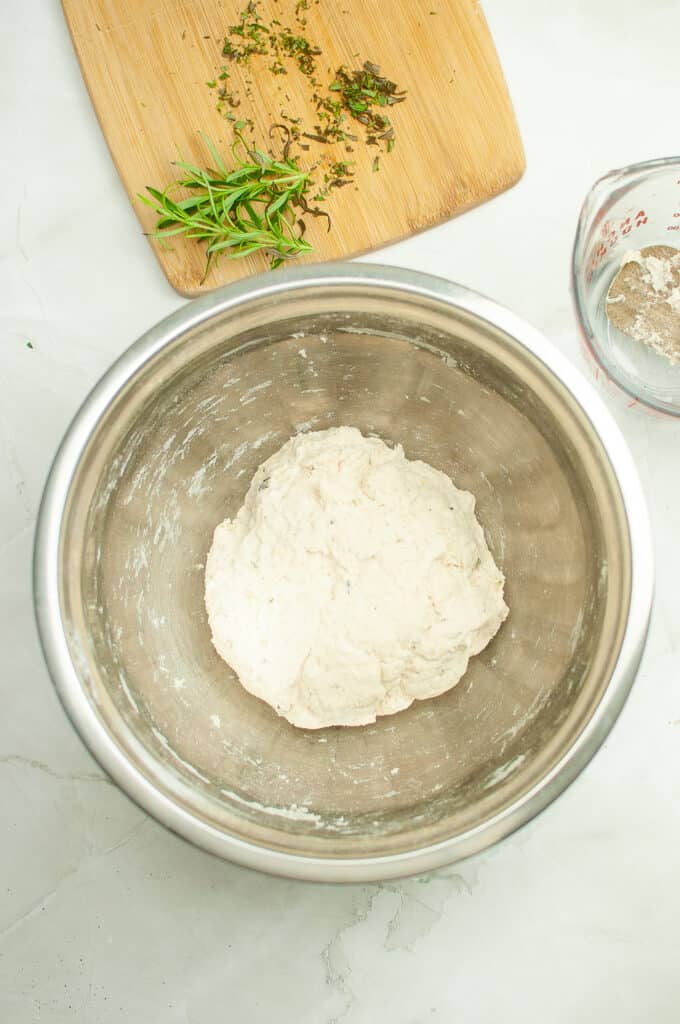
Once the flour has been measured properly into a medium or large bowl, add the chopped rosemary, garlic, and salt to the flour mixing everything together well.
By now the yeast will be a little foamy in the hot water and ready to add to the flour. Pour the yeast/water mixture into a large bowl with the flour and mix. Begin to work the mixture into a sticky but firm ball of dough. I usually work it with my hands…but remember, this is a “no-knead” bread so it’s not kneading – just mixing well.
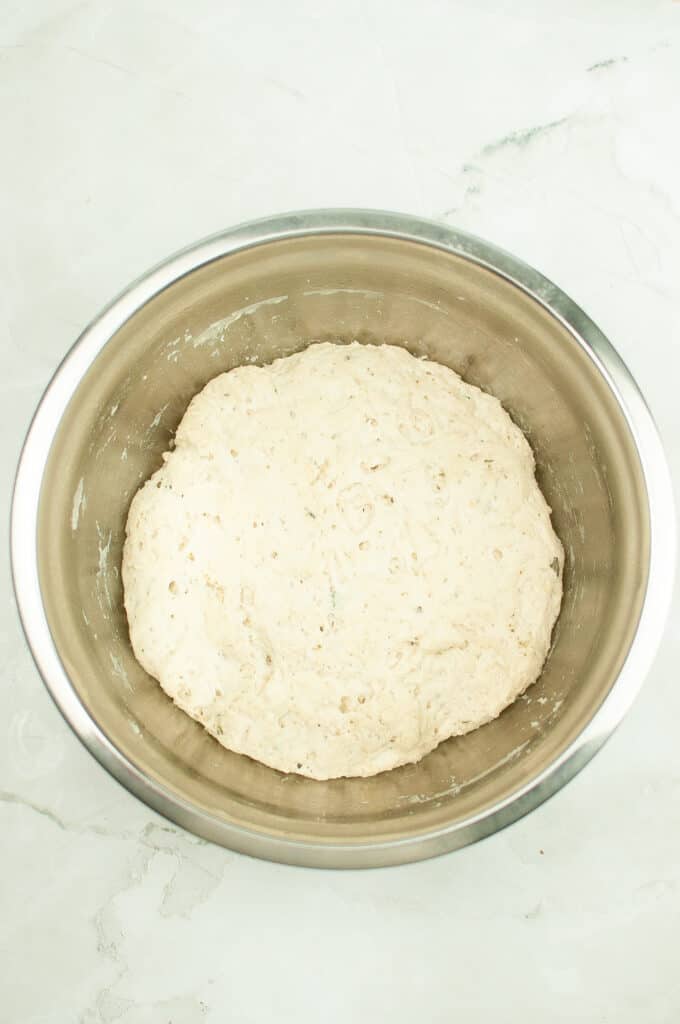
Step six: the dough rise
Your dough might be a little bit shaggy still. Use your hands to form it into a ball. Cover the dough ball with a slightly damp cloth or plastic wrap. This will keep the dough from drying out while it rises.
I personally prefer using plastic wrap. It keeps the moisture in and I don’t need to worry about any strange flavors coming from the wet dishcloth (like dryer sheet scent and such).
Make sure to place the bowl in a warmish, non-drafty spot in your kitchen and allow rising for one hour. The dough ball will double in size.
Steps seven-nine: final preparations for baking your homemade bread
During the last 20-30 minutes of rise time, preheat your oven to 450° and check your oven racks to make sure they are in the best position to accommodate the dutch oven you will be using. This will be a very hot oven and you don’t want to be messing with the racks at the last minute.
After the one-hour rise time, lightly dust a flat dry surface and gently work the dough into a round loaf. Again, this isn’t kneading – just forming the ball. Try not to squish it down too much in the process.
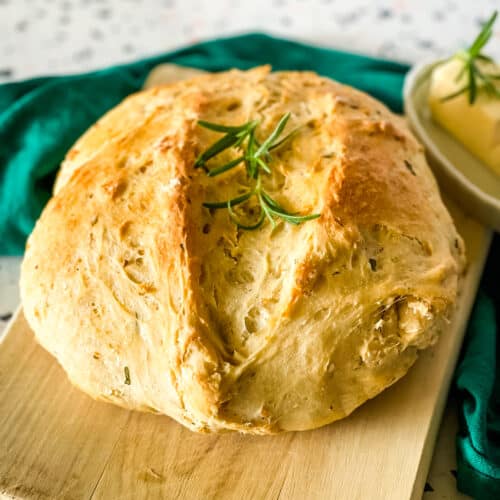
Add another large sheet of parchment paper to the Dutch oven and place the dough inside. Score the top with a straight cut or an “X”.

Final steps: Bake and enjoy your homemade bread!
Ready to bake bread? Cover your dutch oven with the lid and bake at 450°f for 30 minutes. At 30 minutes, remove the lid and cook for another 5-10 minutes if necessary until the crust is nice and golden brown.
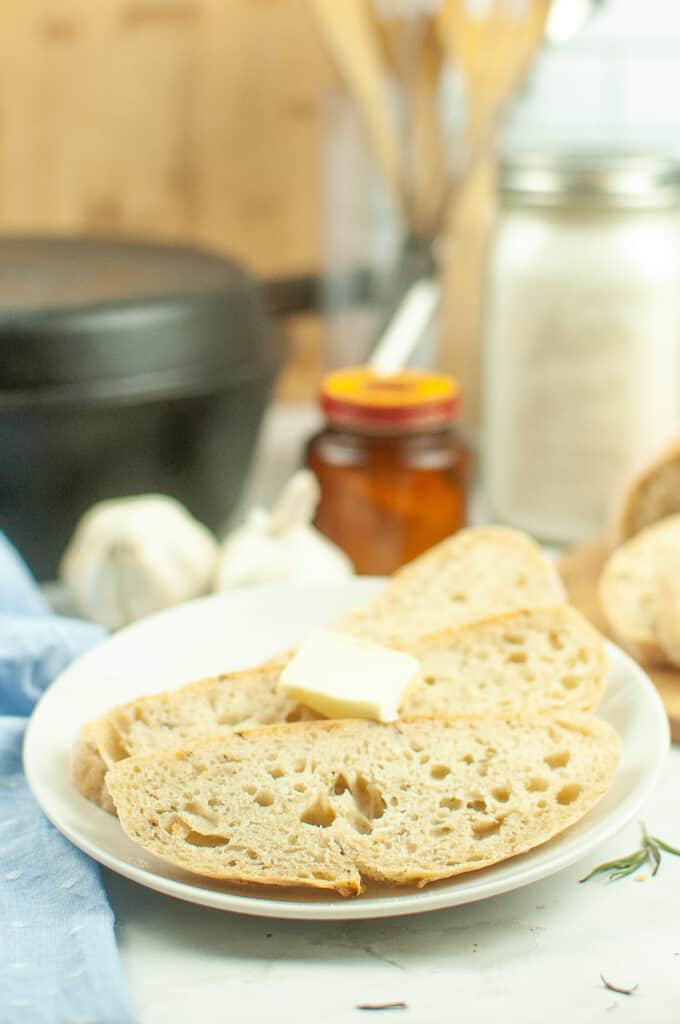
You should allow the baked bread to cool before slicing. Do I ever do this? Uh…heck no! I can’t resist slathering my freshly baked rosemary bread with vegan butter! Try my herbed basil garlic butter too. It’s extra tasty:)
Strange as this may seem, a little small batch strawberry jam is a nice compliment to the herby flavors of this easy bread recipe. I learned about this tasty flavor combo when my sister bought me some garlic and rosemary bread from a local bakery and had it delivered with berry jam. Fabulous!

Be aware that when you slice into your bread and it’s too not, it will probably squish the loaf down and make it unsuitable for sandwich bread. If you are just going to eat it with melted butter then it doesn’t really matter.
But, if you are patient enough to wait till your homemade bread cools, you can easily cut some pretty decent slices for sandwich making.
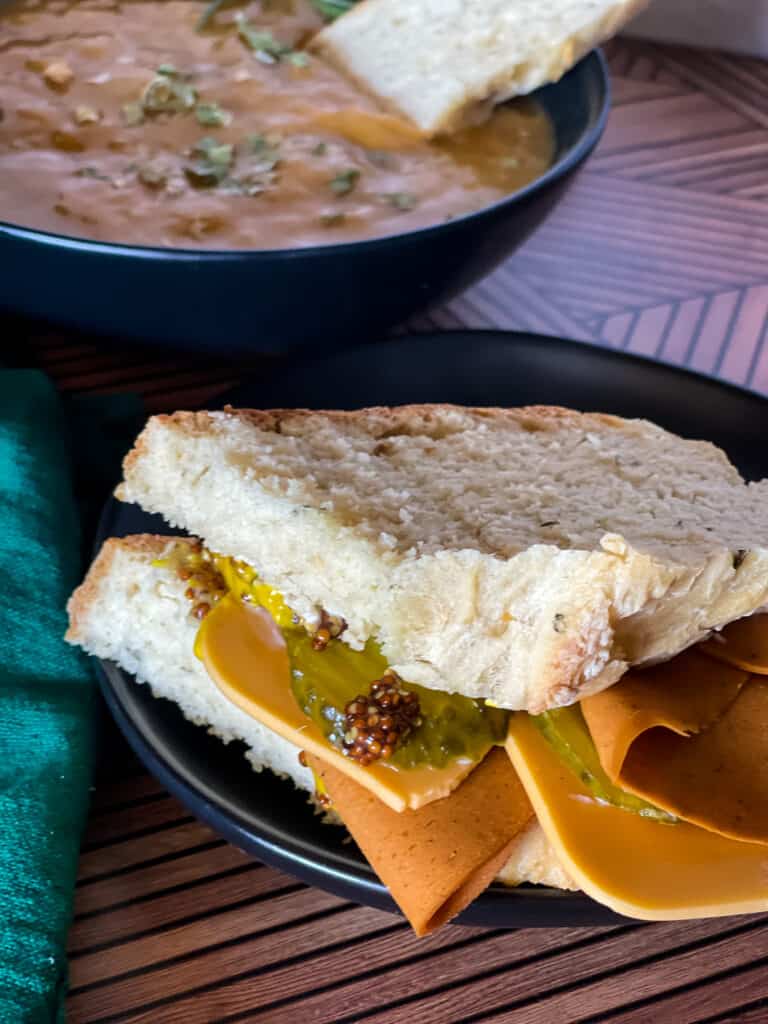
Rosemary garlic bread would be extra tasty with my vegetable lentil soup or Roasted Butternut squash soup with rosemary and thyme. Or served alongside my Veggie Salad with Smooth Tahini Dressing
Ready for this delicious recipe?

Did you love this recipe?
Want to share the love? It would be great if you could leave five ⭐️ ⭐️ ⭐️ ⭐️ ⭐️ stars and even a comment. Did you know that this will help Google to find this recipe when others are looking for something similar? Thanks, Cindy
Rosemary Garlic No-Knead Bread, the Two Hour Method
Equipment
- dutch oven pan with lid
Ingredients
- 1 tablespoon active dry yeast
- 1 ½ cups hot water no hotter than 120°
- 4 cups Bread Flour see notes
- 1 teaspoon salt
- 1 tablespoon fresh rosemary chopped
- 1 tablespoon garlic chopped
Instructions
- Add yeast to hot water and let sit for 5 minutes. It will start to get a little foamy.
- Prep the rosemary by removing the leaves from 2-3 stems of fresh rosemary. Finely dice and set aside. Chop the garlic or measure out prechopped/minced garlic.
- Measure out the flour by gently scooping and leveling. This is a method to lighten or aerate the flour See the blog post for more info on the method.
- Add the chopped rosemary and garlic to the flour along with the salt and mix together well.
- Once the yeast is foamy, pour the yeast/water mixture into a large bowl add the flour and mix. Begin to work the mixture into a sticky but firm ball of dough. I usually work it with my hands…but it's not kneading!
- Cover with a damp cloth or plastic wrap and let sit for 1 hour. The dough will about double in size.
- During the rise time, reheat the oven to 450°.
- Lightly dust a flat dry surface and gently work the dough into a round loaf. Again, this isn't kneading.
- Add a large sheet of parchment paper to the Dutch oven and place the dough inside. Score the top with a straight cut or an "X".
- Cover with the lid and bake at 450°f for 30 minutes.
- At 30 minutes, remove the lid and cook for another 5-10 minutes until the crust is golden brown if necessary.
- Let cool before slicing.
Can I use Whole Wheat Bread flour instead? And if so, do I use the same amount?
I have never tried this before. I would read this article about substituting whole wheat flour by King Arthur Baking The author indicates that it will be a heavier loaf that won’t rise as much and recommends starting by substituting 25% of the white flour with wheat flour.
I always sub whole wheat flour for 50 -75 % of the white flour. When I make this recipe (and I will soon!) I will use 3 cups ww and 1 cup white flour.
Okay great- I’m curious how it turned out for you!
I can’t wait to try this bread!!! Rosemary is one of my favorite herbs!!
I hope you enjoy this as much as we do!
Can I use roasted garlic instead of minced garlic in the recipe?
Oh yummy I love roasted garlic! I think that would be a great sub:) Cindy
Do I have to have a lid?
You will need to cover it with something. If you don’t have a lid then cover it with foil. You can use non-stick foil or oil the part that is next to the bread.
What size Dutch oven
I came across this recipe just before Christmas and have made it 3 times since. This bread is delicious alone, with butter or dipped in olive oil and herbs. Thank you for sharing this recipe! Question, can you tell what the serving size is when looking at the nutrition information?
Marvelous! Thank you for letting me know.
I am making this recipe for a second time and wondered if you “could” add a bit of sugar to feed the yeast? I think it grows well on its own but just didn’t know if that would hinder the taste of the rosemary and garlic.
Oooh I don’t know! Did you try it?
Made this in a jiffy as I was making a winter soup tonight – we are Australian so June is winter for us. The bread turned out perfect!
Simply delicious. Great recipe and so easy to make. I have a convection oven so bake time while covered was 22 min. Baked uncover for 5 min for the perfect golden crust. Thank you! I love making different types of breads. Yum!!
Made it with roasted garlic cloves and it was awesome!
ooooh roasted garlic cloves! Sounds fabulous!
Love the simplicity, smell of the baking and of course, fresh taste warm bread
I’m so very glad you enjoyed it!
So very glad you enjoyed this one.
Deeelicious! I failed Bread Baking 101 in my 30s/40s, failing over and over. At 70, I’ve discovered what I was doing wrong.
This is my first attempt at Rosemary Garlic Bread, and it turned out great! I used a 6-quart pan. The next time I make this (and there will definitely be a “next time”), I’m going to use roasted garlic and a smaller pan to get a taller, rounder loaf. I’ll reduce the heat to 425°F and increase the covered time to 25 minutes, cooking 10 minutes after removing the lid.
Thank you for sharing your recipe!
I just doubled the recipe and made a loaf for my boyfriend and I one for a friend. It’s delicious and only my second time baking at home. I couldn’t cover them so the crust is a bit harder than I’d like. But an easy to follow recipe and extremely satisfying. Thank you!
Amazing! Thank you so much for letting me know:)