Capture the essence of a bountiful berry harvest with this small batch triple berry jam, a handcrafted blend of fresh raspberries, strawberries, and blueberries. Carefully cooked to coax out their natural pectins, this jam achieves a luscious set without the need for added pectin or butter, while the raspberry seeds are strained to ensure a silky-smooth texture. A splash of lemon juice not only adds a bright note to balance the sweetness but also aids in the gelling process, resulting in a luscious spread that’s perfect for morning toasts, pastries, or as a gourmet addition to your vegan snacking board. Packaged in an elegant jar and tied with a ribbon, this jam also makes for a charming, heartfelt gift that’s sure to delight any recipient with its homemade touch and vibrant taste.

I prefer making small batch jam because it allows for a more intimate and manageable cooking experience. With small batches, I can focus on the quality and flavor nuances of each jar, ensuring that each spoonful captures the peak freshness and vibrancy of the fruit.
This method also offers the flexibility to experiment with different flavor combinations like strawberry pineapple, peach amaretto, or pumpkin, maple, and bourbon without the commitment of a large-scale production. It's a more spontaneous and creative process, where I can respond to the best fruit in season or what's on hand.
Moreover, large-scale jam making and canning is freaking stressful! I have no desire for the labor-intensive time suck that traditional jam making entails. Small batch jamming fits perfectly into my lifestyle, requiring less time and fewer resources, and it eliminates the need for extensive storage space.
The smaller quantity also means that I can enjoy my jams at their best, share them with friends and family, or gift them as personal tokens of affection, all without the worry of waste or spoilage. Can you imagine receiving a gift of hand crafted jam, a loaf or artisan bread or biscuits, in a basket with a cute tea towel? Fun!
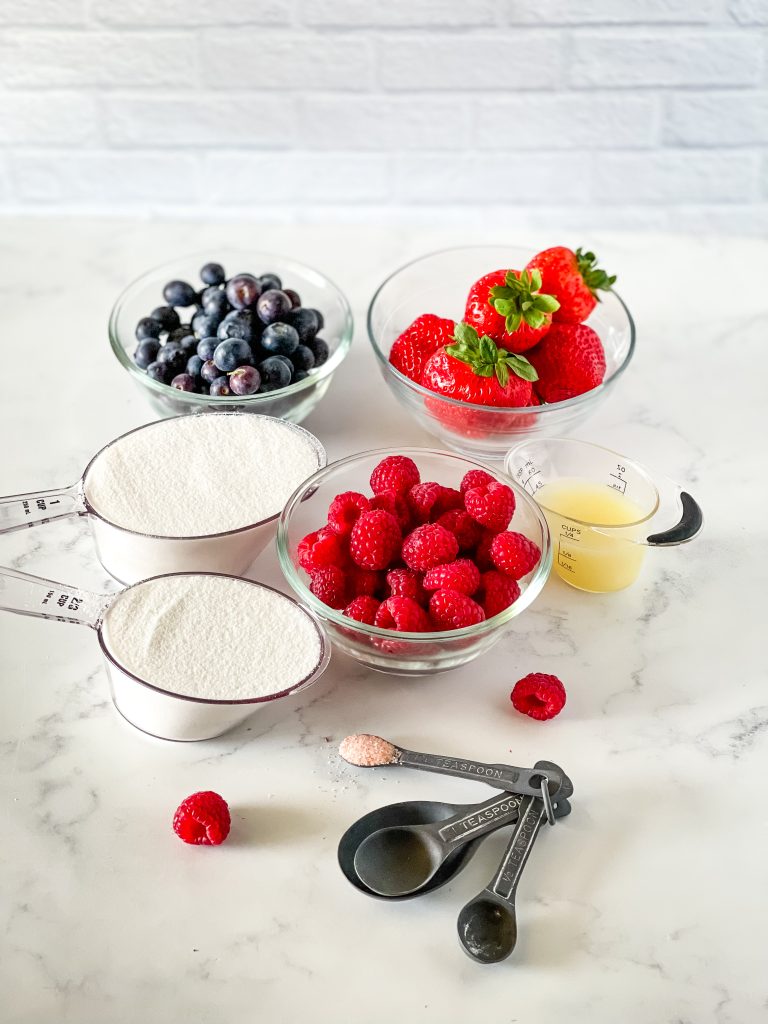
Ingredients needed to make triple berry jam the small-batch way
I tried to make the berry quantities used in the recipe the same as what you would buy in the grocery store – either the full container or a half container. Perhaps this will make things easier for you! I used fresh fruit. If you use frozen fruit expect the cooking time to vary.
- 8 ounces strawberries – Typically strawberries come in a 16-ounce container. You will be using half of the container. Once you hull and slice the strawberries it is a very very generous one-cup measurement. Please see the photo below.
- 6 ounces raspberries – Do you hate when the little seeds get stuck in your teeth? I do! When I made blackberry jam (also very seedy) I discovered that I could strain and separate the seeds from the cooked fruit!
- 6 ounces blueberries
- granulated sugar
- lemon juice – You can use fresh or bottled lemon juice.
- a little salt
- What you don’t see in this recipe is butter and pectin! Totally not necessary in this small batch jam recipe.
- You’ll also need a heavy bottomed sauce pan, some small plates for the gel test, and a candy thermometer will be super helpful for the best success.
How to made small batch triple berry jam
The exact ingredients with measurements can be found in the recipe card below along with more concise abbreviated instructions. Read on for more details, tips, and tricks so that you will feel confident making this recipe.
Step 1: Place the small plates in the freezer
Before even getting started, place several small plates or flat bowls in the freezer. These are used to do the gel test later, after the jam has cooked, to make sure the jam has set enough. Even if you are using a candy thermometer, do the gel test!
Step 2: Prep the berries
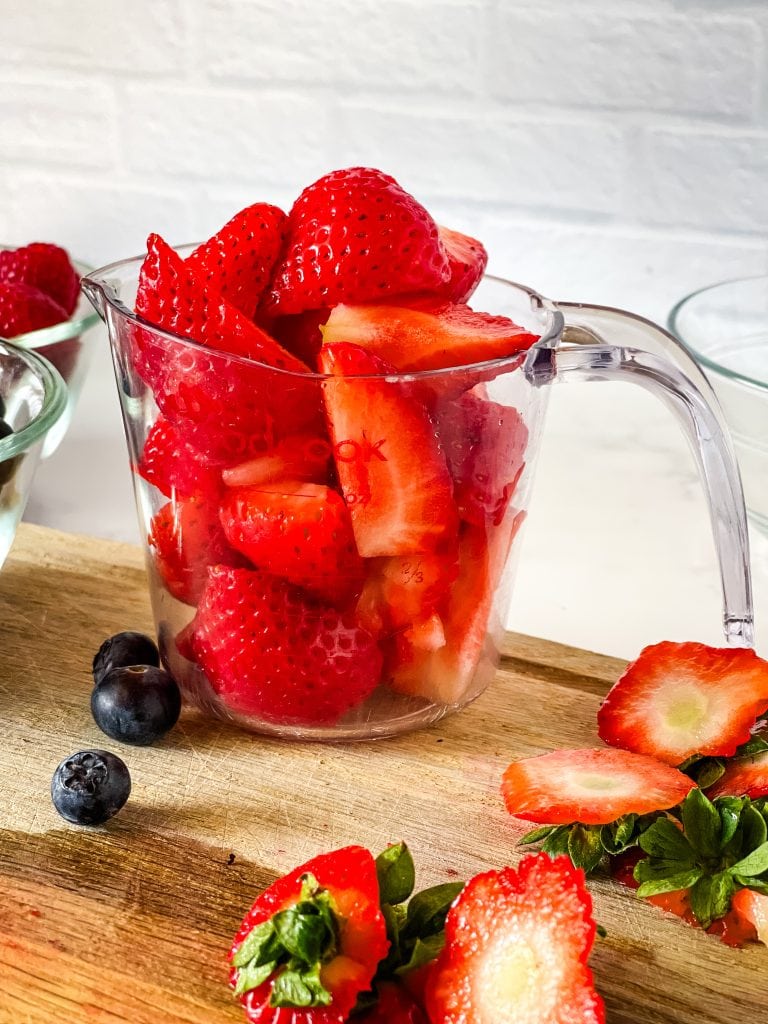
Prepare the strawberries by washing the berries and cutting off the tops. I also cut very large berries in half or quarters. Please note the photo below. Eight ounces of prepped and cut strawberries is more than an eight ounce measuring cup. That’s a fluid ounce measurement – strawberries aren’t fluid!
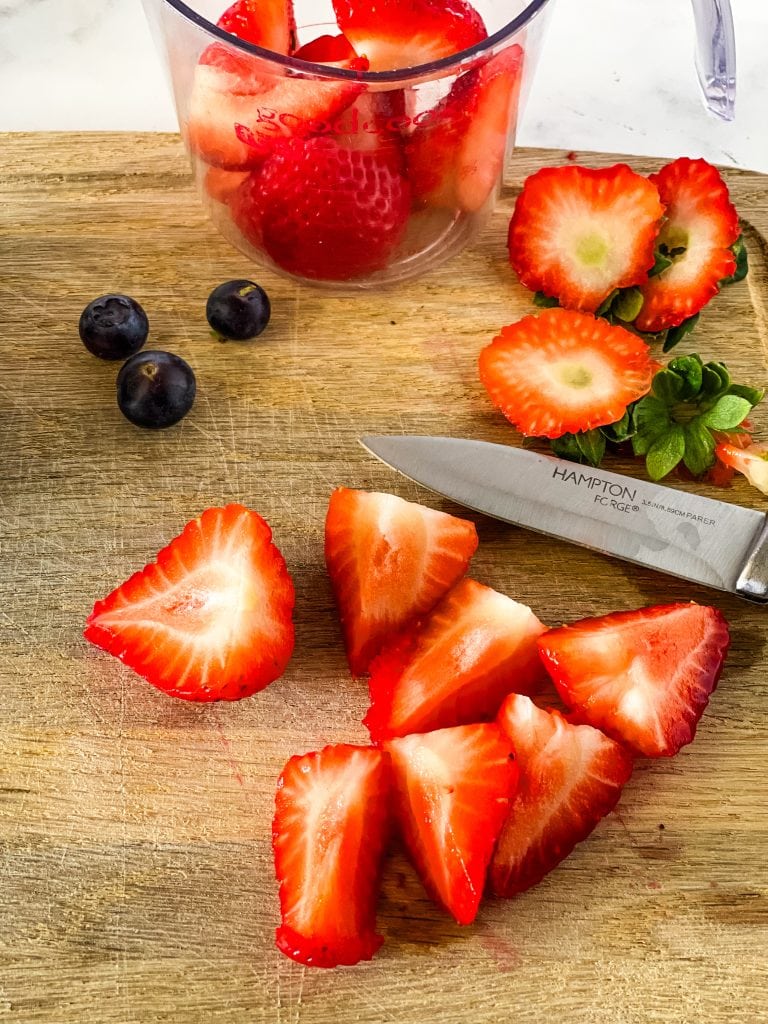
Wash the raspberries and blueberries. Discard any mushy/bad fruit. If any leafy tops on on the raspberries, remove those as well. If you are using a fresh lemon then juice the lemon now.
Step 3: The raspberries
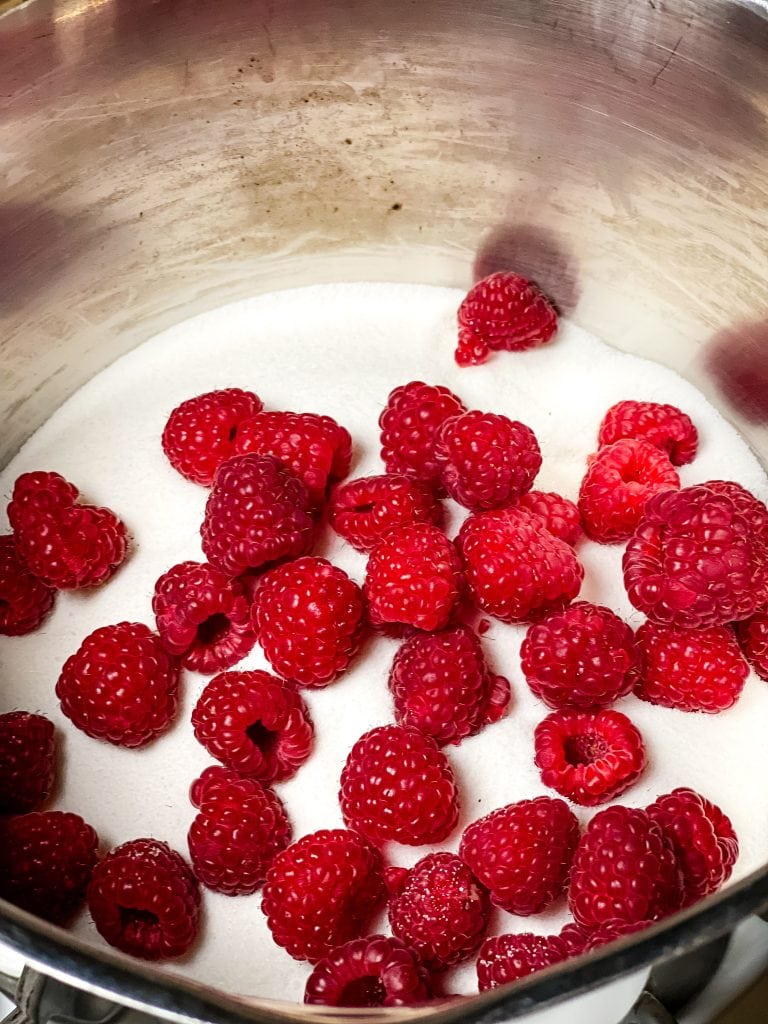
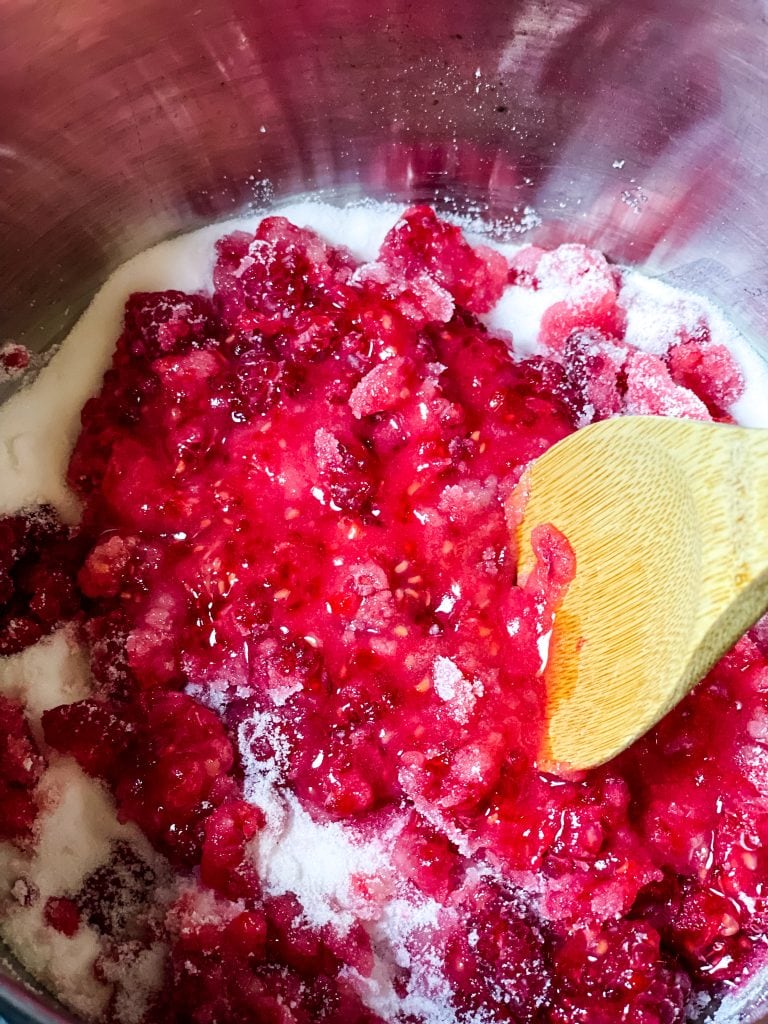
Place the raspberries and sugar in a medium-sized saucepan and cook over medium heat until the sugar has melted. This should take about five minutes. Stir and mash the berries while the sugar is melting. You’ll know the sugar has melted if you take some of the liquid onto a spoon and hold it into the light to see if there are any grains of sugar still present.

Remove the raspberry/melted sugar mixture from heat and run the cooked raspberries through a sieve or mesh of some sort. Press and mash the raspberries over a bowl to remove the seeds, preserving as much pulp as possible. This might take a few minutes.
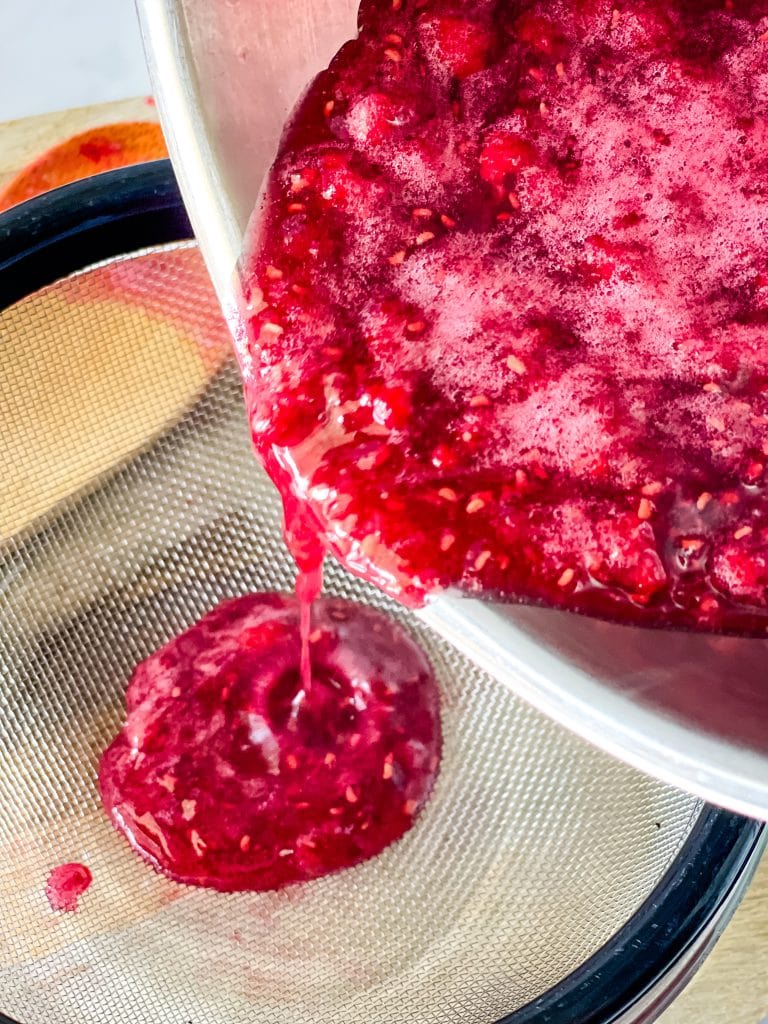
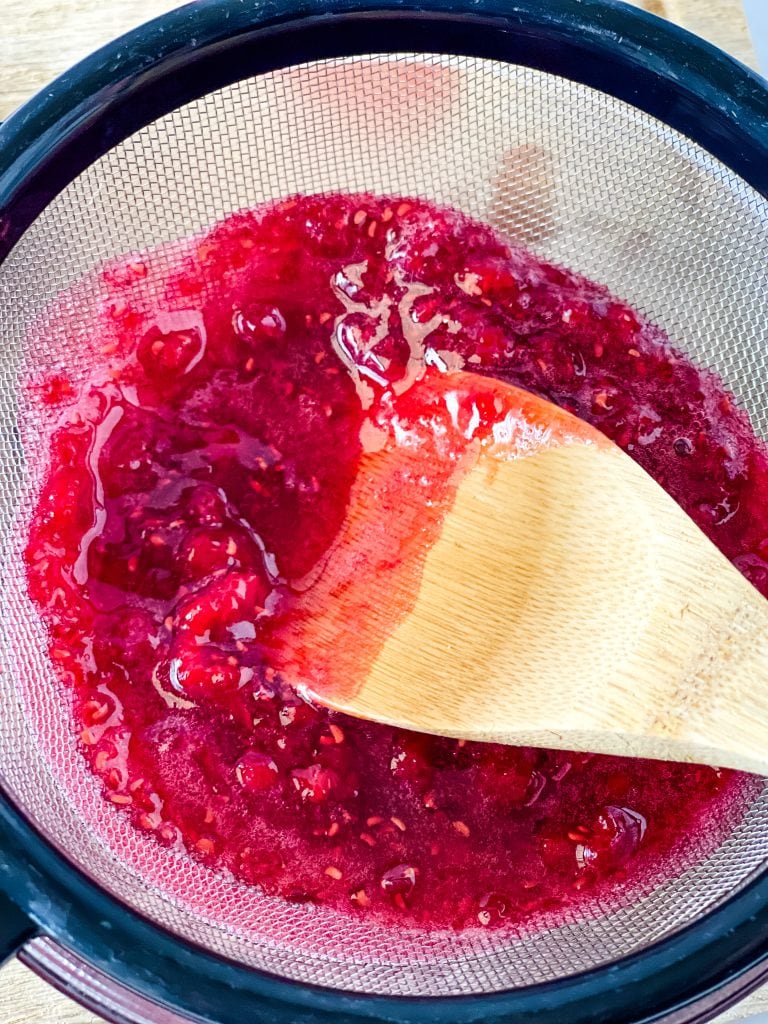

To make sure you have all of the yummy pulp possible, scrape the bottom of the mesh so that you get every little drop that you can. Discard the seeds.
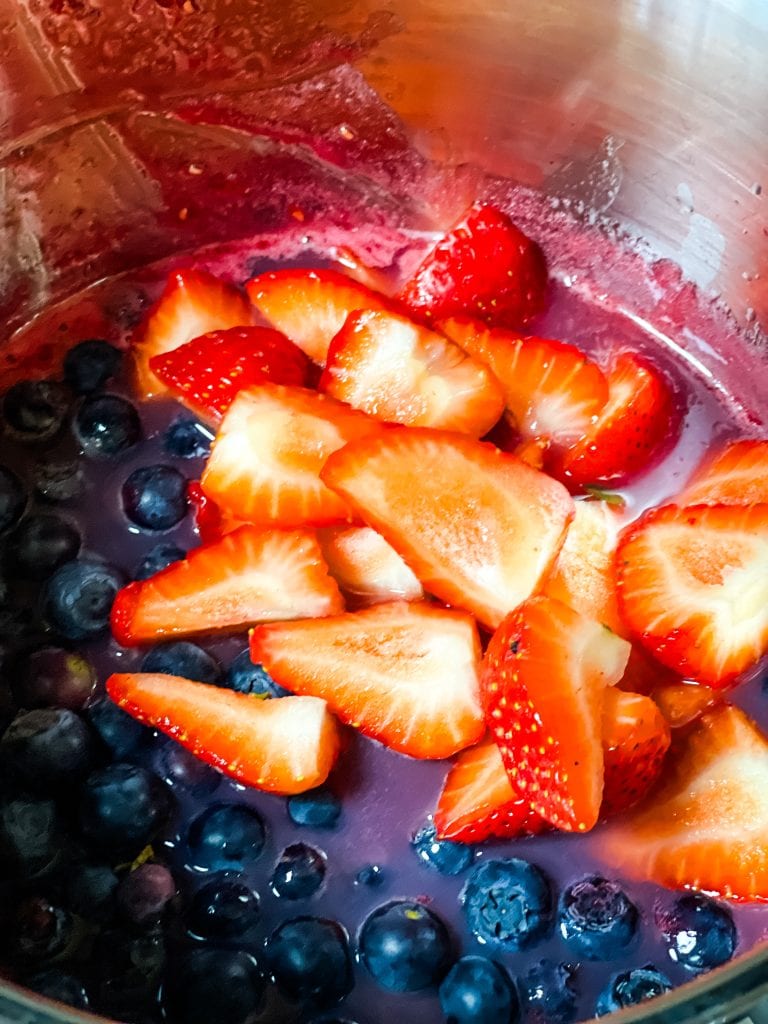
Step 4: Cook the rest of the berries
Return the deseeded raspberry sugar mixture to the medium-size saucepan. Place the prepared strawberries, blueberries, lemon juice, and salt in the saucepan with the deseeded raspberry mixture and cook over medium heat for five minutes. It can gently boil/simmer but do not allow it to come to a hard boil.
Step 5: Mash the berries
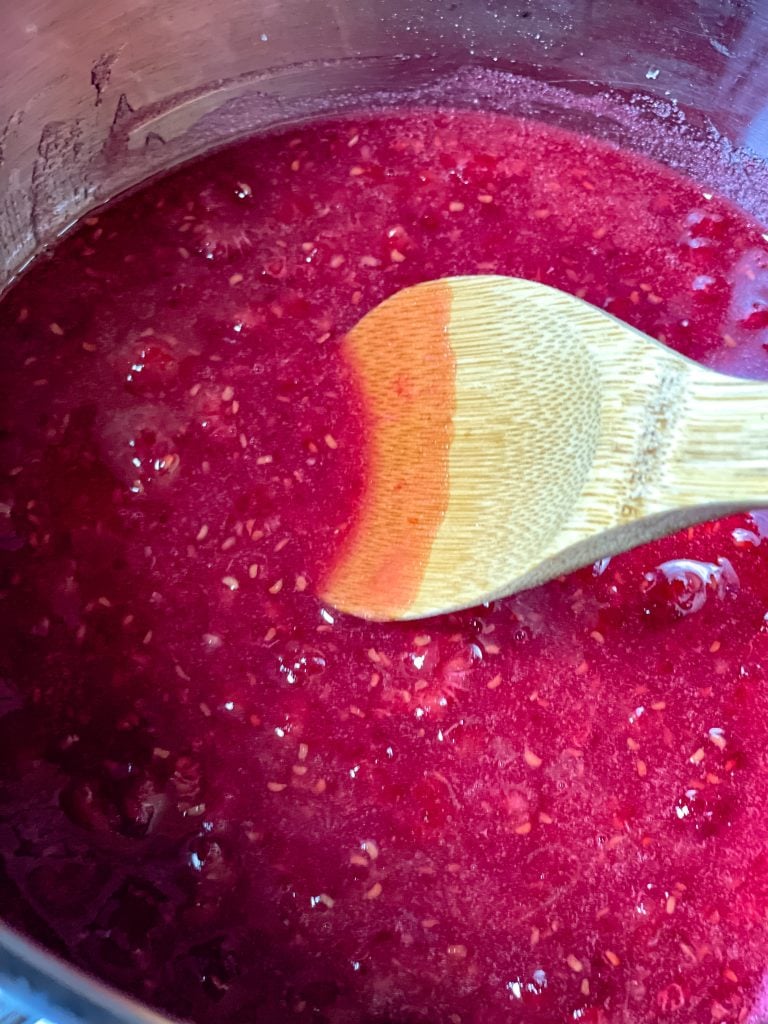
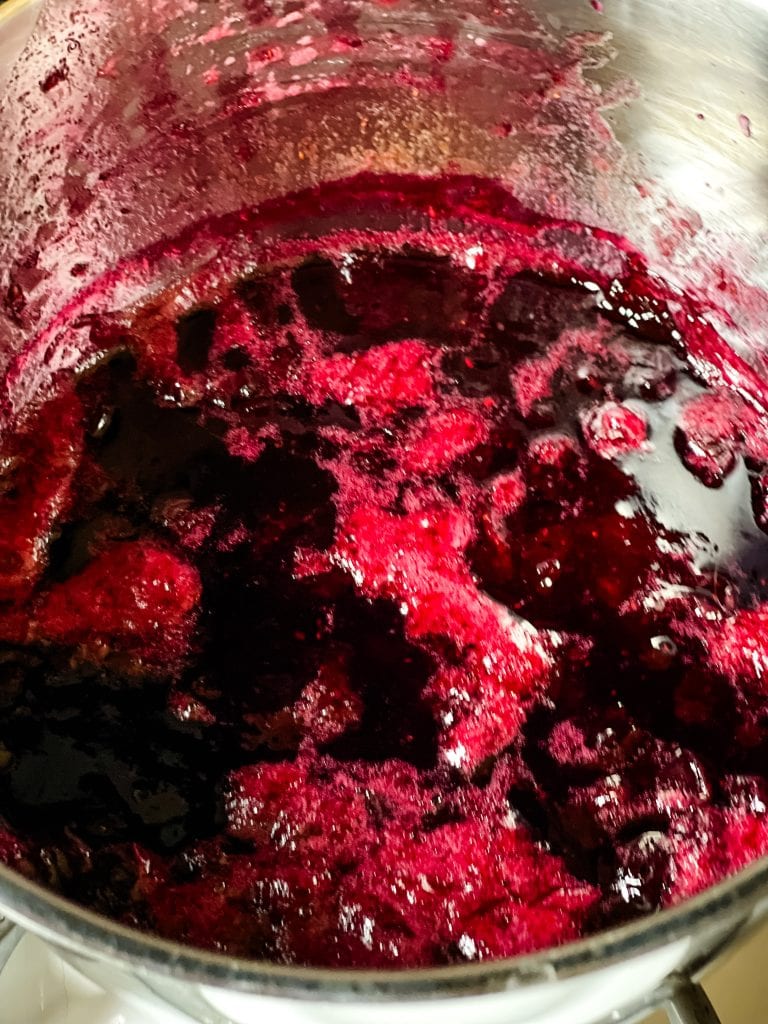
Turn off the heat and mash the berries until they are the size you’d like. The trickiest part will be to mash the blueberries depending on how large your potato masher holes are – they kept slipping through on mine! You can also use a hand immersion blender – but it might blend too well. I like a chunky jam:)

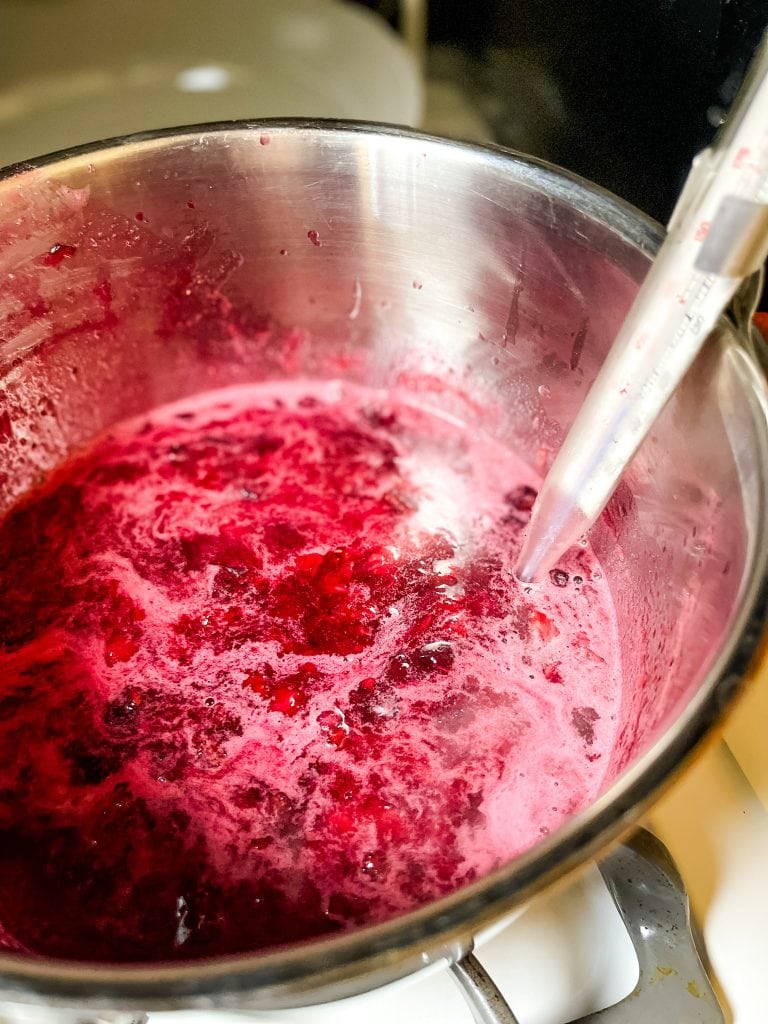
Step 6: Cooking the jam
Return the mixture to a boil, and then turn the heat down and simmer for about 20-30 minutes without stirring. If you are using a candy thermometer, cook until it reads 210℉ before doing the gel test – see the next step.
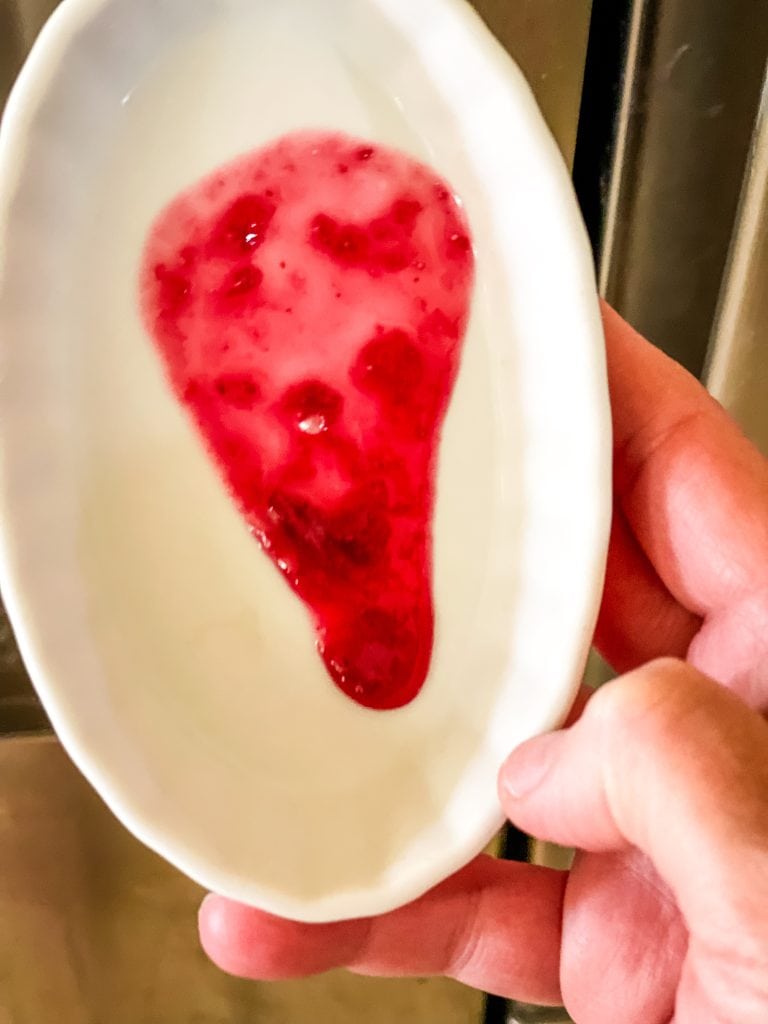
Step 7: The Gel test
Set your expectations – this is not a super thick jam like you’d buy at the store, but rather more loose and spreadable. Still, we are making jam and not syrup and need to do the gel test to see how it will set when cooled.
Even if you are using a candy thermometer, I strongly suggest doing the gel test so that your jam will be as thick as you’d like it to be.
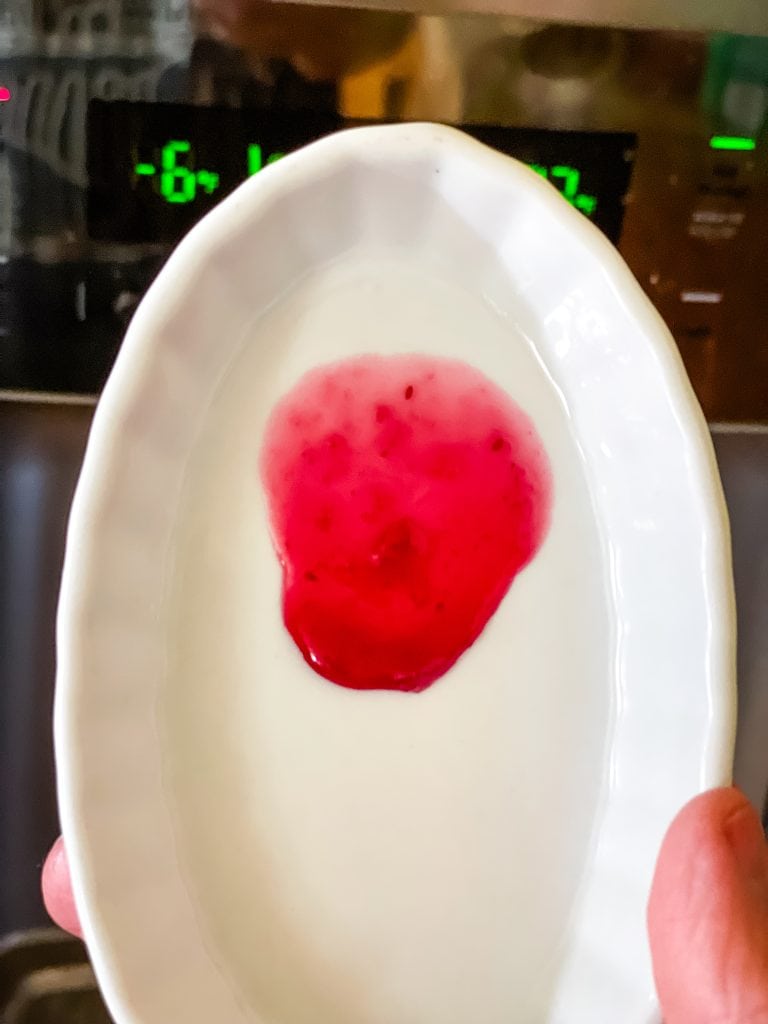
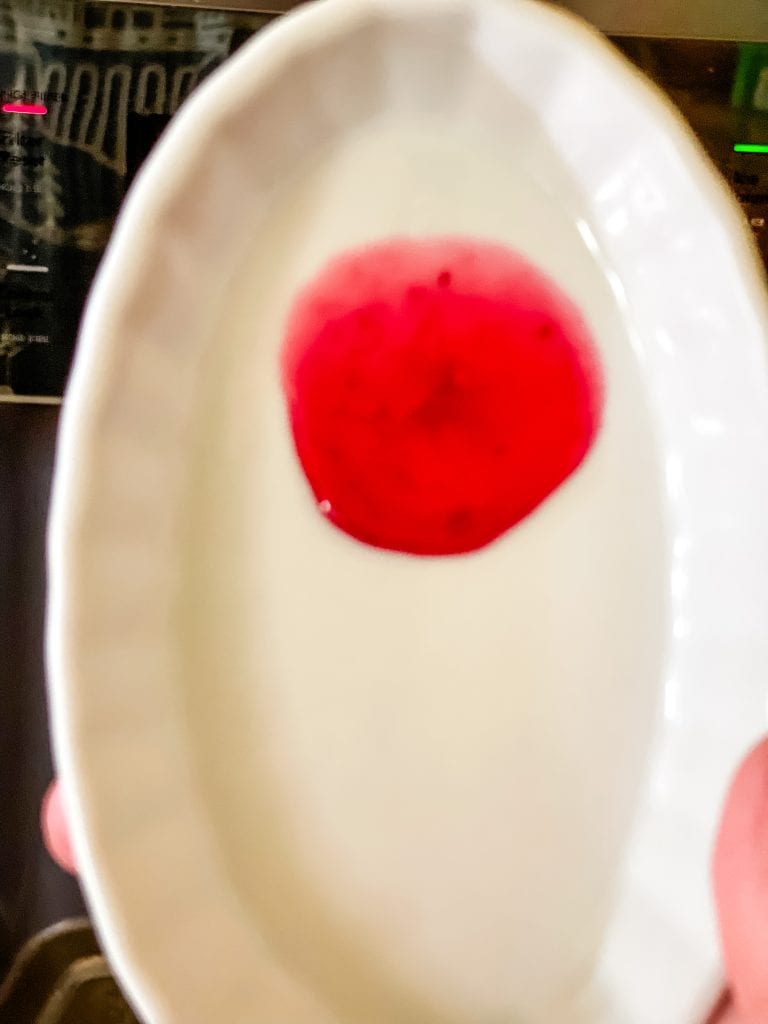
To do the gel test (even if you use a candy thermometer), do your first test at about 20 – 30 minutes. Turn off the stove while you complete the gel test. Spoon a small amount (one-half teaspoon) onto the cold plate (the one you had placed in the freezer). Return the plate with the spoonful of jam on it to the freezer for two minutes. Tilt the plate to see if the mixture runs down the plate quickly or if it very slowly creeps.
If the cooked and cooled jam runs quickly it’s too loose. Return the mixture to a quick boil and then immediately turn it down to a simmer for another few minutes. Try the test again. You might need to do it a third time. You should not need to try a fourth time.
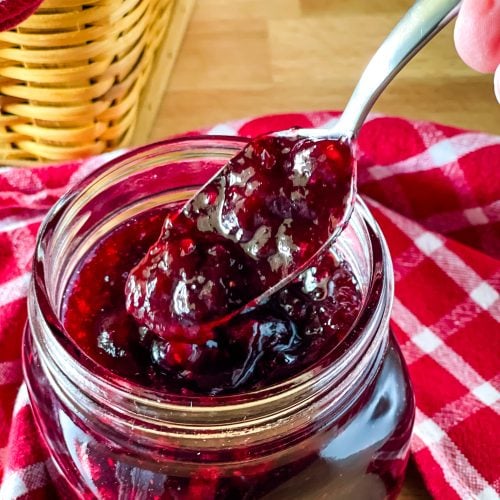
Cool, Pour into jars, and enjoy!
Remove the jam from the stove top and let cool for about 30 minutes until it’s easier to handle. Give it a stir before pouring the mixture into the jar/s. Store the jam in the fridge for up to one month unopened. Once it’s been opened, try to consume within a week or so.
You’ll notice a little bit of foam on top of your jam but don’t worry about that. Just stir it in and as it’s cooled, stirred and used, the foam just kind of melts in to the rest of the jam and you won’t even notice it.
This recipe makes one large jar or two smaller jars. I like to make mine into two smaller jars, even if I don’t plan on giving one away. This will keep one jar fresher while you use the other jar.
The printable recipe card
Did you love this recipe?
Want to share the love? It would be great if you could leave five ⭐️ ⭐️ ⭐️ ⭐️ ⭐️ stars and even a comment. Did you know that this will help Google to find this recipe when others are looking for something similar? Thanks, Cindy
Small Batch Triple Berry Jam, No Pectin and No Butter
Equipment
- candy thermometer OR do the gel test
- potato masher or immersion blender
- fine mesh sieve or cheesecloth for removing the seeds from the cooked raspberries
Ingredients
- 8 ounces strawberries one cup
- 6 ounces raspberries
- 6 ounces blueberries
- 1⅔ cups granulated sugar
- 3 Tablespoons lemon juice use fresh or bottled
- ¼ teaspoon salt heaping
Instructions
- Place several small plates or flat bowls in the freezer for the gel test after the mixture cooks.
- Prepare the strawberries by washing the berries and cutting off the tops. I also cut very large berries in half. Wash the raspberries and blueberries. Discard any mushy/bad fruit. If any leafy tops on on the raspberries, remove those as well. Juice the lemon if you are using fresh lemon.
- Place the raspberries and sugar in a medium-sized saucepan and cook over medium heat until the sugar has melted. This should take about five minutes. Remove from heat and run the cooked raspberries through a sieve or mesh of some sort. Press and mash the raspberries over a bowl to remove the seeds, preserving as much pulp as possible. This might take a few minutes. Discard the seeds.6 ounces raspberries, 1⅔ cups granulated sugar
- Return the deseeded raspberry sugar mixture to the pan. Place the prepared strawberries, blueberries, lemon juice, and salt in the saucepan with the deseeded raspberry mixture and cook over medium heat for five minutes. It can gently boil/simmer but do not allow it to come to a hard boil.8 ounces strawberries, 6 ounces blueberries, 3 Tablespoons lemon juice, ¼ teaspoon salt
- Turn off the heat and mash the berries until they are the size you'd like. The trickiest part will be to mash the blueberries depending on how large your potato masher holes are. This will take a couple of minutes.
- Return the mixture to a boil, then turn the heat down and simmer for about 20-30 minutes without stirring. If you are using a candy thermometer, cook until it reads 210℉ (see notes). AND do the gel test – see the next step.
- To do the gel test (even if you use a candy thermometer), do your first test at about 20 minutes. Turn off the stove while you complete the gel test. Spoon a small amount (one-half teaspoon) onto the cold plate. Return to the freezer for two minutes. Tilt the plate to see if the mixture runs down the plate quickly or if it very slowly creeps. If it runs quickly, return the mixture to a quick boil and then immediately turn it down to a simmer for another minute or two. Try the test again. You might need to do it a third time. You should not need to try a fourth time. See notes for another freezer test.
- Remove the jam from the stove top and let cool for about 30 minutes until it's easier to handle. Give it a stir before pouring the mixture into the jar/s. Store the jam in the fridge for up to one month unopened. Once it's been opened, try to consume within a week or so.

I used to buy a triple berry jam from a place called Wildberrys. Not any more.
Absolutely love this recipe and if you follow her instructions it comes out perfect.
I’m so glad that you enjoyed the recipe and that it worked out for you! This is one of our favorites too:)
Would I need to change the measurements at all if I used blackberries instead of blueberries?
That should be fine – very seedy though.
Made this last night and served it this morning (warmed slightly) with the overnight french toast recipe from December, 2004 Bon Appetit (Vanilla-Maple French Toast). The triple berry preserves was the best part of brunch! I can’t wait to make again.
Fabulous! And that sounds so yummy!
Can you double this recipe?
Hi, thanks for the question. Yes you could but you’ll want to use a slightly larger pot. Also, your cooking time will likely be longer. I have not doubled it so I don’t know exactly how much longer. Let me know if you decide to make this and double it.