“This isn’t pumpkin butter — pumpkin jam is bolder, brighter, and tastes like fall with a splash of sunshine.”
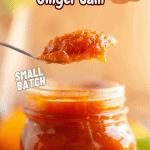
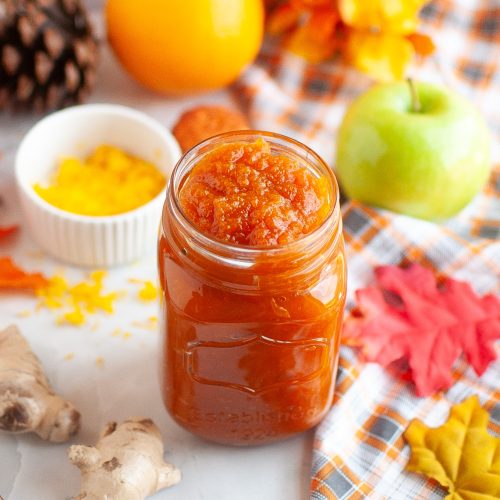
Move over pumpkin butter! This Pumpkin Orange Ginger Jam is lighter, fruitier, and alive with citrus and spice. Think glossy spoonfuls of golden jam with just enough tang to balance pumpkin’s cozy sweetness. It’s small-batch friendly, easy to make on the stovetop, and absolutely delightful spread on toast, stirred into yogurt, or spooned over pancakes.
I’ve fallen in love with making small-batch jams — quick, simple, and full of fresh flavor. My first experiments (strawberry and triple berry jams) became instant family favorites. I’ve never been drawn to the all-day canning process, but the bright, fruity taste of homemade jam always pulls me back. There’s something deeply satisfying about spreading a spoonful of homemade pumpkin jam on warm bread straight from the oven.
Why You’ll Love This Jam
This jam brings all the cozy pumpkin warmth you love — without the heaviness of pumpkin butter. It’s jammy, bright, and perfectly balanced.
You’ll love it because:
Customizable: If you crave that traditional flavor, stir in ⅛ teaspoon pumpkin-pie spice — or make my Slow Cooker Pumpkin Butter instead!
Naturally jammy: Pumpkin’s starches give body, while orange peel and apple add gentle, natural pectin.
No added pectin: Just real fruit and citrus doing the work.
Vegan + small batch: Makes about two cups — one to keep, one to share.
Balanced flavor: Fresh ginger for warmth instead of pumpkin-pie spice.
🧡 Pumpkin Jam verses Pumpkin Butter
Pumpkin butter is thick, velvety, and deeply spiced — it tastes like fall condensed. It’s cooked low and slow with heavy autumn spices and sugar until it’s glossy and spoonable, more like apple butter.
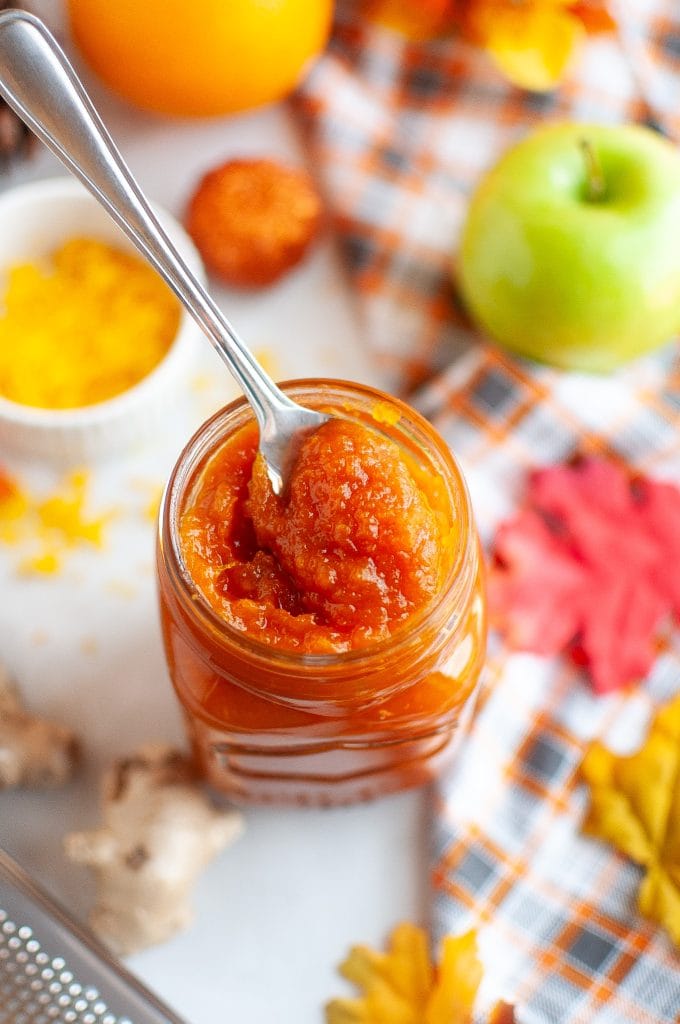
Pumpkin jam, on the other hand, feels lighter and fruitier — glossy, jewel-toned, and just jammy enough to spread. It’s less spice-forward, more fruit-acid balanced, and brings a brightness that offsets pumpkin’s earthiness.

To achieve that, we need natural pectin and acid, since pumpkin alone doesn’t have either.
Understanding Pumpkin in Jam
Pumpkin behaves differently from fruit. It’s naturally starchy and low in soluble pectin, so it doesn’t gel like berry or citrus jams. Instead, it thickens into a smooth, spoonable texture — more like a soft conserve than a true gel.
That’s exactly what makes this recipe so special: the grated apple and orange peel lend just enough natural pectin for body while keeping the finish silky and bright.
Ingredients & Notes
(See recipe card below for exact measurements.)
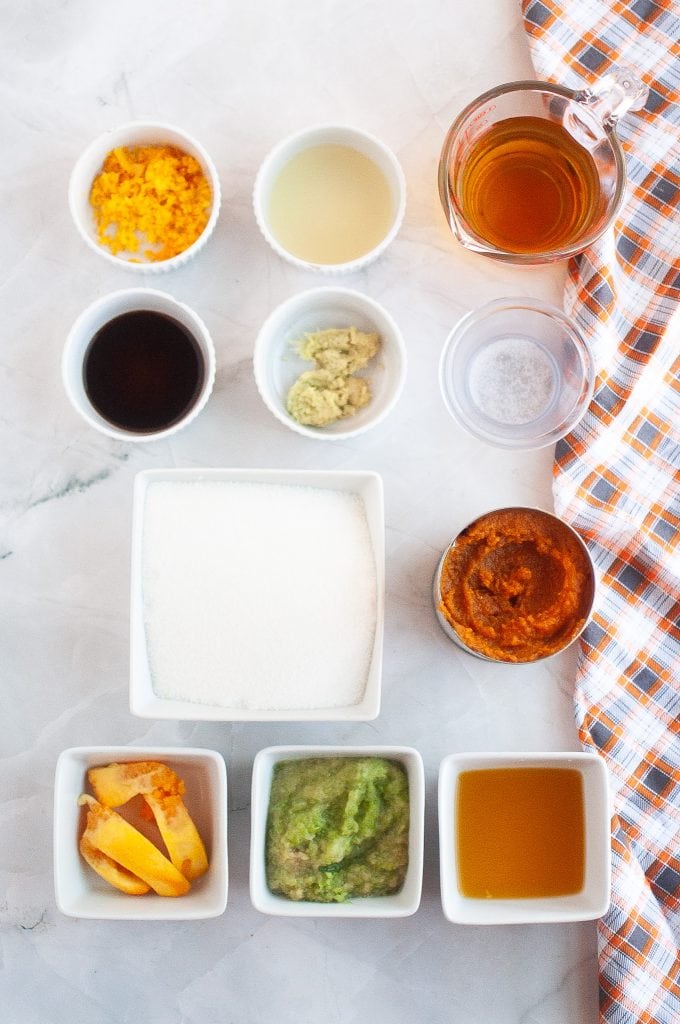
Fresh fruit for brightness + natural pectin:
- Oranges: Zest, juice, and two strips of peel (white pith included) bring both citrus depth and light bitterness.
- Granny Smith apple: Grated with peel on — the natural pectin helps thicken the jam.
Pumpkin base:
- Pure pumpkin purée (not pie filling) for creamy texture and warm sweetness.
Flavor balance:
- Apple juice for liquid and sweetness.
- Lemon juice for acidity.
- Ginger paste or fresh grated ginger for a little bite.
- Vanilla + pinch of salt to finish and balance.
Step-by-Step Instructions
Steps 1 and 2 – Prepare the Citrus and Apple (and ginger)
Zest one orange and set aside 1½ tablespoons. Slice off two thin strips of peel (3–4 inches long, ½-inch wide) with white pith included, and squeeze out 2 tablespoons of juice. Set all aside.

Quick note: I’ve gone through more citrus zesters than I can count, and most left my hands looking like I lost a fight with the fruit. This one glides through citrus peel without shredding my knuckles — no Band-Aids required. It’s the only one I use now!
Grate a Granny Smith apple, leaving the peel on for natural pectin. Measure about ½ cup. Use a regular grater on fine grate, or (more work but for best results), sue the zester. Grate the ginger or use ginger paste.


Step 3 – Combine the Base
In a heavy saucepan, combine pumpkin purée, grated apple, apple juice, sugar, orange zest, orange juice, peel strips, ginger, lemon juice, and salt. Stir well to mix. You’ll be adding the vanilla extract and pinch of salt at the end.

Step 4 – Set Up Your Thermometer
Clip a candy thermometer to the side of the pot, ensuring the tip sits in the jam but doesn’t touch the bottom.
Step 5 – Cook and Stir
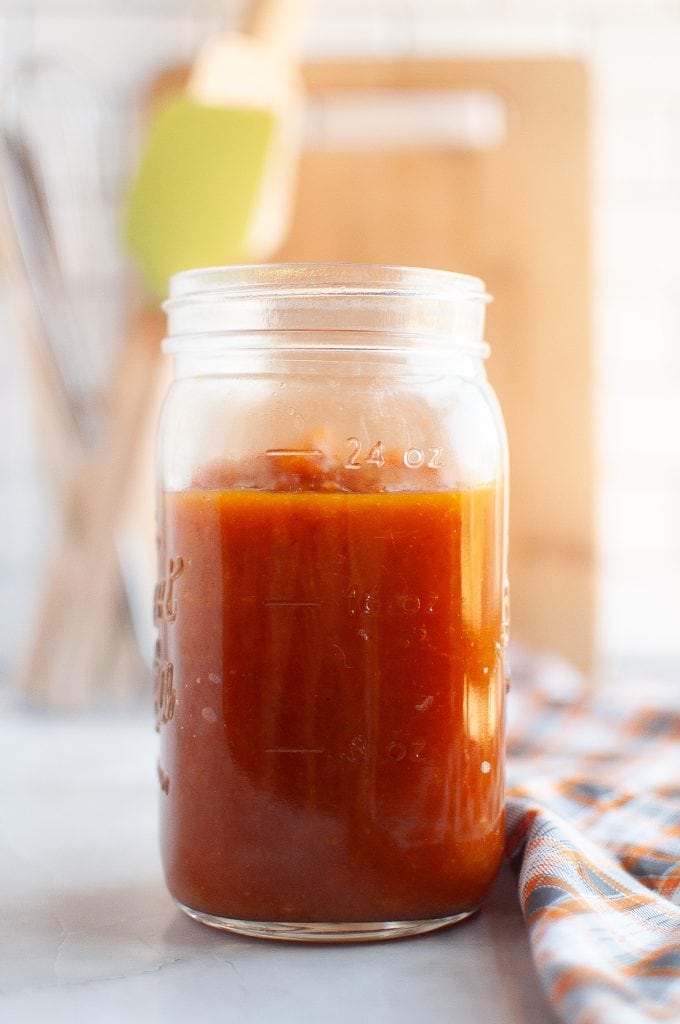
Bring to a gentle boil over medium heat, stirring every few minutes with a silicone spatula or flat-edged spoon so the starchy pumpkin doesn’t stick. When the temperature reaches 200°F, lower the heat slightly and stir every 1–2 minutes. Continue cooking about 20 minutes — the mixture should look glossy and thick.

Step 6 – Cold Plate Test
To check doneness you can do the cold-plate test which is explained in detail below. With his pumpkin jam, you may never get to 220F° because of the pumpkin starch. A cold plate test will show the exact texture your jam will be when cooled.
Step 7 – Finish
Remove the orange peel strips. Stir in vanilla and a final pinch of salt. Taste and add a few drops more lemon juice if you want extra brightness.

Step 8 – Cool and Store
Let the jam cool completely before spooning into clean jars. This recipe makes about two cups total — enough for one small jar to keep and one to share. Store in the refrigerator up to two weeks.
Pro Tips + Cold Plate Method
- Use a wide, heavy-bottomed pan for faster water evaporation and even heating.
- Stir frequently: Every 2–3 minutes early on, every 1–2 minutes mid-way, and constantly near the end.
- Don’t chase a high temperature. Pumpkin’s starches prevent it from reaching the 220°F “jam standard” without getting gummy. Around 200°F is perfect.
- The jam will thicken as it cools into a soft, glossy spread.
- Taste and add a little more lemon juice at the end for a brighter, tarter taste.
Cold Plate Method (Explained)
If you don’t have a thermometer, the cold-plate test tells you everything you need to know. Keep a small saucer in the freezer while the jam simmers. When you’re close to done, spoon a little jam onto the chilled plate and wait 60 seconds. Swipe your finger through the middle:
- If the jam parts and the edges wrinkle slightly → you’re done.
- If it slides back together → keep simmering a bit longer.
FAQs + Final Thoughts
Is this pumpkin butter?
No — and that’s exactly what makes it special. Pumpkin butter is thick, heavily spiced, and dense. This jam is lighter, brighter, and fruit-forward. It’s fall sunshine in a jar.
Can I cut the recipe in half?
Yes! I used to make a single-jar batch. But now I always double it so I can keep one and gift one — because it’s too good not to share.
Does it use commercial pectin?
Nope. The combination of apple, citrus peel, and lemon juice naturally thickens the jam without additives.
How many jars does this recipe make? This recipe makes two jars. I used to make only one jar, but I quickly realized it was more fun to double it — one jar for me, one to share with a friend (usually alongside a loaf of homemade bread). This recipe contains the doubled version because it’s just too good to not share!
Serving Ideas

- Spread on homemade bread – this recipe was developed to go with yeasted bread maker pumpkin bread.
- Layer into overnight oats or chia pudding
- Swirl into vegan yogurt or ice cream
- Serve alongside vegan cheese and crackers for a fall appetizer – It might be pretty tasty with pumpkin fries!
- Spoon over pancakes or waffles for a cozy brunch
The Bottom Line
This pumpkin jam isn’t your grandma’s pumpkin butter — it’s lighter, brighter, and just jammy enough to make you wonder why pumpkin wasn’t a jam fruit all along.

Did you love this recipe?
Want to share the love? It would be great if you could leave five ⭐️ ⭐️ ⭐️ ⭐️ ⭐️ stars and even a comment. Did you know that this will help Google to find this recipe when others are looking for something similar? Thanks, Cindy
Pumpkin Orange Ginger Jam (No Pectin, Small batch)
Equipment
- candy thermometer
Ingredients
Fresh Fruit – 2 large oranges and 1 large apple
- 1½ Tablespoons orange zest see notes
- 2 Tablespoons orange juice
- 2 strips of peel with white pith 3-4" x ½"
- ½ cup Granny Smith Apple grated – include the peel
Remaining ingredients
- 15 ounce pumpkin purée (1 can) not pumpkin pie filling
- 2/3 cup apple juice unsweetened
- 1½ cup granulated sugar adjust to taste
- 2 teaspoons ginger paste or finely grated fresh ginger
- 4 teaspoons lemon juice 1 tablespoon plus 1 teaspoon
- 1 teaspoon pure vanilla extract
- 1 pinch of salt
- 1 teaspoon optional additional lemon to taste
Instructions
- Zest the orange first and set the zest aside. Then squeeze out the juice and slice off 2–thin strips(3-4"x½") of the peel (white pith included). You’ll simmer these strips with the jam to release natural pectin and a hint of citrus depth and then remove at the end. See notes.1½ Tablespoons orange zest, 2 Tablespoons orange juice, 2 strips of peel with white pith 3-4" x ½"
- Grate the Granny Smith apple. Include as much of the peel as possible for the natural pectin.½ cup Granny Smith Apple
- In a small heavy saucepan, combine pumpkin purée, grated apple ,apple juice, sugar, orange zest, orange peel strips, and juice, ginger, lemon juice, and salt. Stir well to mix.1½ Tablespoons orange zest, 2 Tablespoons orange juice, ½ cup Granny Smith Apple, 15 ounce pumpkin purée, 2/3 cup apple juice, 1½ cup granulated sugar, 2 teaspoons ginger paste, 4 teaspoons lemon juice, 1 pinch of salt, 2 strips of peel with white pith 3-4" x ½"
- Clip the candy thermometer on the side of the pot ensuring the tip will be immersed the jam but is not touching the bottom of the pot.
- Bring the mixture to a gentle boil over medium heat, stirring every few minutes, scraping the sides and bottom so that the starchy pumpkin does not stick, then reduce to a simmer. Keep heat at a gentle simmer until about 200°F stirring every 10 minutes. Then increase to medium and stir every five minutes. Time it for about 20 minutes. (See notes.) Do the cold plate test (see blog post).
- Remove and discard the orange peel strips. Taste and adjust sweetness or acidity. Add a splash more lemon juice (up to one teaspoon) if you want extra brightness. Stir in the vanilla extract and pinch of salt.1 teaspoon pure vanilla extract, 1 pinch of salt
- Let cool completely, then transfer to a clean jar. Store in the refrigerator for up to 2 weeks. This jam is small batch and will make about two cups total. Make one jar for you and give the other away!