
Hallelujah! Finally, soft sourdough dinner rolls for the vegans! Calling all of the vegan sourdough girlies (and guys): while I’ve never claimed to be a sourdough expert -there are plenty of sourdough experts on the WWW who do – I am pretty good at figuring out vegan food. And these soft sourdough dinner rolls are it!
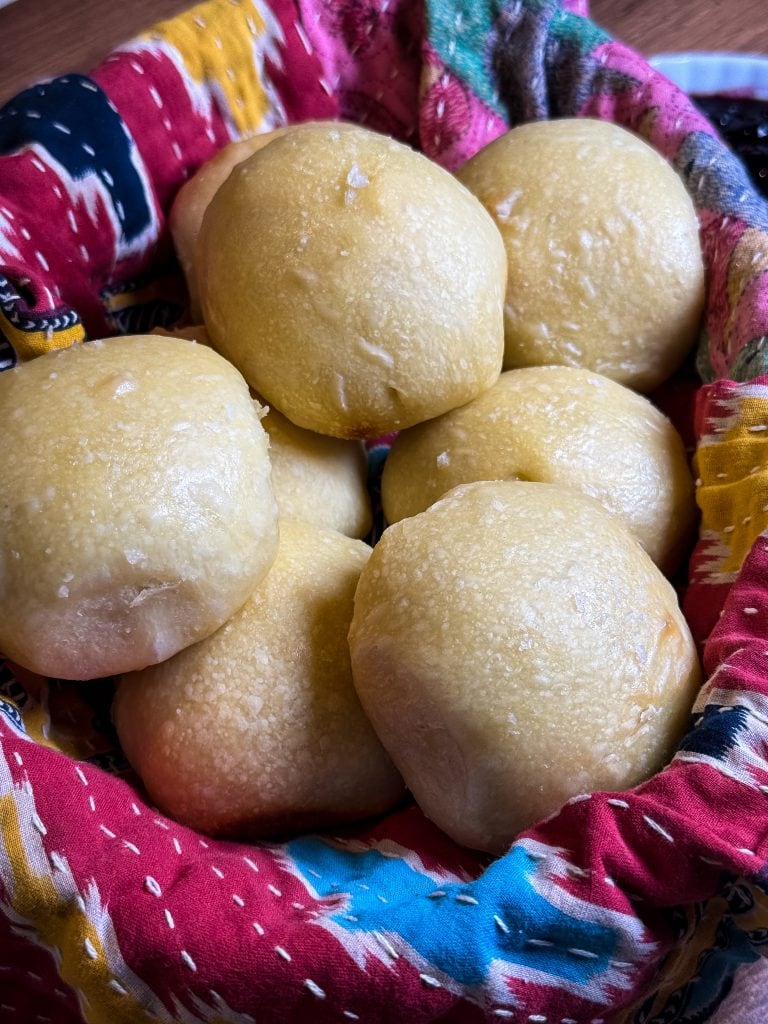
These soft vegan sourdough dinner rolls are made with soy milk and vegan butter, shaped the night before, and refrigerated until the next day. Let them finish proofing on the counter, then bake them shortly before dinner so everyone gets to enjoy them while they are fresh, warm, and at their absolute best. And if you would rather make them from start to finish in one (long) day, I have included that option too.
I'm sometimes shocked by how easy it is to adapt to vegan cooking with a few swaps. Making maple cinnamon butter (which by the way would go fantastic with these vegan dinner rolls) was simply a matter of using vegan butter and swapping in maple syrup for the honey used in the original recipe. Some are a little trickier like with my butternut squash soup which originally used lots of non-vegan ingredients (but would also go great with these vegan rolls!)
This vegan sourdough recipe fell somewhere in the middle. It took a few experiments because with baked goods, non-dairy milk doesn’t always perform the same as dairy milk does and I wanted this homemade vegan roll recipe to be as soft with a delicate crumb and buttery delicious as its non-vegan counterpart.

I first experimented with veganizing a recipe that was supposed to be done – start to finish- in a few hours. But in reality, the recipe took most of the day. Sourdough is tricky that way and using non-dairy milk can make a difference in the final outcome. While this recipe is barely manageable (from start to finish) on an ordinary day. It is much less appealing when dinner is for Thanksgiving, a holiday gathering, or any other meal with ten things happening at once.
The overnight version makes the schedule much more practical. The vegan sourdough rolls are mixed, fermented, and shaped on the first day. The covered pan goes into the refrigerator overnight. On the second day, the rolls come out a few hours before dinner to warm up and finish proofing, and then they bake right before serving.
I do show both versions in the recipe card so you can decide how dedicated you want to be to one-day sourdough baking.

Why You’ll Love These Vegan Sourdough Rolls
- They are soft, fluffy, and completely vegan.
- Soy milk and vegan butter create a tender, enriched dough without dairy or eggs.
- Most of the work can be completed the day before serving.
- The overnight schedule makes fresh sourdough rolls much easier to coordinate with dinner.
- A same-day option is included for days when you have enough time to complete the entire process.
A Quick Note About Sourdough Timing
I may not call myself a sourdough expert; but I have learned that the times in sourdough recipes are useful guidelines, not promises. Sourdough fermentation changes with the strength of the starter, the temperature of the kitchen, the temperature of the dough, and even the temperature of the refrigerator.

This is why the recipe includes both times and visual checks. Use the clock to know when to begin checking, and then let the dough tell you when it is ready.
(That lesson became especially clear while testing these rolls. After the final stretch-and-fold, one batch needed only about 1 hour and 20 minutes to complete bulk fermentation. Waiting several more hours simply because another recipe gave a longer estimate could have pushed the dough too far.)
So lesson learned: Start checking early. It is always easier to give dough more time than to rescue dough that has overproofed.
Ingredients You’ll Need

Active sourdough starter
The starter should be bubbly, expanded, and at or near its peak. If there is enough time, I like to feed my starter at a 1:3:3 ratio. Mine usually takes several hours to become fully active, so remember that preparing the starter happens before the recipe clock really begins.
Unsweetened soy milk
Soy milk adds moisture, protein, and richness to the dough. This recipe was developed with unsweetened soy milk, so that is what I recommend for the most predictable result.
Warm it gently to about 85–95°F. During one test, I warmed the soy milk and vegan butter together and the mixture reached 108°F. That was warmer than I wanted, but there was no need to throw it away—I simply let it cool before stirring in the starter.
Vegan butter
Vegan butter helps create a softer, richer dinner roll. It is used in the dough, for greasing the pan, and again for brushing the freshly baked rolls. Use a salted vegan stick butter for this recipe. You’ll also use vegan butter to “grease” the 9×13 baking pan and to brush on top the fully baked dinner rolls. (Optional but highly recommended!)
Granulated sugar
Three tablespoons add a little sweetness and help create a tender dinner roll without making it taste like dessert.
Bread flour
The recipe uses 360 grams of bread flour. My first mixture started with 340 grams, but the dough was wet enough that it needed another 20 grams. For the finished recipe, it makes more sense to begin with the full 360 grams.
Even with that amount, the freshly mixed dough will look sticky and shaggy. Resist the urge to keep adding flour. Let it rest for the full hour first. The flour needs time to absorb the liquid, and the stretch-and-folds will continue strengthening the dough.
Salt
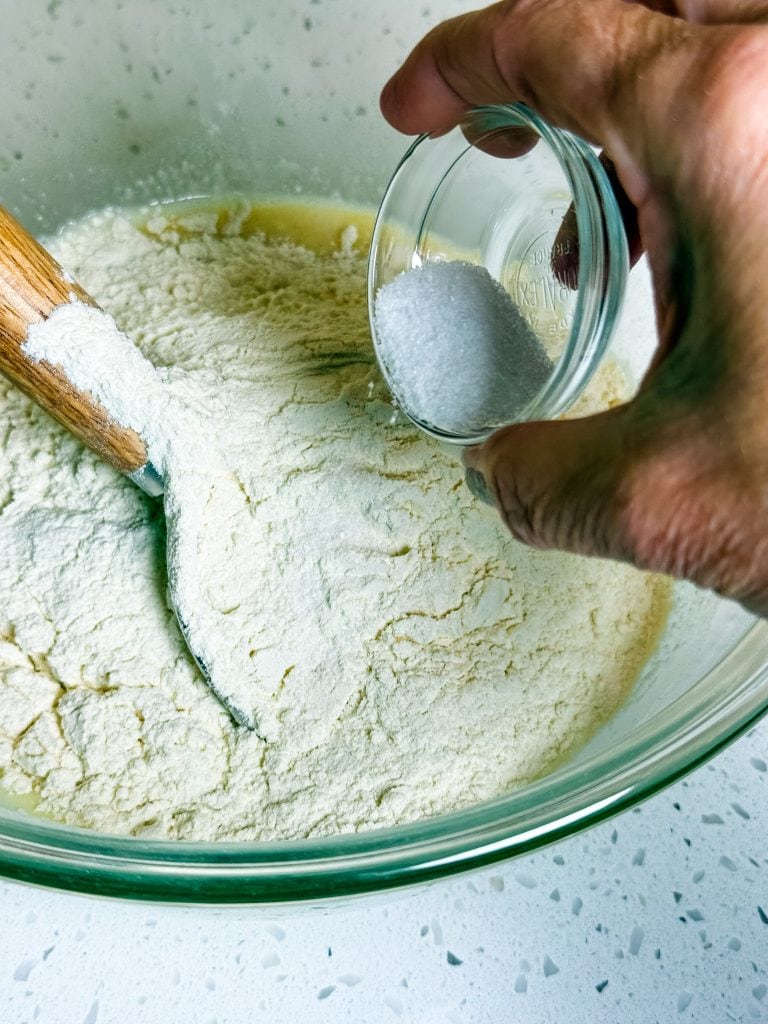
Sprinkle the salt over the flour before mixing everything together. This distributes it through the dough without adding it directly to the starter mixture. I use fine grain kosher sea salt for all of my sourdough baking.
Mixing the dough
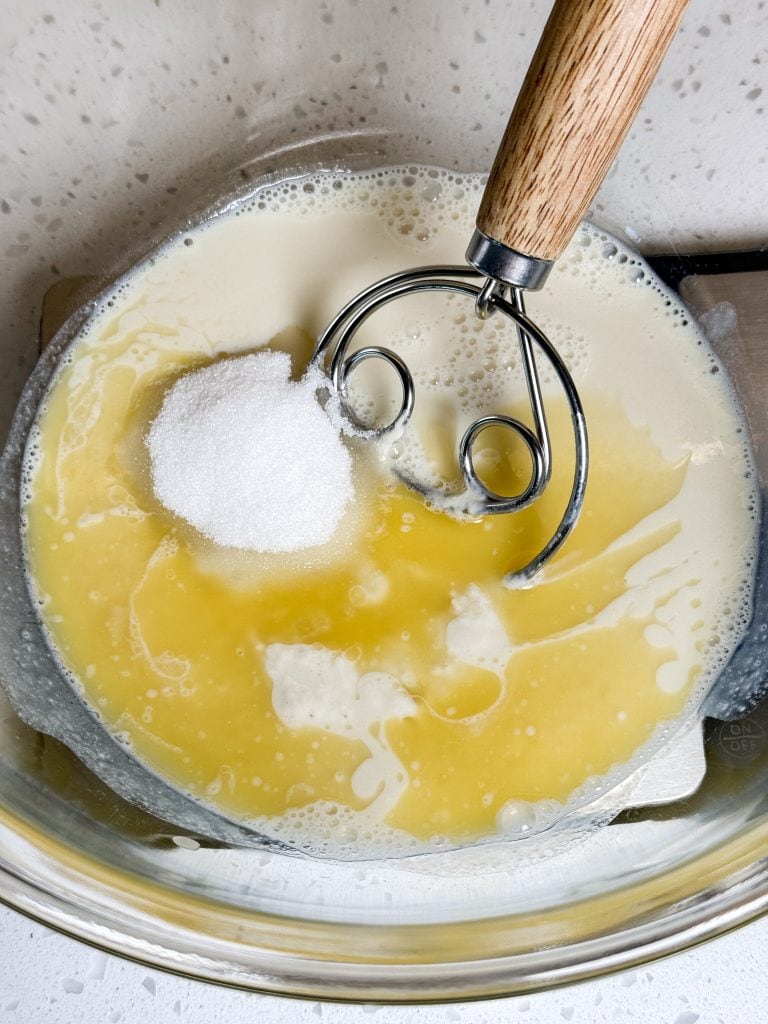
Mix the sourdough starter, warmed soy milk, melted butter, and sugar together before adding the flour. I like to make sure that all of the lumps and bumps from the sourdough starter are mixed in well before adding the bread flour.

Measure out the bread flour and add it to the top of the mixed wet ingredients. Sprinkle the sea salt on top of the flour. Mix well so that no flour remains on the sides and the bottom of the bowl. I use a sourdough whisk and put a little muscle into it.

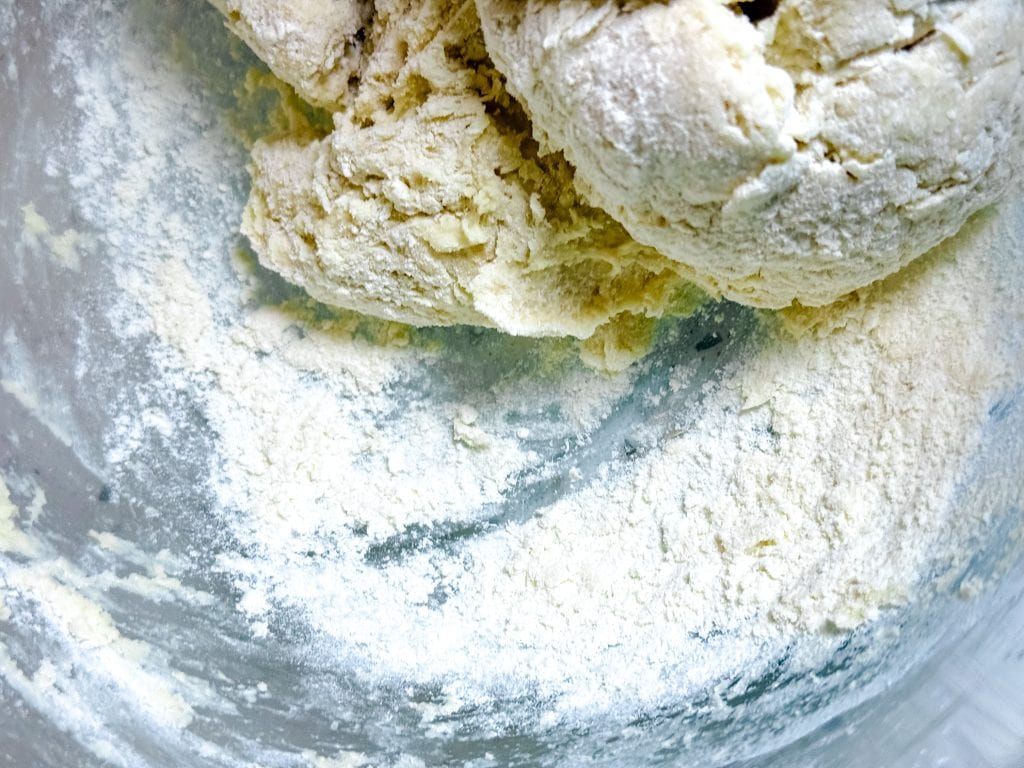
What the Dough Should Look Like
When first mixed, the dough is not going to look like a smooth, tidy ball. It will be sticky, rough, and shaggy. That is normal.
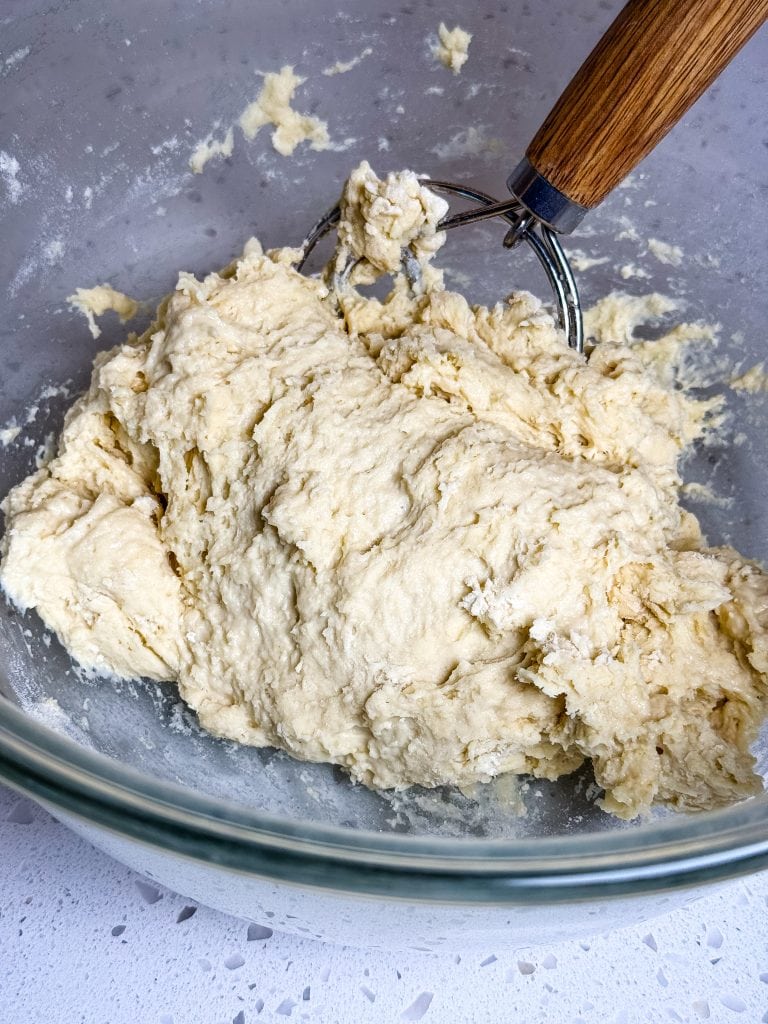
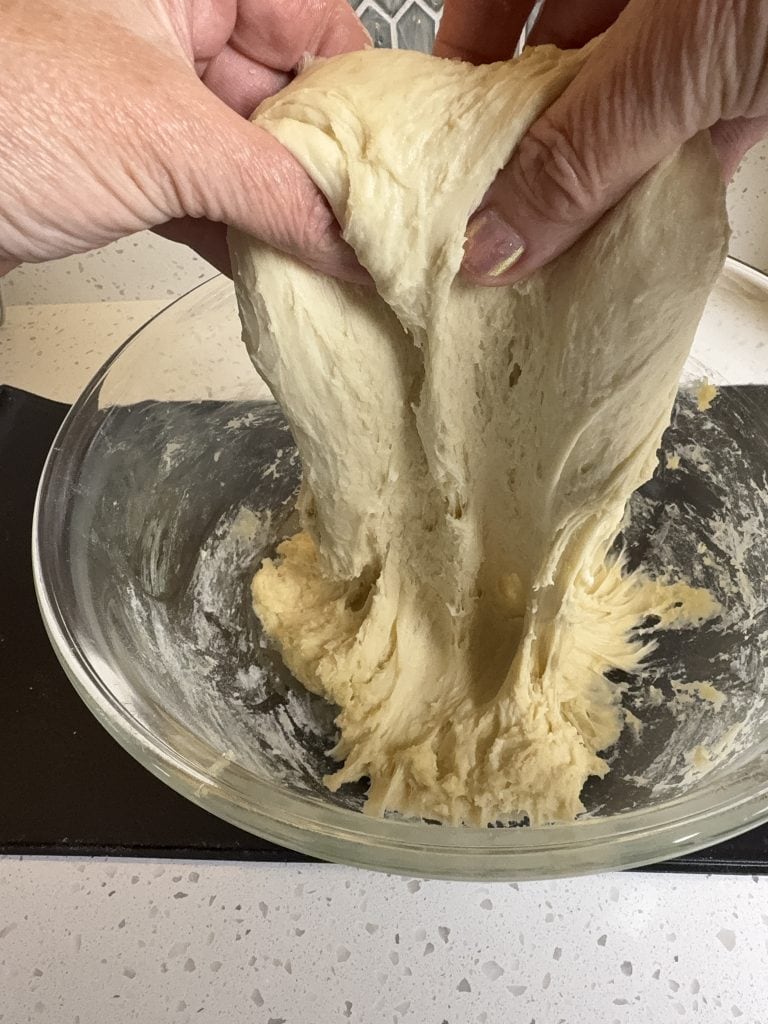
After the one-hour rest and three sets of stretch-and-folds, it should become smoother, more cohesive, and much easier to handle. Damp hands are helpful during the folds because they keep the dough from sticking without incorporating extra flour.
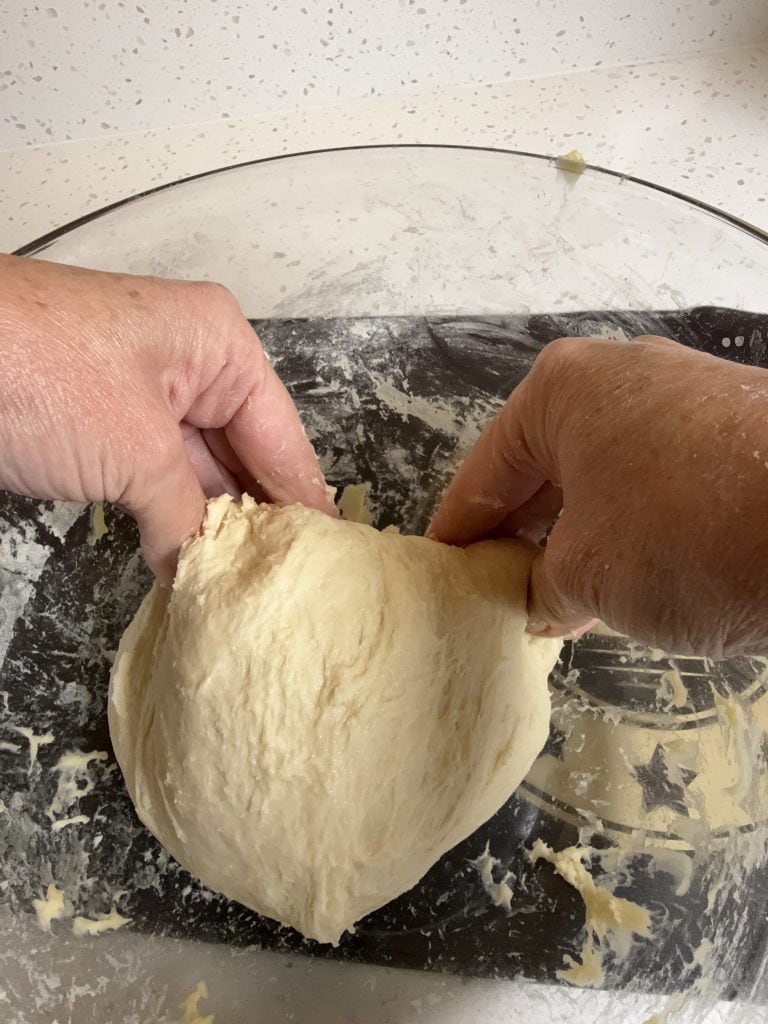
For each set, lift one side of the dough, stretch it upward without tearing it, and fold it over the center. Rotate the bowl and repeat until all four sides have been folded. By the third set of stretch and folds, the dough should feel noticeably tighter, more smooth, and be better able to hold its shape.
How to Know When Bulk Fermentation Is Finished
Bulk fermentation continues after the third set of stretch-and-folds. Begin checking the dough after one hour rather than walking away for several hours.
Look for these signs:
- The dough has increased in volume by approximately 50–75%.
- The top looks fuller and rounded rather than flat and dense.
- The dough appears aerated.
- Small bubbles are visible along the sides or underneath the dough.
- The dough feels lighter than it did after mixing.
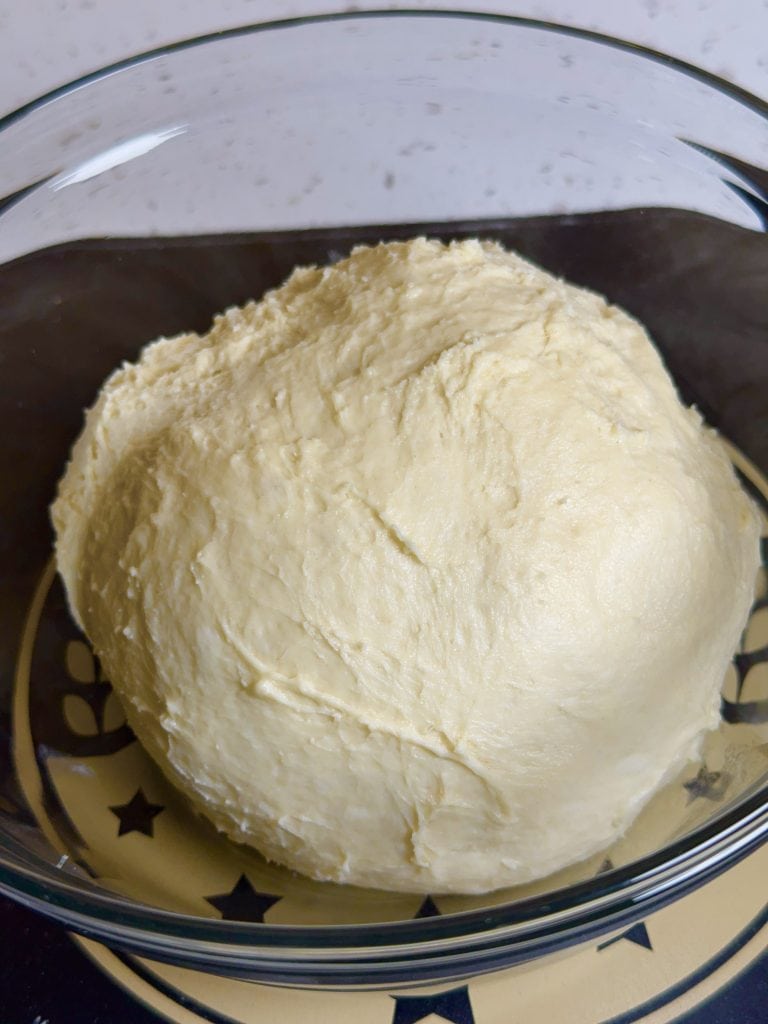
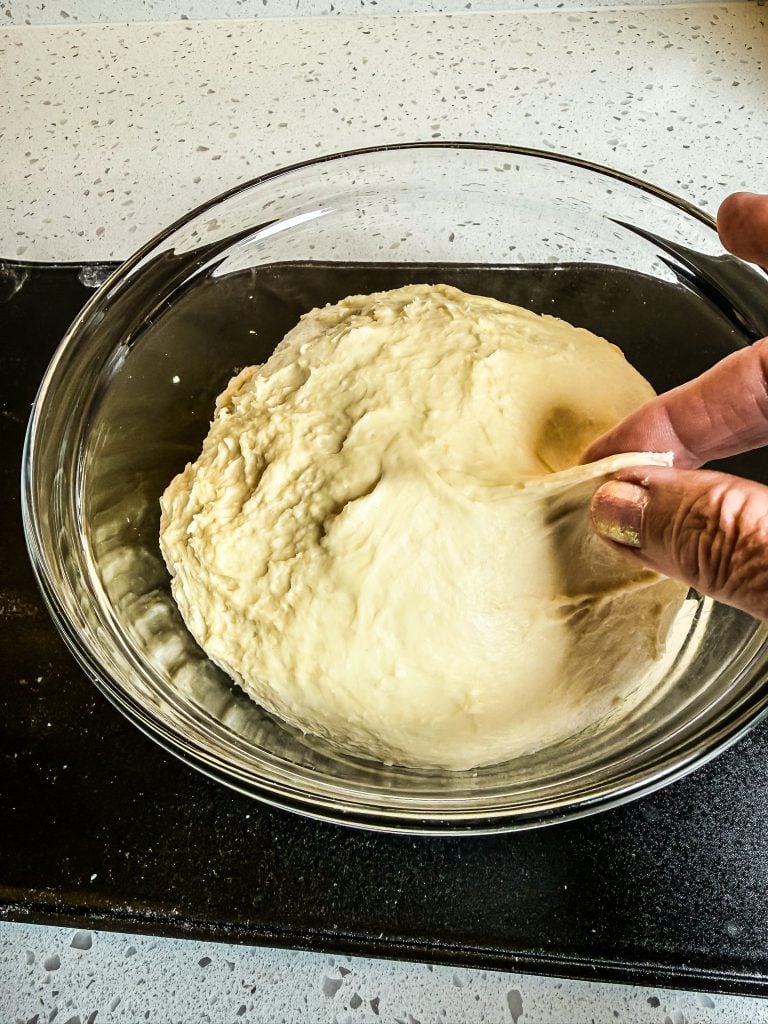
The dough does not need to double, and enriched roll dough may not develop the dramatic jiggle associated with a wetter artisan loaf.
During my first test, the dough was not especially jiggly, but it had clearly risen and bubbles were visible through the glass bowl. Those combined signs were more useful than waiting for one dramatic sign or relying on one test alone.
Dividing and Shaping Even Rolls
Turn the fermented dough onto a lightly floured surface. gently pat into a rectangle without pressing out all of the bubbles that formed during fermentation.
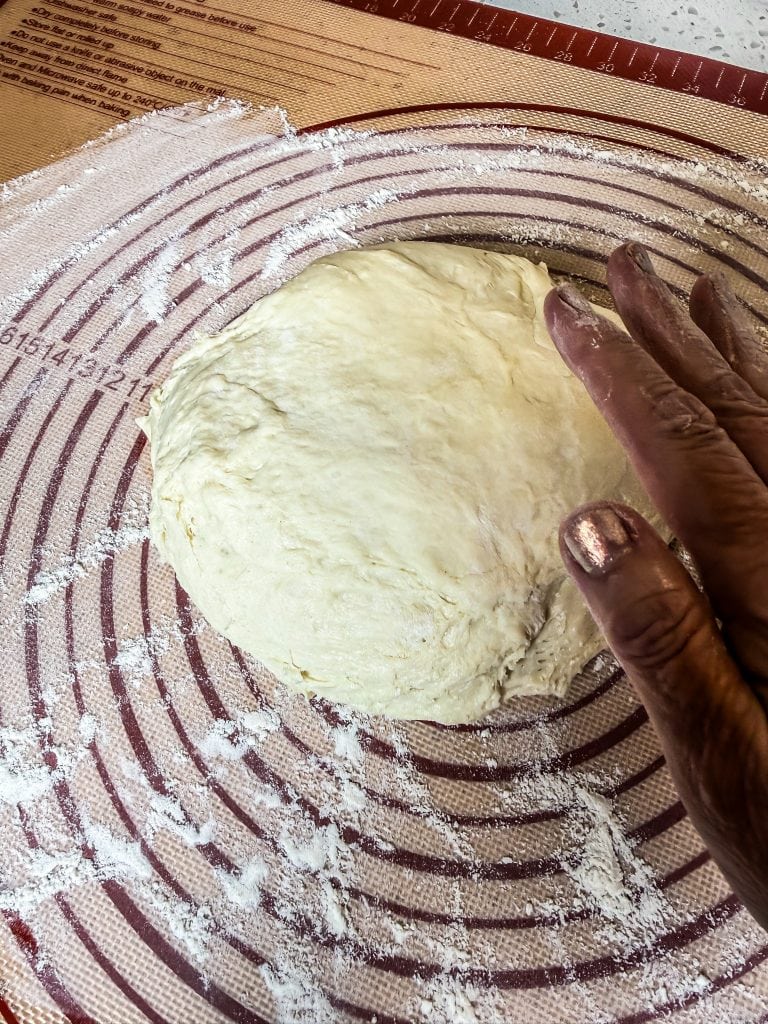
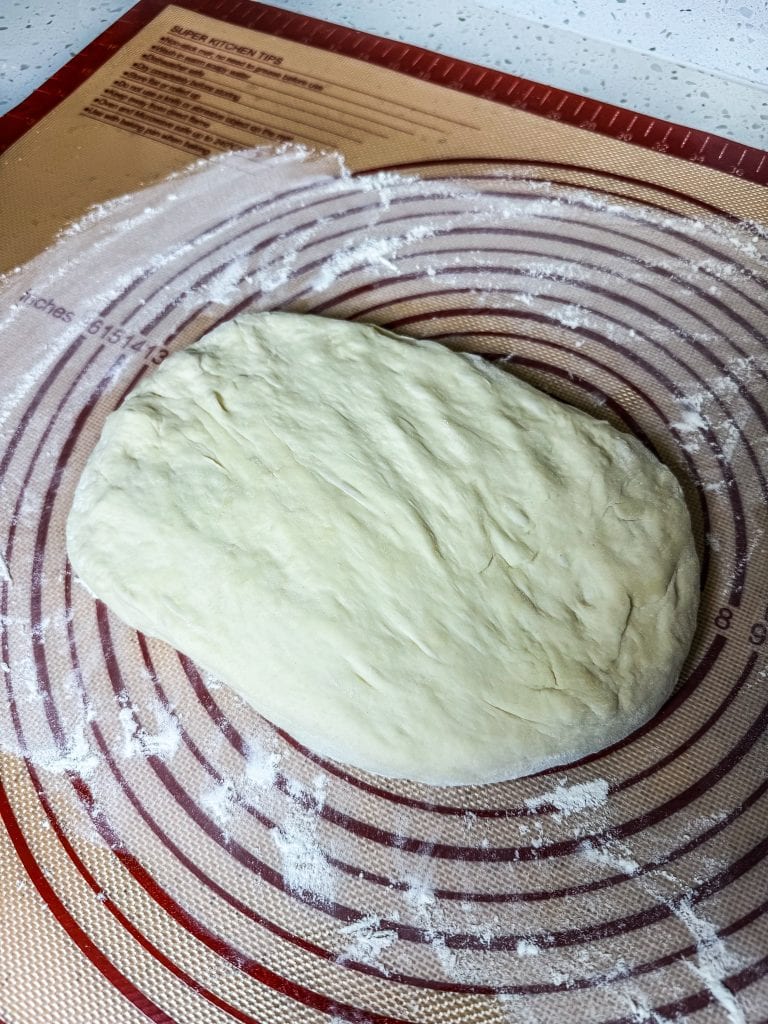
The easiest way to make 12 evenly sized rolls is to weigh the entire batch of dough and divide that number by 12. With this recipe, each portion should be approximately 65–66 grams. But let’s be real…most days I’m probably just going to eyeball it!
Cut the dough into four sections, divide each section into three pieces, and then if you really care, use the scale to make any small adjustments before shaping. It is much easier to correct the portions while they are still rough pieces than after they have been shaped into balls.

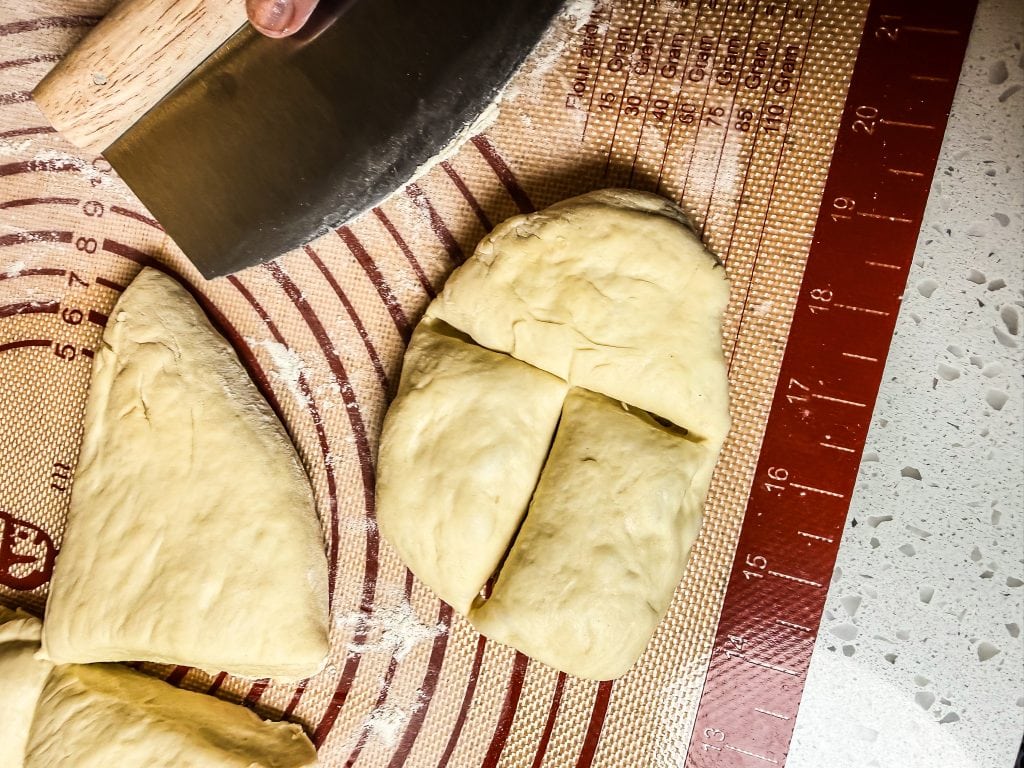
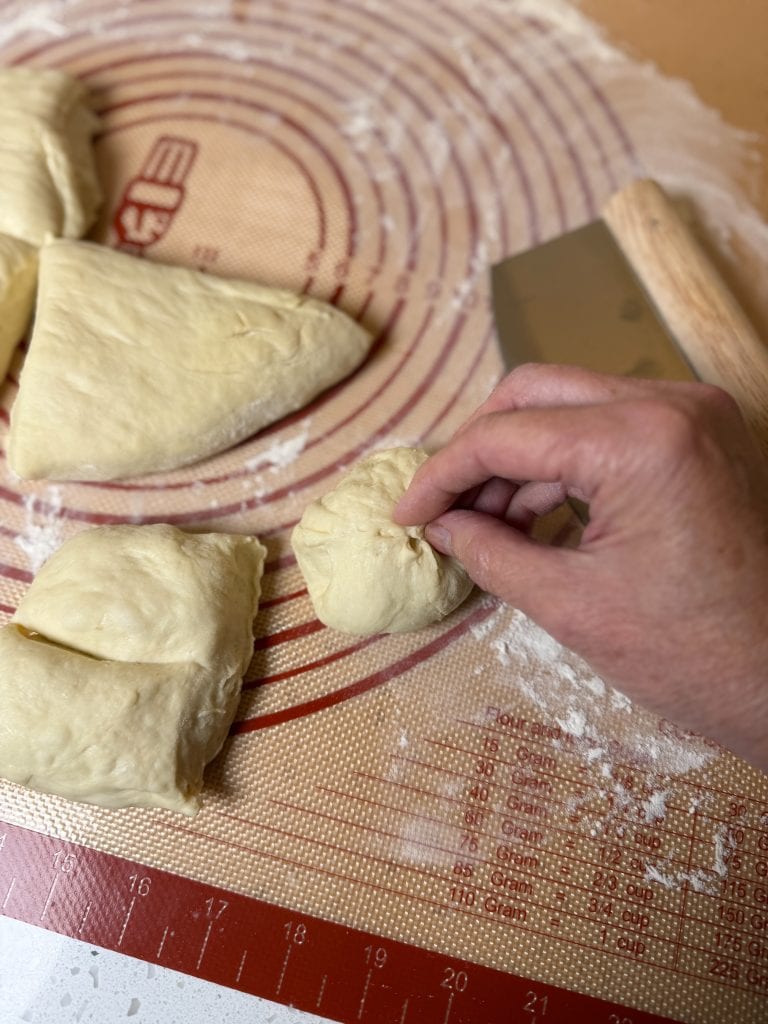
To shape each roll, gently pull the outside edges toward the underside, pinch the seam closed, and place the roll seam-side down in the buttered pan. Some air will escape during dividing and shaping, and that is perfectly fine. The goal is not to crush every bubble, but the rolls do need enough tension to hold their shape.
I grease (with vegan butter) a 9×13 baking pan and place the rolls on the pan, spacing them out the best that I can.

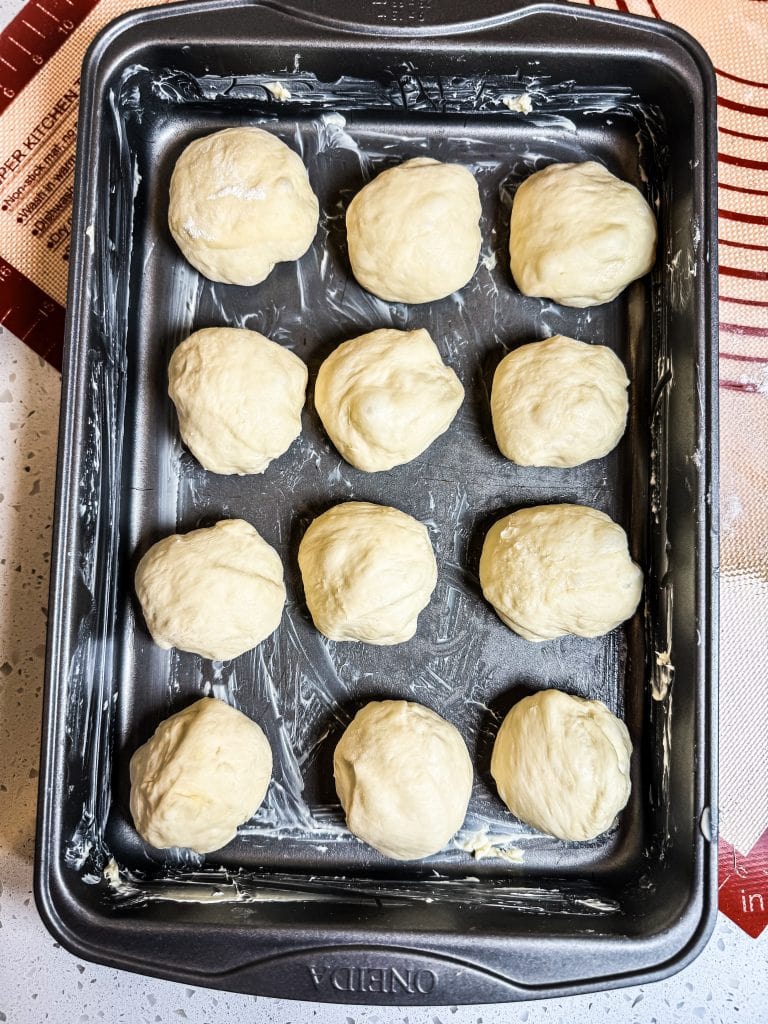
They do not have to look absolutely perfect. Mine certainly did not. Once they proof and bake, minor shaping differences become much less noticeable.
The Overnight Method
Once all 12 rolls are shaped and arranged in the pan, cover the pan tightly and place it directly into the refrigerator. There is no need to let the shaped rolls complete their final proof first.
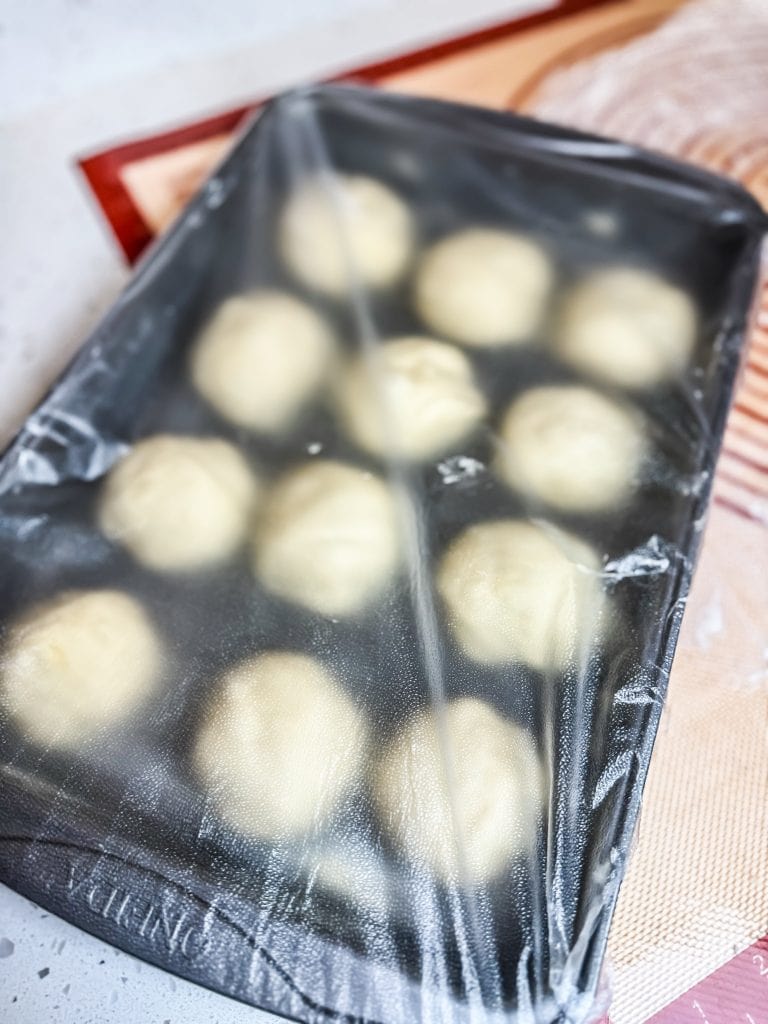
Refrigerate them for approximately 12–18 hours. My test batch stayed refrigerated for over 15 hours. You’ll need to plan removing the cold fermented rolls from the refrigerator approximately two to three hours before baking.
Refrigeration slows fermentation, but it does not stop it completely. That gives the rolls flexibility for an overnight schedule, but it does not mean they should remain refrigerated indefinitely.
As sourdough continues fermenting, acids and naturally occurring enzymes gradually act on the gluten structure. A reasonable cold fermentation can improve flavor and make the dough easier to manage. If it continues too long, however, that gluten network can become weaker. The dough may turn slack, sticky, overly sour, or unable to hold the gas produced during fermentation.
That is why this recipe gives a 12–18 hour range instead of suggesting that the pan can simply sit in the refrigerator for several days.
What Happens on Day Two
Do not expect the cold rolls to look fully proofed as soon as they leave the refrigerator. My rolls had been chilled for more than 15 hours, but when I removed them in the afternoon, they still looked fairly compact and felt cold and firm.

After about two hours at room temperature, they were visibly larger and smoother, but they still needed a little more time. At about 2 and one-half hours after leaving the refrigerator—they looked rounded, soft, and ready for the oven.
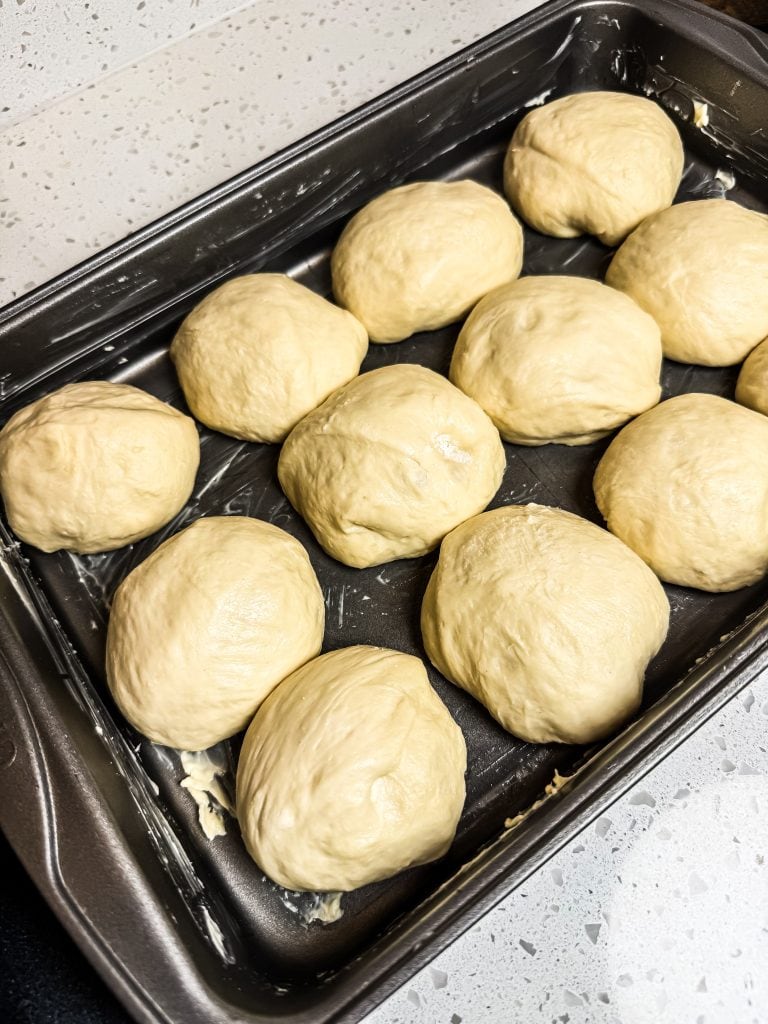
That is a very useful real-life estimate, but room temperature matters. A warmer kitchen may move faster; a cool kitchen may take longer.
Keep the pan covered while the rolls warm and finish rising. Begin checking them after two hours. They are ready when they look noticeably larger, rounded, and pillowy. Some rolls may touch or nearly touch, but that depends on how they were spaced in the pan, so touching should not be the only test.
The Gentle Poke Test
Lightly flour one finger and gently press a roll about ¼ inch deep.
- If the indentation springs back immediately, the rolls probably need another 20–30 minutes.
- If it rises slowly and leaves a faint mark, the rolls are ready to bake.
- If the indentation remains deep and the dough feels fragile, bake the rolls promptly because they may be fully proofed or beginning to overproof.
Use the poke test together with the overall appearance of the rolls. No single sourdough test is perfect on its own.
Do Not Wait for Dark Golden Tops
These vegan dinner rolls may remain fairly light on top even when they are completely baked.
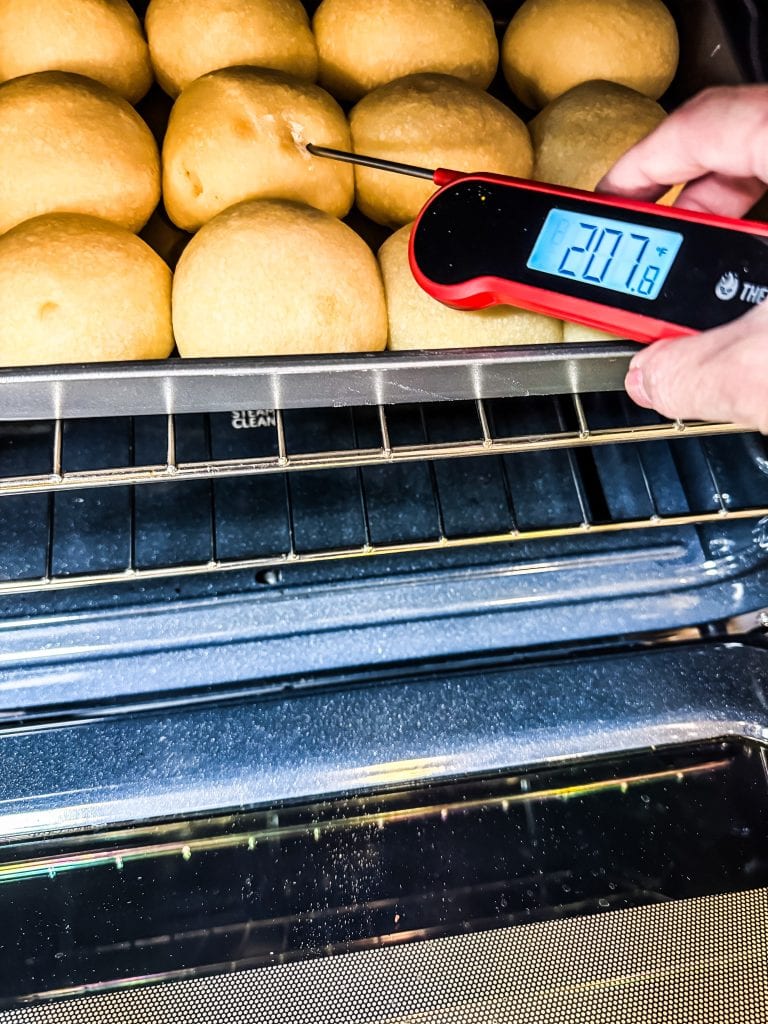
I learned that lesson very clearly during early testing. At 22 minutes, the rolls were only lightly golden, but the center registered 218°F. They were absolutely finished and needed to come out of the oven. Leaving them longer just to deepen the color would only have dried them out.
Begin checking at 18 minutes. An internal temperature of approximately 195–200°F in a center roll is a better indication of doneness than waiting for a deeply browned top.
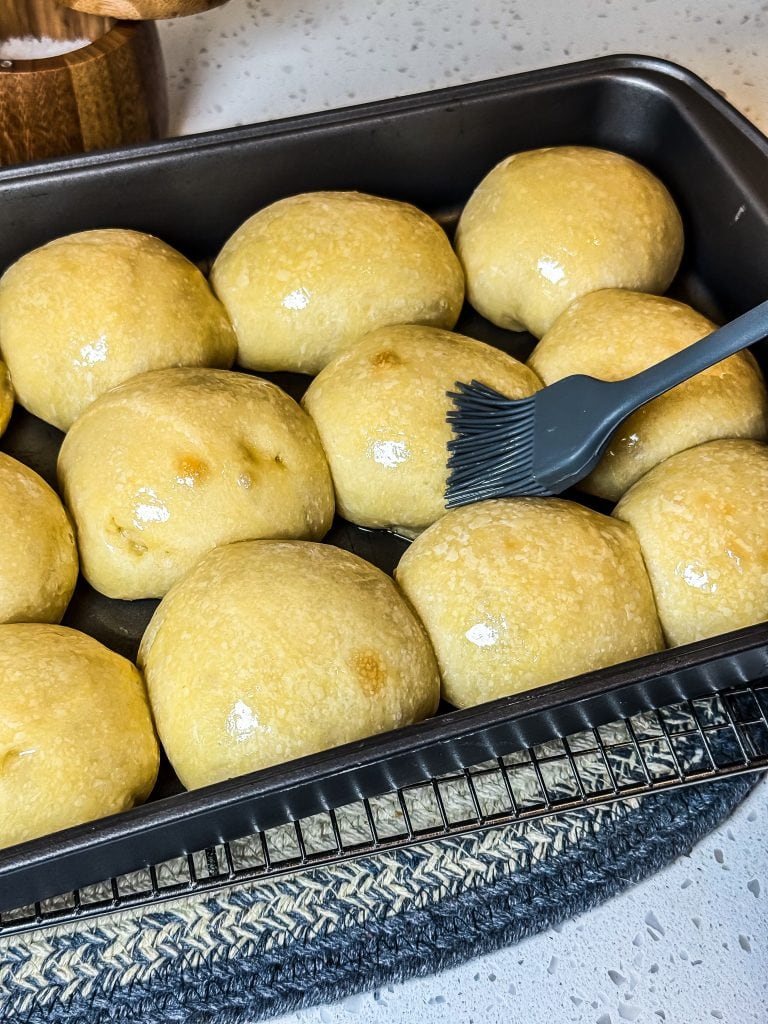
Brush the hot rolls with melted vegan butter as soon as they leave the oven. This adds flavor and helps keep the tops soft. I also like to sprinkle a little flaked sea salt on top. Maldon Sea Salt is my go-to for topping my sourdough rolls.

A Practical Overnight Schedule
This is one example of how the recipe can fit around a late-afternoon or early-evening dinner. Adjust it according to the activity of your starter and the temperature of your kitchen.
Day one
- Late morning or early afternoon: Feed the starter so it will be active by late afternoon.
- Early evening: Mix the dough.
- One hour later: Complete the first stretch-and-fold.
- Over the following hour: Complete the second and third sets, approximately 30 minutes apart.
- After the final fold: Begin checking bulk fermentation after one hour.
- Before bed: Divide, shape, cover, and refrigerate the rolls.
Day two
- About 2–3 hours before baking: Remove the covered pan from the refrigerator.
- After 2 hours: Begin checking the rolls every 20–30 minutes.
- Shortly before serving: Bake for approximately 18–22 minutes, brush with vegan butter, and serve warm.
The important planning detail is the starter. If the starter is not ready until late in the evening, every step that follows will also happen late. Feed it early enough that the dough can be mixed and shaped at a reasonable hour.
Prefer to Make Them in One Day?
The same-day method works beautifully and produced wonderfully soft rolls in my first test. It is a good choice when you are home and can keep an eye on the dough.
Follow the Day One directions through shaping, but do not refrigerate the pan. Cover the shaped rolls and let them proof at room temperature until they look expanded, rounded, and pillowy. This will generally take 2–3 hours, but begin checking before the two-hour mark if the kitchen is warm or the starter is especially active.
My same-day batch was ready about 2 hours and 20 minutes after shaping. Again, use that time as a cue to begin paying attention rather than as a deadline the dough must follow.
Serving Suggestions
These rolls are lovely with almost any meal that calls for soft, warm bread. Serve them with:
- A special holiday meal or Thanksgiving dinner
- A hearty bowl of soup or chili
- A vegan roast and gravy
- A simple pasta dinner
- Leftover holiday fillings tucked inside as small sandwiches
- Vegan butter and homemade jam – I’m using triple berry jam today – yum!

Storage: An Honest Note
These rolls are best on the day they are baked. That is not a line added because every bread recipe is supposed to say it—it is what I observed while testing them.
They were wonderful fresh from the oven and still acceptable the next day, especially after gentle reheating. By the third day, I did not enjoy them at all. They had lost the soft texture that made them special in the first place.
Allow leftover rolls to cool completely, then store them in an airtight container at room temperature. Reheat them gently before serving the next day.
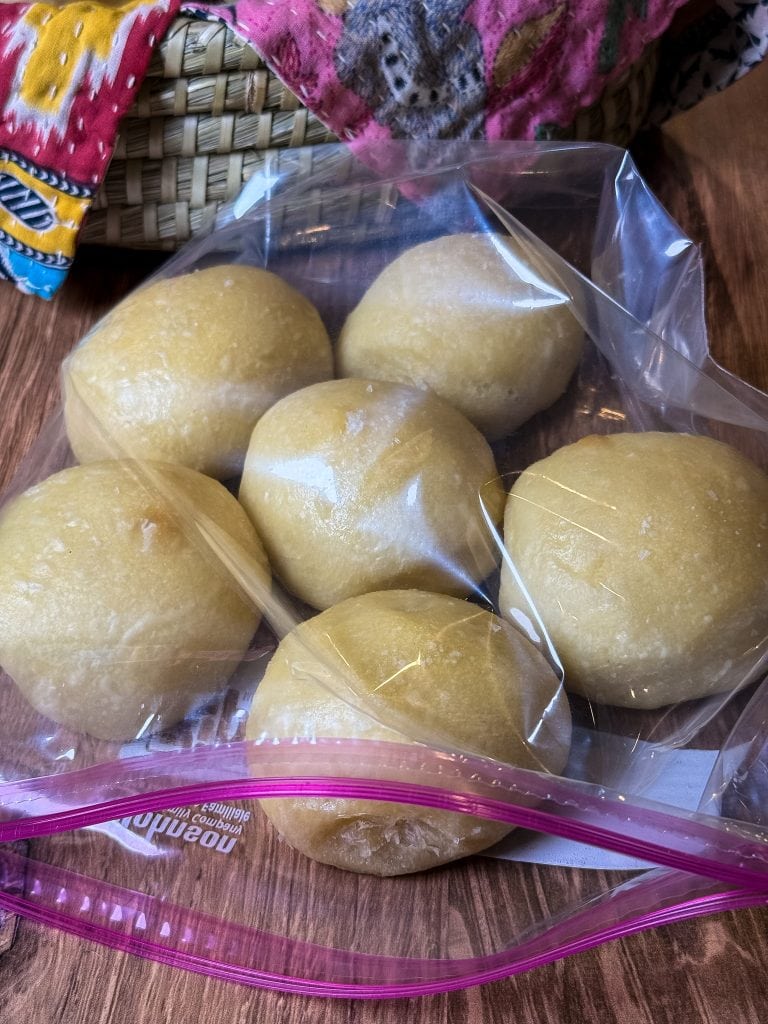
If you need to freeze your rolls, place them in an airtight freezer safe container (I used the ziplock bag). When you are ready to eat them, take them out of the freezer, wrap the rolls tightly in foil at heat at 350 degrees for about 15-20 minutes before enjoying. I’ve never managed to keep mine in the freezer longer than a week because they are too delicious – I’ll update when I’ve tested the outer limits of freezer storage.
Cindy’s Kitchen Tips
- Use a starter that is bubbly, expanded, and at or near its peak.
- Warm the soy milk gently and let it cool if it exceeds 95°F before adding the starter.
- Do not judge the flour amount immediately after mixing. The one-hour rest makes a substantial difference.
- Keep hands damp—not heavily floured—during stretch-and-folds.
- Begin checking bulk fermentation one hour after the final fold.
- Look for a 50–75% rise rather than waiting for the dough to double.
- Weigh the portions for evenly sized rolls that bake at the same rate.
- Keep the pan tightly covered in the refrigerator so the rolls do not dry out.
- Allow 2–3 hours for refrigerated rolls to warm and finish proofing.
- Trust the internal temperature more than the color of the tops.
- Brush the rolls with melted vegan butter immediately after baking.
- Plan to serve them fresh or by the following day.
Frequently Asked Questions
Can the rolls be baked directly from the refrigerator?
This recipe was tested by allowing the rolls to warm and finish proofing at room temperature before baking. Cold rolls may still be underproofed even after a long night in the refrigerator. Give them time to become visibly larger, soft, and pillowy before they go into the oven.
Why didn’t the rolls double during bulk fermentation?
They are not supposed to double. For this enriched dough, aim for approximately a 50–75% increase along with a rounded appearance and visible bubbles. Waiting for a complete doubling may lead to overfermentation.
Can another plant milk be used?
The recipe was developed with unsweetened soy milk. Other unsweetened plant milks may work, but their protein, fat, and water content vary, so they may produce a slightly different dough and finished texture.
Why are the rolls still pale when they are done?
Vegan rolls without an egg wash may remain lighter than traditional dinner rolls. Check a center roll with an instant-read thermometer and remove the pan at approximately 195–200°F rather than baking until the tops become dark brown.
How far ahead can these rolls be made?
Shape and refrigerate them for approximately 12–18 hours, then allow 2–3 hours at room temperature before baking. For the best texture, bake them on the day they will be served rather than baking them several days ahead.
Final Thoughts
Sourdough dinner rolls require some patience, but they should not require spending an entire holiday watching the clock and wondering whether dinner will be delayed by the bread.
The overnight method moves the long wait into the refrigerator and leaves the final proof and baking for the day the rolls will be served. The same-day option is still there when the schedule allows it—and based on my first batch, it is a wonderful option—but the overnight version makes fresh sourdough rolls much more realistic for a busy dinner.
Most importantly, watch the dough, check it earlier than you think you need to, and do not leave fully baked rolls in the oven merely because they are still pale. Homemade sourdough rarely follows an exact schedule, but knowing what to look for makes the process much less intimidating.
When these soft vegan sourdough rolls reach the table warm, brushed with melted vegan butter, and ready to pull apart, all that waiting finally makes sense.

Did you love this recipe?
Want to share the love? It would be great if you could leave five ⭐️ ⭐️ ⭐️ ⭐️ ⭐️ stars and even a comment. Did you know that this will help Google to find this recipe when others are looking for something similar? Thanks, Cindy
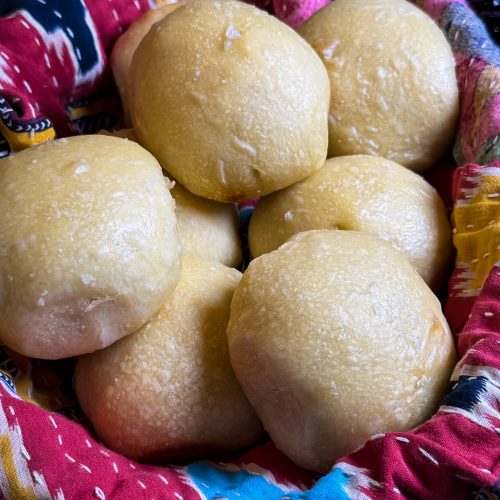
Overnight Vegan Sourdough Dinner Rolls (With Same-Day Option)
Equipment
- 9-by-13-inch metal baking pan
Ingredients
- 115 grams sourdough starter active and bubbly
- 240 grams unsweetened soy milk warmed
- 2 Tablespoons vegan butter melted
- 3 Tablespoons granulated sugar
- 360 grams bread flour plus a small amount only if absolutely necessary
- 1 teaspoon fine salt
- Additional vegan butter for greasing the pan and brushing the baked rolls
- sea salt flakes for finishing optional
Instructions
Day One
- Prepare your active bubbly sourdough starter (I use 1:3:3 ratio. It takes several hours so plan accordingly.)
- Warm the soy milk to approximately 85–95°F. If it becomes warmer, let it cool before adding the starter. Melt the vegan butter240 grams unsweetened soy milk, 2 Tablespoons vegan butter
- Stir the melted vegan butter and sugar into the warm soy milk.3 Tablespoons granulated sugar
- Add the active sourdough starter and stir until mostly combined.115 grams sourdough starter
- Add 360 grams of bread flour, then sprinkle the salt over the flour.360 grams bread flour, 1 teaspoon fine salt
- Mix until no dry flour remains. The dough will initially be sticky and shaggy. Do not immediately add more flour.
- Cover and let the dough rest for 1 hour.
- Complete three sets of stretch-and-folds, spacing the sets approximately 30 minutes apart. With damp hands, stretch one side of the dough upward and fold it over itself. Rotate the bowl and repeat on all four sides.
- After the third set of stretch and folds, cover the dough and let it continue fermenting. Begin checking it after 1 hour. It may need approximately 1–2 hours after the final stretch-and-fold, depending on the room temperature and starter strength.
- Check the dough. The dough is ready when it has risen approximately 50–75%, looks rounded and aerated, and has visible bubbles along the sides or underneath. It does not have to double or become extremely jiggly.
- Generously grease a 9-by-13-inch metal baking pan with vegan butter.
- Shape each portion into a ball by pulling the edges underneath and pinching the seam closed. Arrange the rolls seam-side down in the prepared pan. (Weigh the entire dough and divide that number by 12. Each portion should weigh approximately 65–66 grams. See the blog post for visual instructions.)
- Cover the pan tightly and refrigerate immediately for 12–18 hours. The tested batch was refrigerated for approximately 15 hours.
Day Two
- Remove the covered pan from the refrigerator approximately 2–3 hours before baking.
- Keep the rolls covered while they warm and finish proofing. Begin checking after 2 hours.
- The rolls are ready when they look noticeably larger, rounded, and pillowy. Some may be touching or nearly touching, although spacing in the pan can affect this.
- Gently press one roll about ¼ inch with a lightly floured finger. The indentation should slowly rise while remaining faintly visible. If it springs back immediately, allow another 20–30 minutes.
- Preheat the oven to 375°F while the rolls finish proofing.
- Bake for approximately 18–22 minutes, beginning the temperature check at 18 minutes. The tops may only become lightly golden.
- Remove the rolls when a center roll reaches approximately 195–200°F internally. Do not continue baking solely to achieve a darker top.
- Brush the hot rolls with melted vegan butter.
- Cool in the pan for 5–10 minutes, then transfer to a cooling rack.
For Same Day Option
- Follow the Day One directions above but don't put them in the refrigerator. After shaping, cover the rolls and let them proof at room temperature until pillowy and visibly expanded, approximately 2–3 hours. Begin checking before the 2-hour mark because a warm kitchen or very active starter can shorten the proof considerably. Bake as directed above.
Notes
- Use an active starter. The starter should be bubbly, expanded, and at or near its peak before mixing the dough. If I have enough time, I like to prepare a 1:3:3 ratio for my starter.
- Watch the milk temperature. Warm the soy milk to about 85–95°F. Milk that feels hot can damage the natural yeast in the starter.
- Expect sticky dough. The dough will be sticky and shaggy when first mixed. Give the flour time to hydrate during the one-hour rest before deciding whether it needs additional flour. Add more only if the dough remains unmanageably wet after resting.
- Follow the dough, not only the clock. Sourdough timing varies with room temperature, starter strength, and refrigerator temperature. During bulk fermentation, look for a 50–75% increase in volume, a rounded appearance, and visible bubbles.
- Check bulk fermentation early. Begin checking within 1 hour after the final stretch-and-fold. In a warm kitchen, the dough may be ready within 1–2 hours.
- Overnight timing: The shaped rolls can be refrigerated for approximately 12–18 hours. This recipe was tested with a cold proof of about 15 hours.
- Avoid an unnecessarily long cold proof. Refrigeration slows fermentation but does not stop it. Extended fermentation can eventually weaken the gluten, leaving the rolls overly sour, sticky, slack, or unable to hold their shape.
- Plan for a room-temperature proof. After refrigeration, the rolls will generally need 2–3 hours to warm and finish rising. Begin checking at 2 hours.
- Same-day option: Skip refrigeration after shaping and let the covered rolls rise at room temperature until pillowy, generally 2–3 hours. Begin checking before the 2-hour mark in a warm kitchen.
- Use visual proofing cues. Properly proofed rolls should look larger, rounded, soft, and pillowy. They may not all touch if they were spaced farther apart. the gentle poke test. A shallow indentation should slowly rise while remaining faintly visible. A mark that springs back immediately indicates that the rolls need more time.
- Do not wait for deeply browned tops. These vegan rolls may remain only lightly golden. Begin checking at 18 minutes and use an internal temperature of 195–200°F as the best indicator of doneness.
- Best enjoyed fresh. These rolls are at their softest on the day they are baked. Store cooled leftovers airtight at room temperature and gently reheat before serving the following day. They are not recommended for three-day storage.
