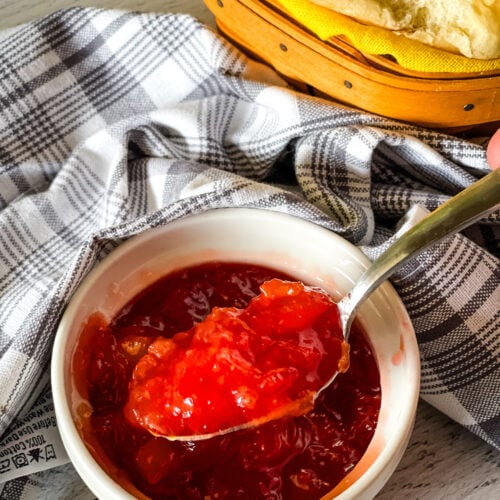
Strawberry Pineapple Jam is the delightful fusion of sweet and tangy flavors. You’ll love this small batch luscious spread crafted without the need for pectin or butter. This easy to make homemade jam captures the essence of ripe, juicy strawberries and succulent canned pineapple. This small batch jam is perfect for spreading on your favorite morning toast or incorporating into a variety of culinary creations. Elevate your breakfast or snack time with this easy-to-make, irresistibly delicious strawberry pineapple jam that brings the best of both fruits to your palate with a simple small batch jam recipe.

You’ll love our Strawberry Pineapple Jam for its delicious blend of sweet and tangy flavors that make it perfect for spreading on homemade bread, biscuits, or muffins. It’s a tropical twist on traditional small batch strawberry jam that I think you’ll really enjoy! Made without pectin or butter, it’s a simple, homemade treat that adds a burst of fruity goodness to your breakfast or snacks.
Vegan home cooks who love to make homemade jam will delight in the fact that homemade small batch jams don't require butter like traditional large-scale jams meant for canning!
Traditional jam-making can be a real pain in the rear! With factors like pectin levels and precise cooking, AND what seems like forever attending to and stirring a hot pot, I’ve found solace and better success in small batch jams. The simplicity of managing fewer ingredients and ensuring a more controlled process makes it my preferred choice.

Ingredients needed to make a small batch of strawberry pineapple jam
- strawberries – I use fresh strawberries in my jam recipe. You can also use frozen berries but be prepared to adjust the cooking time.
- canned crushed pineapple in juice – Don’t use canned pineapple in syrup. That will make the jam recipe too sweet.
- granulated sugar – If you are a “sugar vegan” then use organic sugar.
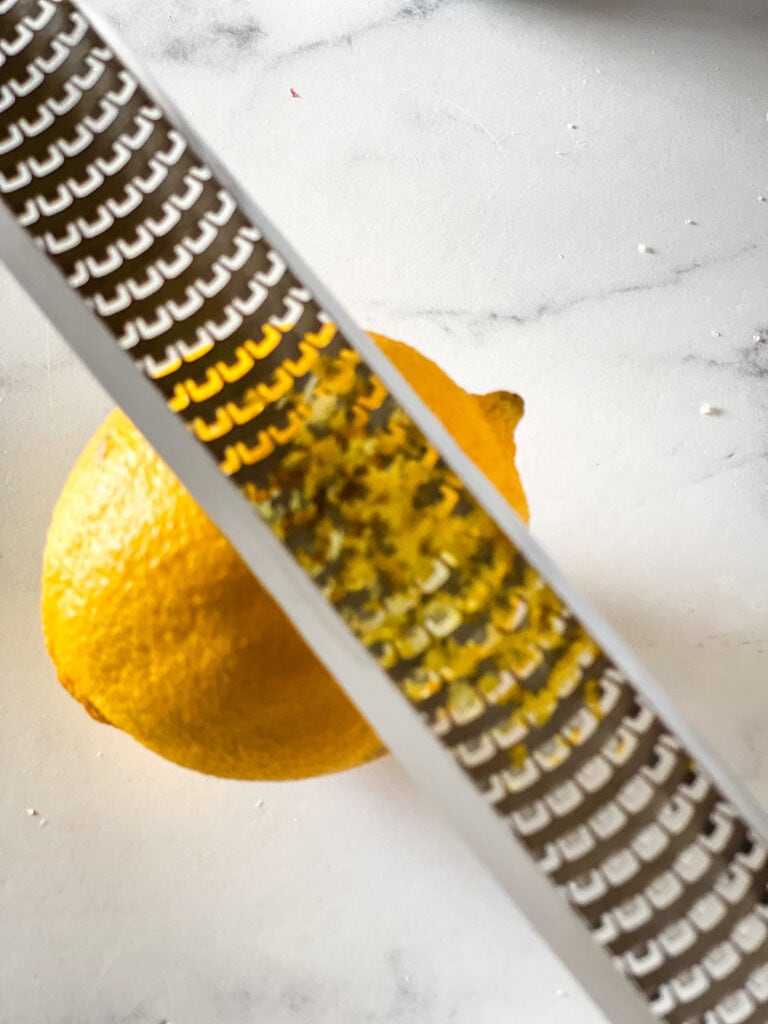
- lemon juice – You can use fresh or bottled lemon juice for this recipe, BUT you will be using a little lemon zest for an added zing. So do buy at least one fresh lemon.
- lemon zest
- a very small amount of salt– A little salt helps to balance the sweet!
- You’ll also need a heavy-bottomed sauce pan.
- You’ll need a potato masher to mash the berries or perhaps an immersion blender.
- A lemon zester is super useful to zest a lemon – but a fine grater would work as well.
- A candy thermometer is very handy for this recipe!

How to make strawberry pineapple jam the “small batch” way
The exact ingredients with measurements can be found in the recipe card below along with more concise abbreviated instructions. Read on for more details, tips, and tricks so that you will feel confident making this recipe.
Steps 1-3: Preparations
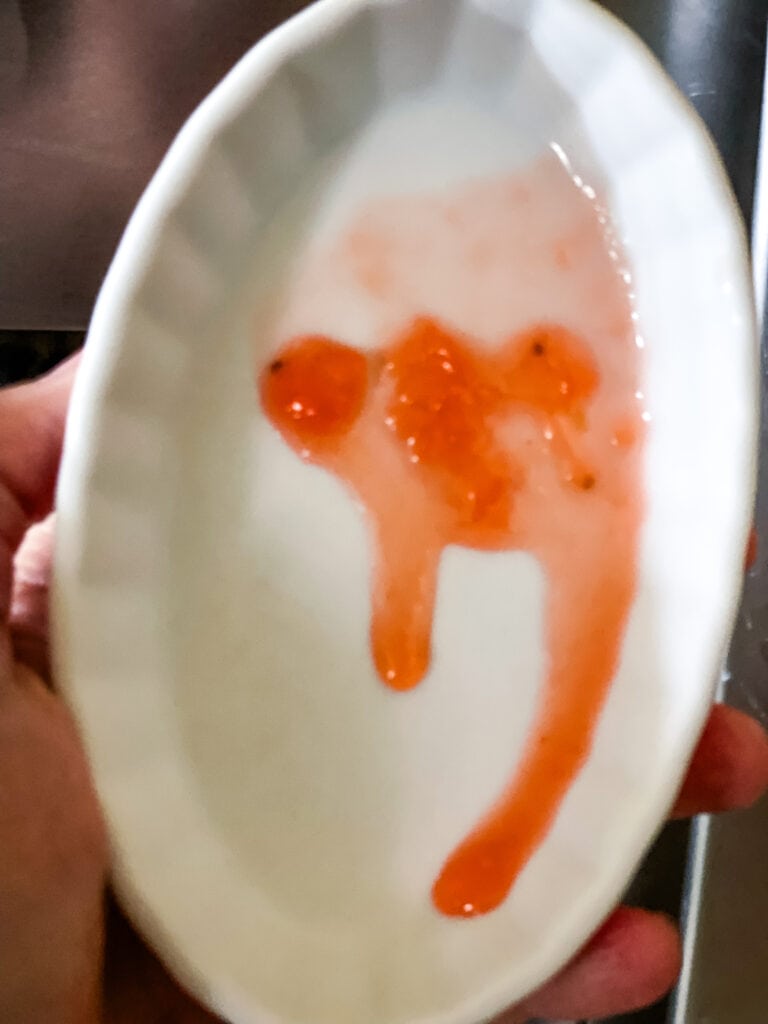
Put several small plates or flat bowls in the freezer for the gel test you’ll do after the mixture cooks. Even if you are using a candy thermometer, doing a gel test ensures your jam will be as thick – or thin- as you’d like.
If you are using frozen strawberries then set them out to thaw. Wash the fresh strawberries and cut off the green leafy tops. Cut the strawberries into halves or for the extra large berries cut into quarters.

This recipe calls for eight ounces of strawberries. Most strawberry containers are 16 ounces so you will need to use one-half of the container. Eight ounces is one cup but when you measure the strawberries, your one-cup measuring cup won’t be level but have a generous rounded hump on top.

Zest and squeeze your lemon. You only need a small amount of zest. I usually zest the whole lemon and freeze the leftover so that I can pull it out and use it whenever I need just a small amount. You will need one and a half tablespoons of lemon juice for this recipe. I can usually get this from one large juicy lemon.
Step 4: Melt the sugar and cook the jam
This is considered the “first cooking” step. You are cooking the ingredients to melt the sugar and to soften the fruit. You’ll be mashing and cooking longer to set the gel in the following steps.
Place the prepared strawberries, canned crushed pineapple including the juice, sugar, lemon juice and zest, and salt in a medium saucepan and cook over medium heat. Stir it regularly until the sugar has dissolved. This will take about six minutes. Don’t allow for a hard boil during this step. A gentle boil is fine.


You’ll know that the sugar has melted when you scoop up some of the syrup with a spoon and hold it in the light. If the sugar has fully melted then you won’t see any little sugar granules in the syrup.
Step 5: Mash the berries
Turn off the stove or remove from heat so that you don’t get splatters of hot jam on you and mash the strawberries into small bits with a potato masher or use an immersion blender.
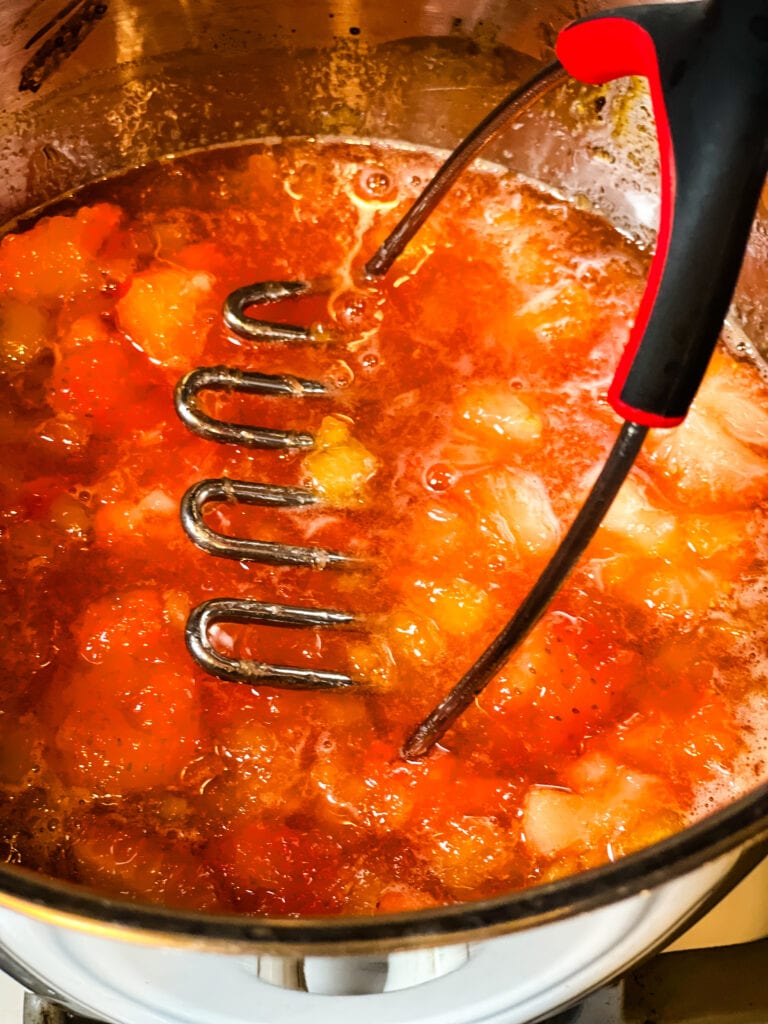
This jam will be chunky because of the pineapple. You can control how big you’d like the strawberries to be. I like my jam a little chunky.
Step 6: Bring mashed jam to a boil
Return to a high boil and then turn down to a low boil and let simmer/low boil without stirring for 15-20 minutes before doing the first gel test. The goal is to cook to 210℉ using a candy thermometer. (Depending on how thick you’d like your jam to be.)

Even if you are using a candy thermometer, do the gel test to make sure the jam is as thick as you’d like. The gel test is THE ultimate way to see what your jam will be like when set.
Step 7: The Gel Test
The gel test is the definitive way to know if your jam is going to set up the way you’d like. You really can’t tell how it’s going to set up when it’s still hot in the saucepan. Doing a gel test “fakes” what the jam’s texture will be when cooled.
Remember those small plates we placed in the freezer? Time to pull them out and put our jam to the test. Turn off the stove while you complete the gel test. Spoon a small amount (one-half teaspoon) onto the cold plate. Return to the freezer for two minutes.
Take out the place and tilt to see if the mixture runs down the plate quickly or if it very slowly creeps. If it runs quickly, return the mixture to a quick boil and then immediately turn it down to a simmer for another three-five. Try the test again. I’d be surprised but you might need to do this process a third time. You should not need to try a fourth time.

Final steps: Cooling and bottling
Remove the pan with the cooked jam from the stove and let cool until it’s easy to handle without burning yourself if it splashes. Give it a stir before pouring the mixture into a clean jar with a lid. Store the jam in the fridge for up to 1 month unopened. Consume within a week once opened.
This jam makes one larger one-cup jar or two very small jars. One to use right away and the other to share:)
The printable recipe card
Did you love this recipe?
Want to share the love? It would be great if you could leave five ⭐️ ⭐️ ⭐️ ⭐️ ⭐️ stars and even a comment. Did you know that this will help Google to find this recipe when others are looking for something similar? Thanks, Cindy
Strawberry Pineapple Jam, Small Batch with No Pectin or Butter
Ingredients
- 8 ounces Strawberries a generous cup
- 8 ounces crushed pineapple in juice
- 17 Tablespoons granulated sugar see notes
- 1½ Tablespoons lemon juice use fresh or bottled
- ¼ teaspoon lemon zest
- ¼ teaspoon salt scant – see notes
Instructions
- Put several small plates or flat bowls in the freezer for the gel test you'll do after the mixture cooks.
- Prepare the strawberries by washing and cutting off any tops or leaves. Cut the berries into halves or quarters if they are extra large.
- Juice and zest the lemon.
- Place the prepared strawberries, canned crushed pineapple including the juice, sugar, lemon juice and zest, and salt in a medium saucepan and cook over medium heat. Stir it regularly until the sugar has dissolved. This will take about six minutes. Don't allow for a hard boil during this step. A gentle boil is fine.8 ounces Strawberries, 8 ounces crushed pineapple, 17 Tablespoons granulated sugar, 1½ Tablespoons lemon juice, ¼ teaspoon lemon zest, ¼ teaspoon salt
- Turn off the stove or remove from heat so that you don't get splatters of hot jam on you and mash the strawberries into small bits with a potato masher.
- Return to a high boil and then turn down to a low boil and let simmer/low boil without stirring for 15-20 minutes before doing the first gel test. The goal is to cook to 210℉ using a candy thermometer. (Depending on how thick you'd like your jam to be.).Even if you are using a candy thermometer, do the gel test to make sure the jam is as thick as you'd like. The gel test is THE ultimate way to see what your jam will be like when set.
- Turn off the stove while you complete the gel test. Spoon a small amount (one-half teaspoon) onto the cold plate. Return to the freezer for two minutes. Tilt the plate to see if the mixture runs down the plate quickly or if it very slowly creeps. If it runs quickly, return the mixture to a quick boil and then immediately turn it down to a simmer for another three-five. Try the test again. I'd be surprised but you might need to do this process a third time. You should not need to try a fourth time. See notes for another freezer test.
- Remove from the stove and let cool. Give it a stir before pouring the mixture into a clean jar with a lid. Store the jam in the fridge for up to 1 month unopened. Consume within a week once opened.

Can I process this jam in a water-bath canner?
If you know about such things then I don’t know why not. I love the simplicity of small batch jam because I don’t like complicated processes and I can consume my jam in a short amount of time. Let me know if you did and how it turned out!