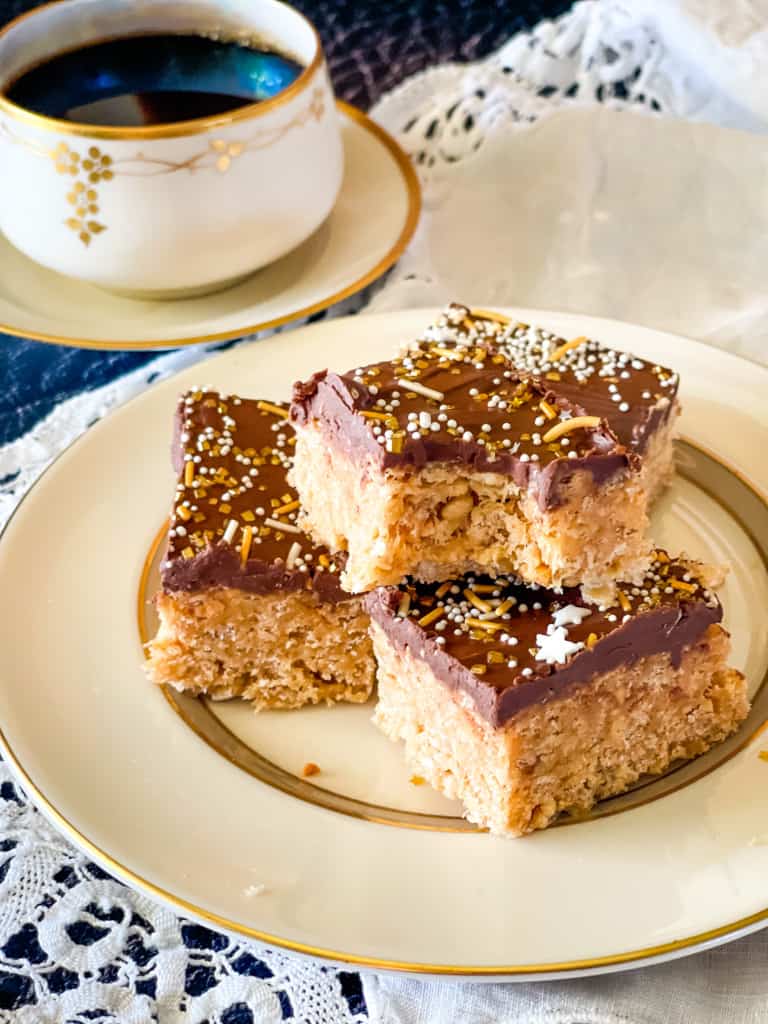
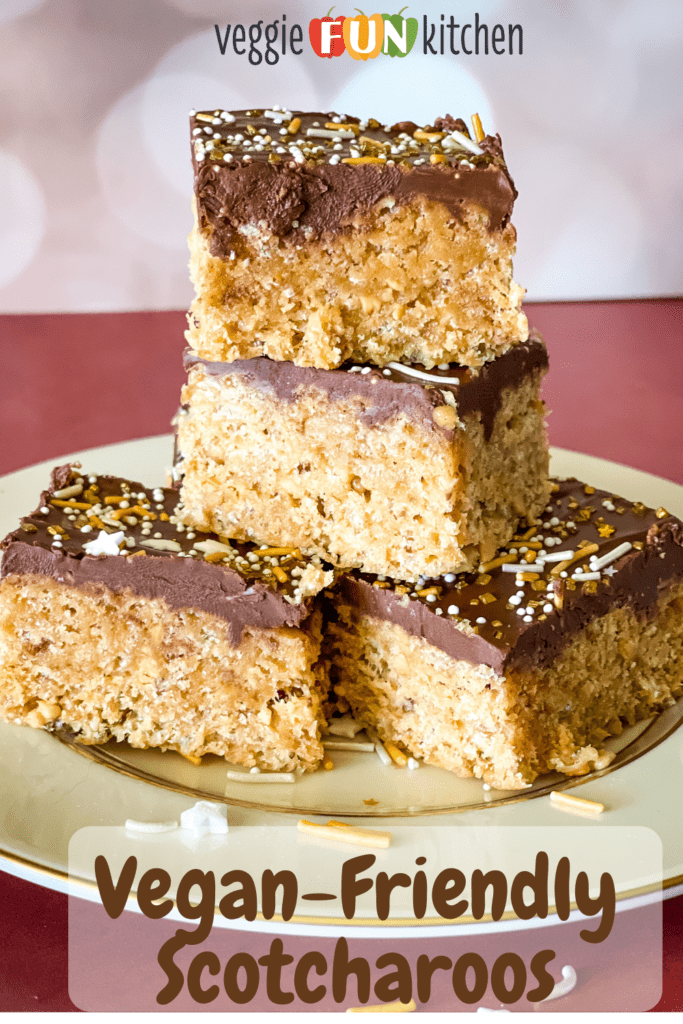
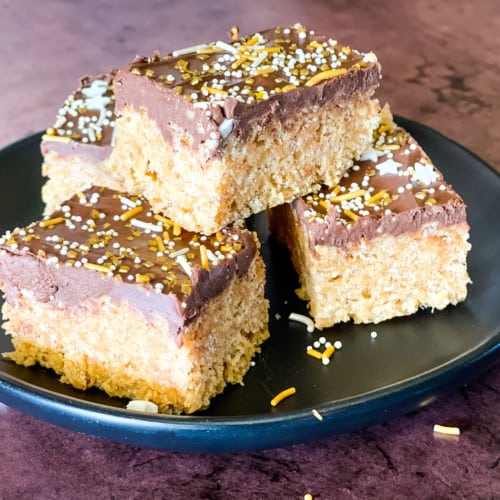
Peanut butter rice Krispies are the perfect treat! Chewy, peanut buttery, sweet, and chocolatey, these classic Scotcheroos Peanut Butter Rice Krispies treats can be made vegan by using vegan-friendly ingredients.

Peanut butter Scotcheroos are an old family favorite from when I was a little girl. Only back then they were named for my mother! Really! At least in our small town church group.
Our church proudly produced a cookbook in which every recipe was named for the person submitting it – whether it was their recipe or not. And over the years, the names stuck.
So at Thanksgiving, we would always have “Sister Pincock’s Orange Rolls” which were a special delight. And if we were at a potluck and heard that somebody brought Margie Tanner’s Orange Fluff salad, we knew exactly what we’d be getting.
Well, these were Deanna Avis’s Peanut Butter Rice Krispy Treats. And yes, the recipe was likely taken straight from the back of a rice Krispies cereal box, but in our neck of the woods, the recipe was named for and belonged to my mother.
This is my version – you can call them Cindy Rainey’s Peanut Butter Rice Krispy Treats and know that they have been remade into a vegan-friendly version so that my grown kids can continue to enjoy them as a special holiday treat they remember from when they were small.
Reasons you’ll love these Scotcheroos Vegan Rice Crispy Treats
- Chewy
- peanut buttery
- that beautiful marriage of chocolate and butterscotch on top
- I’ve been making these for years and so know all of the hacks
- I give you the perfect vegan-friendly substitutions
Pin now to save for later
A little history on Scotcheroos (Peanut Butter Rice Krispies Treats)
First of all, are they Scotcharoos…Or Scotcheroos? See the difference? One has an “a” and the other an “e”. Would you believe the WWW doesn’t agree? You can find recipes for each in equal amounts. I’ve always used an “a” but according to Kellog’s Website, it’s definitely an “e”. You can click here to see the absolute original Scotcheroo recipe straight from the source.
And while we are on the subject…Is it Rice KRISPY treats? Or Rice KRISPIE treats? Neither! It’s Rice Krispies treats! Though you will still see lots of references to Rice Krispie treats. It might be a Mandela effect but the box of Kellogg’s cereal definitely calls it Kellogg’s Rice Krispies. Because it’s plural. I get it. But I always thought it was simply Krispy – and spelled it Rice Crispy. Silly me!
Kellogg’s Rice Krispies Treats came onto the household scene in the late 1930s as the classic marshmallow treat and were originally produced as a Camp Fire Girls fundraiser. It was later that housewives everywhere began recreating these special treats at home. Read more about the history of Rice Krispies Treats on Wikipedia.
Scotcheroos finally enter the scene
It wasn’t until the mid-60s that the recipe for Scotcheroos was printed on the back of the Kellogg’s Rice Krispies Box. This was about the same time that my mother decided the recipe was hers and had her name printed along with the recipe in the church cookbooks.
To be fair, my mother’s original recipe was made using Special K cereal – back in the day, Special K cereal came as little round discs rather than flakes. So it kinda made sense.
Over the years peanut butter rice Krispies treats – or Scotcheroos (or ScotchAroos!), have become a well-loved dessert bar. They were the special treat I made for every holiday and special event when my kids were younger. (And by that time Special K Cereal was not used in the peanut butter treats recipes – only rice Krispies.)
Unfortunately, there are several ingredients in the original Scotcheroos recipe that makes it not so vegan-friendly. Read on to learn about the wonderful vegan products I have found to make my peanut butter rice Krispies treats vegan so that we can enjoy them again!
Ingredients needed to make peanut butter vegan-friendly rice Krispies treats
- light corn syrup
- granulated sugar
- peanut butter – I like chunky
- crispy rice cereal – NOT Kellogg’s!!
- vegan chocolate chips – see below
- vegan butterscotch chips – see below
- 9×13 casserole dish
- large pot/pan for cooking and mixing

A special note about the vegan ingredients
I was able to find ingredients that were vegan-friendly to meet our family’s ethics. There are a couple of exceptions that might be gray areas. Decide for yourself if it works for you and yours.
Sugar
If sugar is a concern for you, you can use organic sugar for granulated sugar. But then, I’m not sure about the sugar used in some of the other products such as peanut butter, rice cereal, and the dairy-free chocolate chips, and butterscotch chips. I would assume light corn syrup such as Lite Karo Syrup is vegan according to the various websites I’ve looked at.
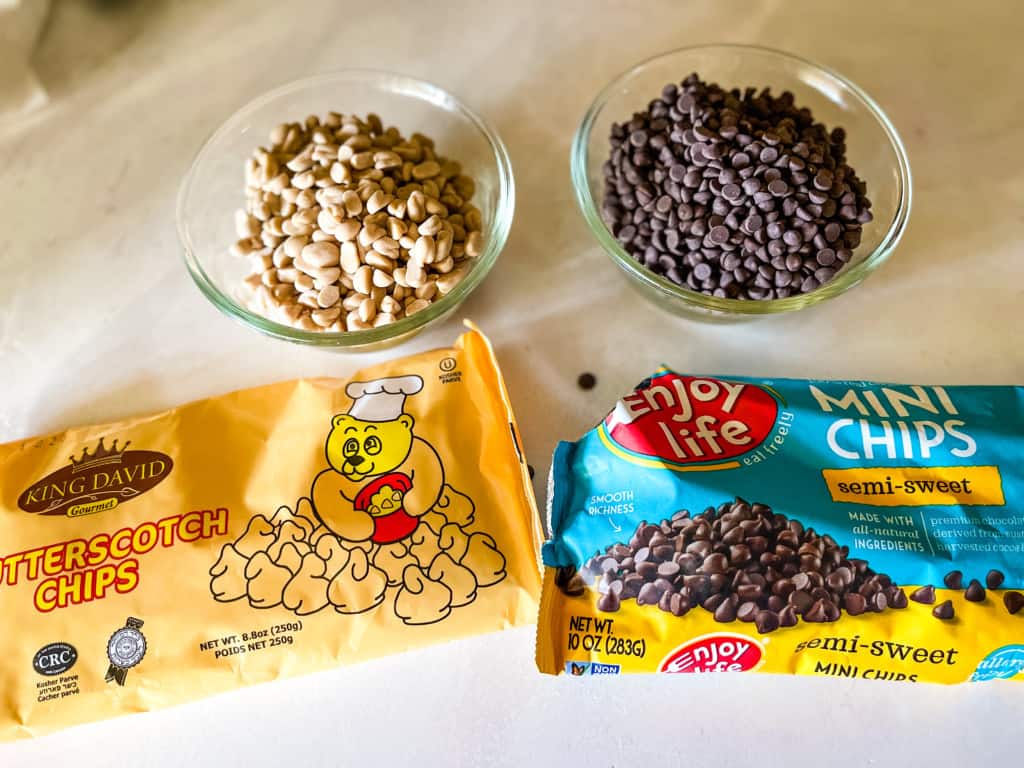
Chocolate and butterscotch chips
Just make sure to read your ingredients and source dairy-free chocolate and butterscotch chips. Be aware that just because the chips are semisweet chocolate chips or even dark chocolate chips, it doesn’t necessarily mean they are vegan.
It’s easy enough to find the right chocolate chips in the grocery store. Not so much for the vegan butterscotch chips. I buy them both on Amazon and these are my favorite brands.
The all-important rice krispy cereal
Do you want the bad news or the good news first? Well, the bad news is that as of this writing, many Kellogg’s cereals – including Rice Krispies cereal and Special K cereal – are not considered vegan. This is because the source of vitamin D3 they use is made from Lanolin, which is made from sheep’s wool. So not vegan.
Perhaps this isn’t an issue for you. If it is, you’ll be happy to know that many store brands do not contain D3 and are vegan-compliant! And that’s the good news:)
A special note about the peanut butter
Yes, peanut butter is vegan – no worries there. But I did want to personally give recommendations for the best kind of nut butter to use in this recipe.
First of all, don’t try to go all healthy and use natural peanut butter or oil-free/sugar-free/sodium-free or..whatever. This is not a health food. I repeat, there is nothing inherently healthy about this recipe! You are making this recipe because you are wanting the tastiest peanut butter dessert bars ever, not because you are looking for a health bar!
So just use regular everyday peanut butter BUT I do prefer to use crunchy peanut butter rather than creamy peanut butter for my rice Krispy treats. Most recipes suggest creamy peanut butter, but I like the crunch and taste of crunchy.
And only use peanut butter for this recipe. Unless you have a specific dietary/allergy issue, don’t use almond butter, cashew butter, or other fancy nut butter. Just peanut butter. But, if you have an allergy to peanuts or tree nuts and are able to use sunflower seed butter, I’d love to hear about it!
Just make sure that whichever peanut butter you use for the recipe is tasty enough to eat off a spoon without anything added. The flavor of the peanut butter will directly affect the flavor of your dessert bars. Now let’s get started!

How to make the best vegan Scotcheroos!
I’ve been making these tasty peanut butter treats for many years and have perfected the method. Please follow along so that your rice crispy treats will turn out as yummy as mine do.
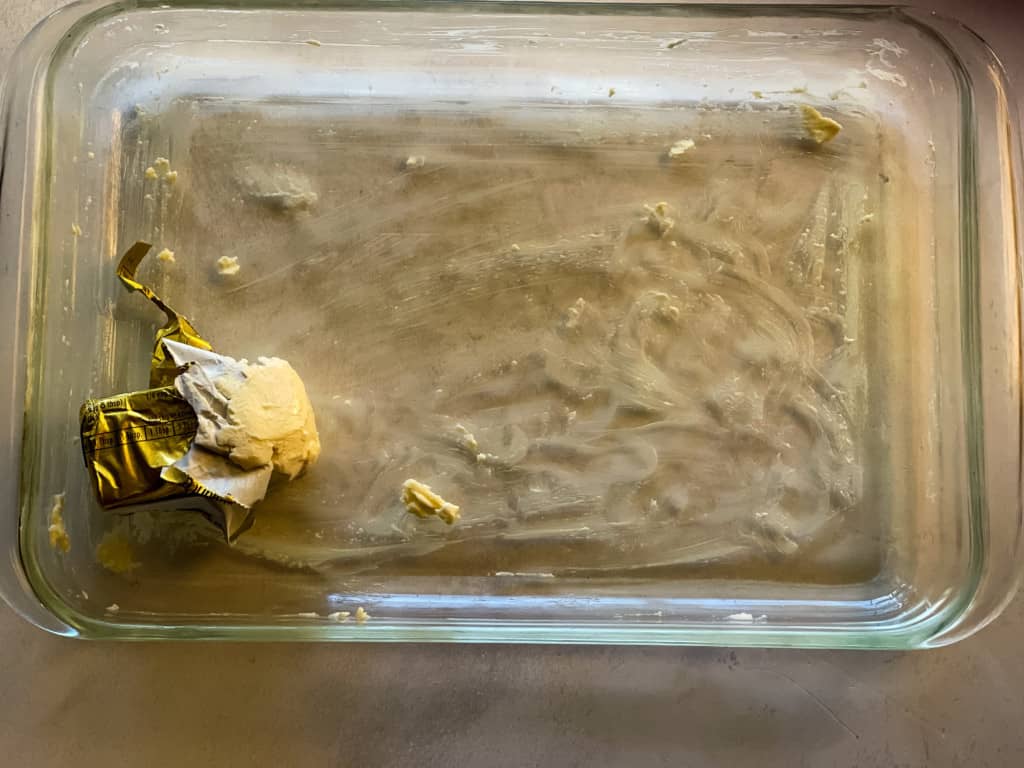
Step 1: Measure out everything first and prep your baking dish
Before I even get started, I measure out the ingredients – especially the peanut butter and rice cereal – and prep the pan. Once the sugar melts you need to move fast so that the mixture does not cook too long or too hot and begins to harden. So measure out everything ahead of time.
Prep a 9×13 baking dish by rubbing it with vegan butter. I suppose you could use coconut oil or cooking spray, but I personally like the buttery taste of vegan butter and so will always use that.
You will also be using the vegan butter to butter your hands to press the cooked mixture into the pan.
Step 2: Melt the sugar into the LIght corn syrup
I use Lite Karo corn syrup. It already has a lovely vanilla taste so you will not be using vanilla extract in this recipe.
Mix together the refined sugar and the corn syrup right into the pan you be using to cook with. And do make sure that the pot your are cooking in has a large enough capacity to hold all of the ingredients. You will be mixing evertything together in this pot.
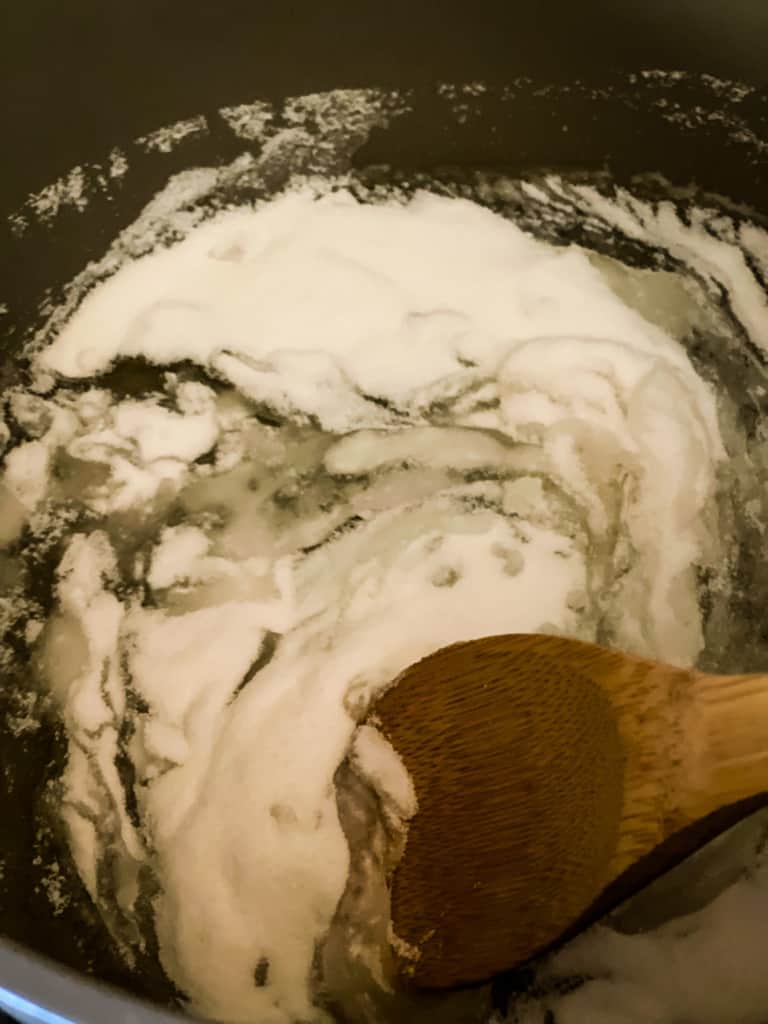
Cook on med/high heat, stirring while the sugar melts. This will take about five minutes. You don’t want this mixture to boil, so watch carefully. When it starts to be bubbly around the edges, it’s time to slow it down by removing the pan from heat or stirring with vigor.
You just want the sugar to melt, not the mixture to boil. Unfortunately, it will be hard to tell because the tiny air bubbles in the sugar/corn syrup mixture will look like grains of sugar.
If you dip a spoon in the mixture and pull it out, you should be able to tell by looking at it on the spoon to see if the sugar has melted yet or not.

The danger of cooking too long is that your peanut butter dessert bars will be too hard to eat. So remember, if you don’t bring the mixture to a full boil but just melt the sugar, you should be okay.
Step 3: add the peanut butter
As soon as the sugar has melted, stir in the peanut butter and stir well so that it gets nice and melted and smooth.

I hope you measured the peanut butter and rice cereal out ahead of time because the sugar mixture will begin to harden soon and you need to move fast.
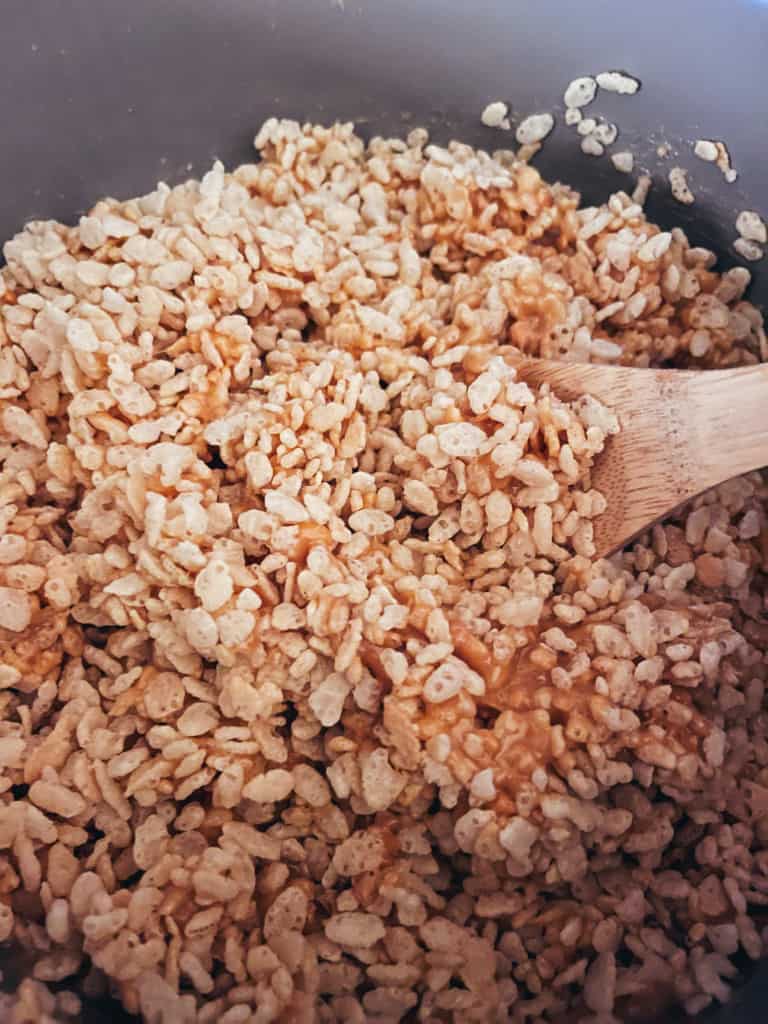
Step 4: Stir in the rice cereal
As soon as the peanut butter mixture has melted and been stirred in, add the already measured rice cereal. Remove from heat before adding and fold in gently. You don’t want to squish it, but fold it in so the cereal pieces stay mostly intact.
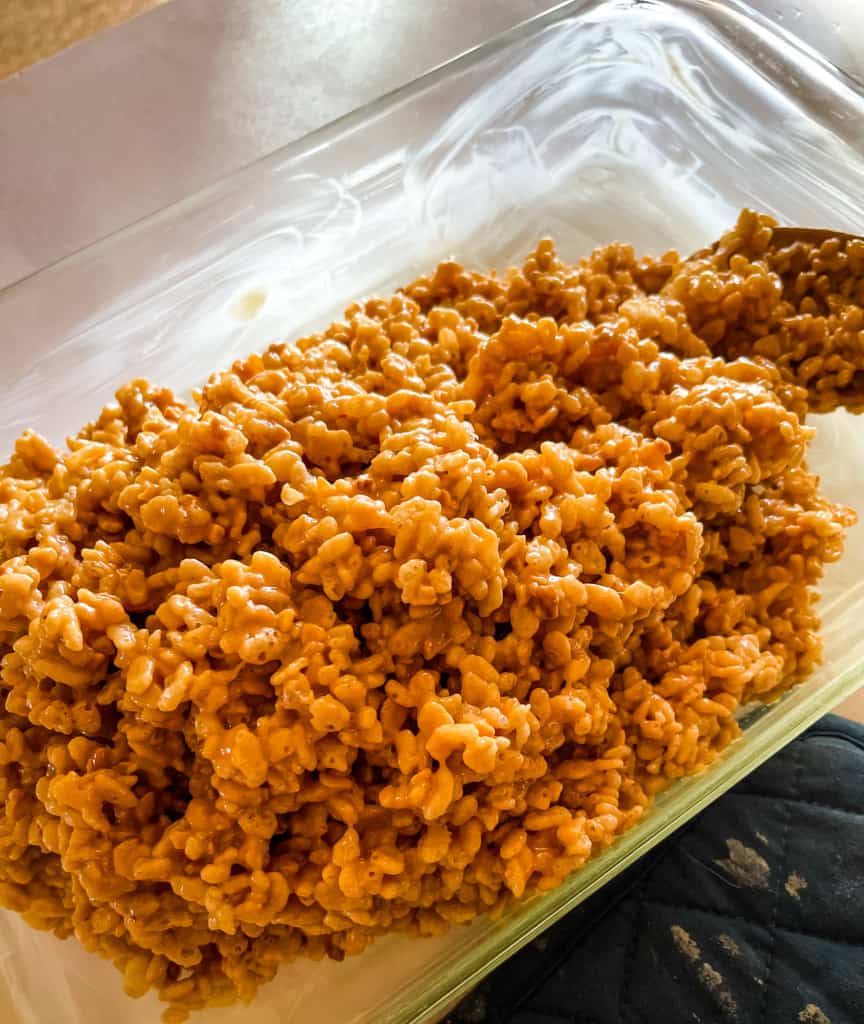
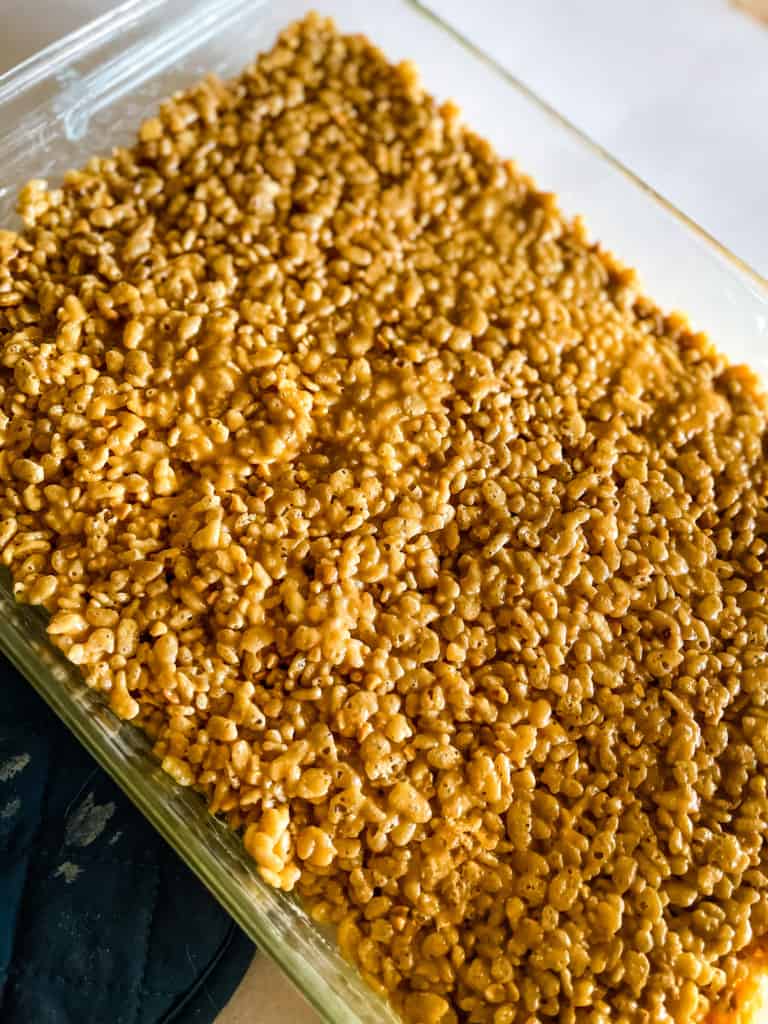
Step 5: pour into the pan
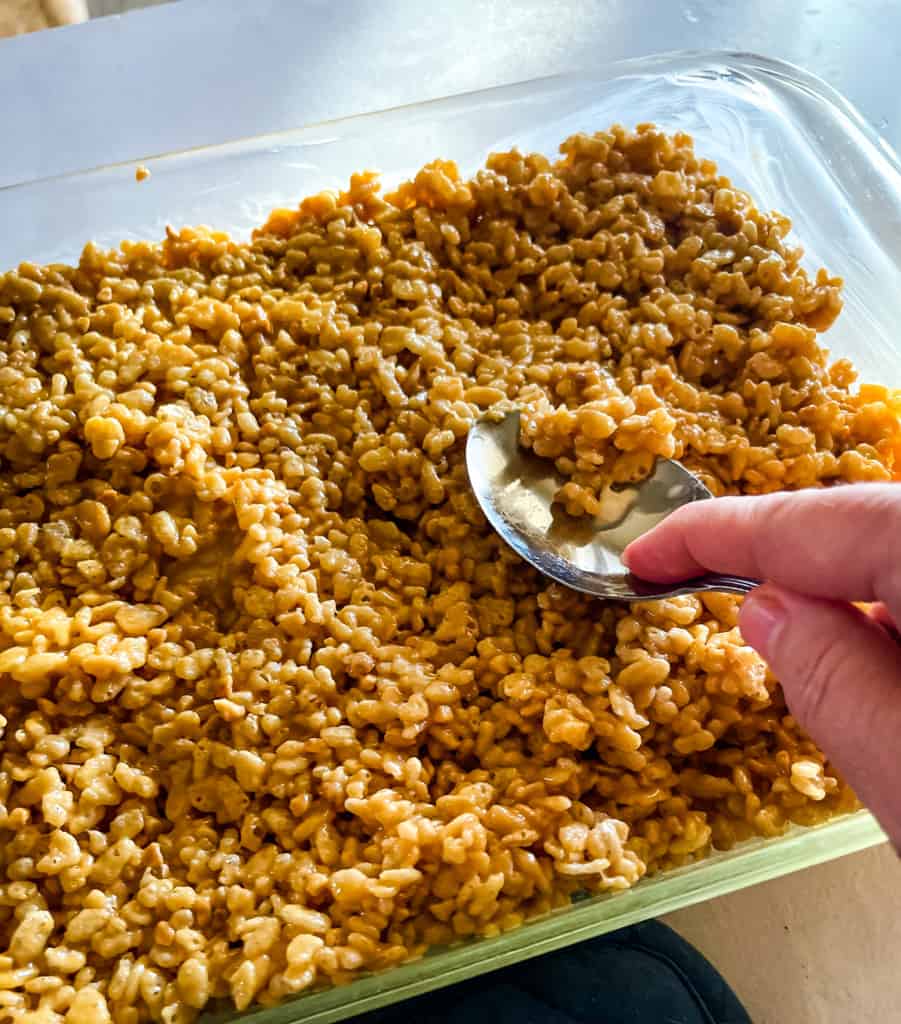
Very carefully pour, scrape, and spoon the hot peanut butter and rice cereal mixture into your prepared pan. With the back of a buttered spoon, press the mixture down.
As soon as it is cool enough to handle, butter your hands and press further until the mixture is slightly compressed and nice and even in the pan.
The butterscotch chips/chocolate topping
These dessert bars are called “SCOTCHeroos for a reason. The rich topping is made from chocolate chips and butterscotch chips melted and mixed together.
You will want to go ahead and make your chocolate topping right away while the rice Krispy mixture is still warm and fresh in the pan. Pouring the butterscotch/chocolate topping over the top protects the top from drying out.
I melt the vegan butterscotch chips and chocolate chips together in a microwave-safe bowl. I start out with two minutes and then remove from the microwave and stir everything together.
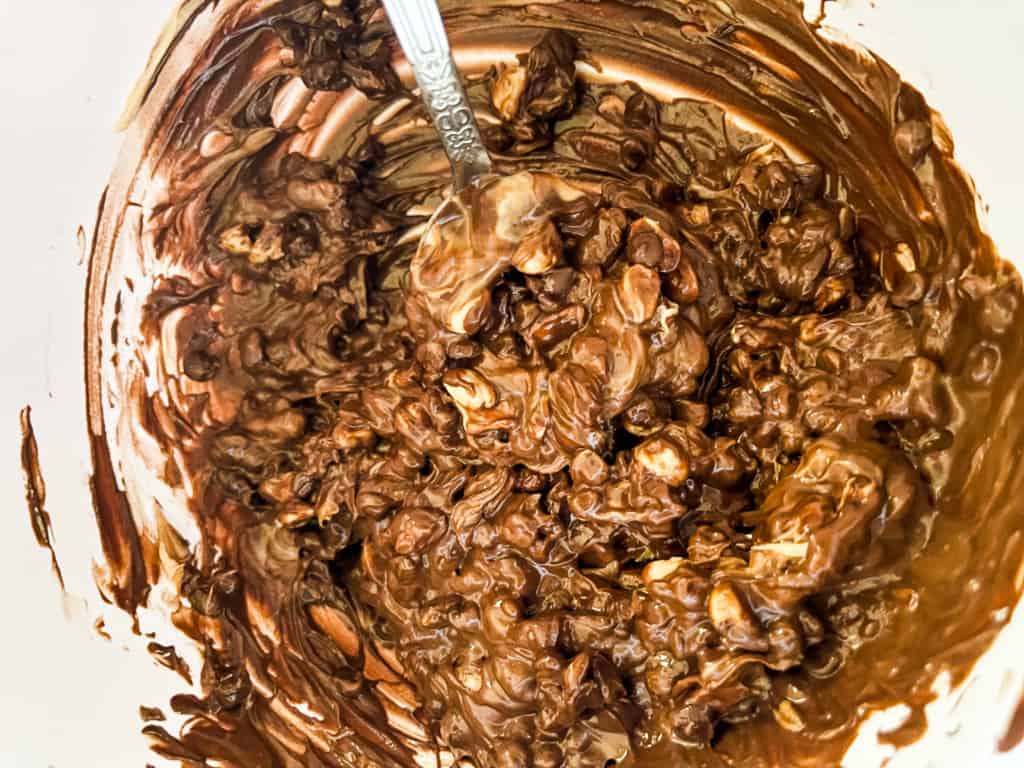
The chocolate chips won’t be fully melted quite yet. Put the mixture back in the microwave and microwave again, now in one-minute increments, stirring each time.
You will need to do this a couple of times before you have a rich and smooth creamy butterscotch chocolate mixture.

Pour the chocolate/butterscotch mixture as evenly as possible over the top. Use a spatula or spoon to spread right to the edges.

My recipe might use more melted chocolate chips than many of the recipes out there. Trust me when I tell you, this is the perfect amount for the best chocolate topping.
Sprinkles!
I like to use sprinkles to decorate my bars. Many sprinkles are vegan and will work for this recipe. Sprinkle your decorations while the chocolate is still melted so they will stick. I get my vegan sprinkles from Baking Time Club or from Fancy Sprinkles (update – Fancy Sprinkles no longer carries vegan sprinkles so I can’t recommend them. Sad…)

Cool, cut, and serve
Set the pan aside in a cool place for a few hours until the top has mostly hardened. For a prettier cut, I trim the edges off before cutting them into squares.
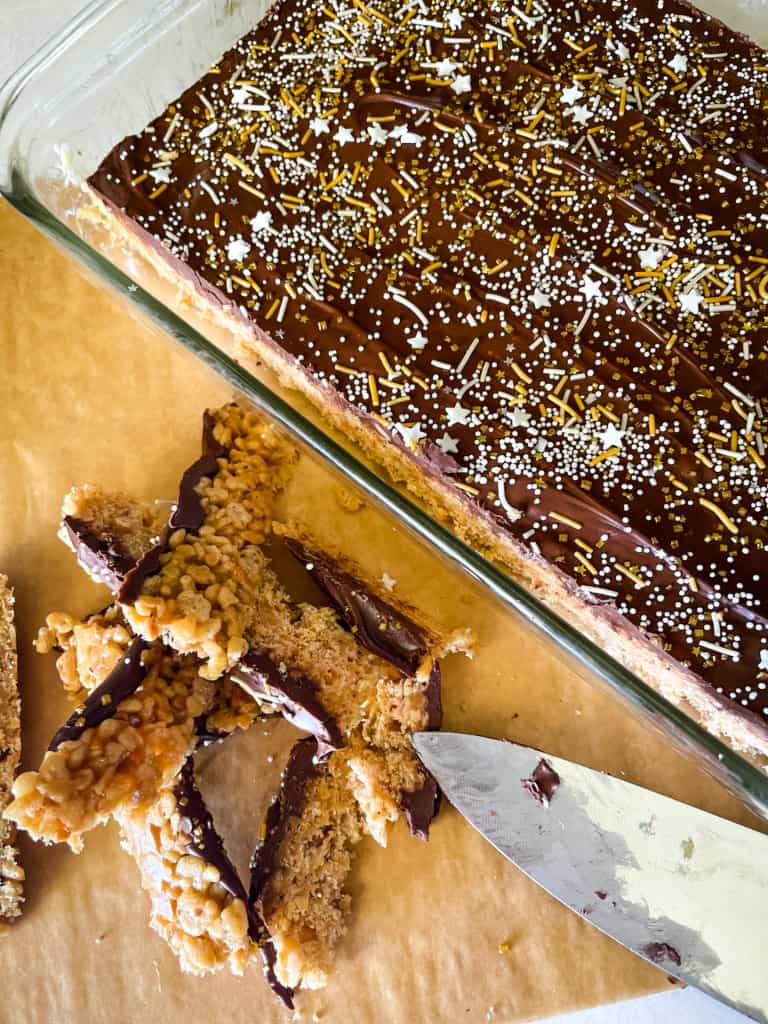
Next, measure across and cut evenly with a large knife. Pause to clean the knife if it gets gunky.
These rice crispy treats tend to dry out when exposed to air. After cutting, place in an airtight container or wrap well.

I made these to send to my son this Christmas. He was so excited to get “mom’s famous rice crispy treats”! So I guess that yes, they are officially “mine” now. I’m passing them to you and hope that your family enjoys these tasty peanut butter rice crispy treats as much as we do!
For some other delicious vegan treats try
- Cranberry Bliss Bars
- Rocky Road Brownies
- Banana Cookies
- Almond Butter Blondies
- Vegan Pecan Snowball Cookies
The Printable Recipe Card for Vegan Scotcheroos

Did you love this recipe?
Want to share the love? It would be great if you could leave five ⭐️ ⭐️ ⭐️ ⭐️ ⭐️ stars and even a comment. Did you know that this will help Google to find this recipe when others are looking for something similar? Thanks, Cindy
Peanut Butter Rice Krispy Treats, Vegan Friendly
Equipment
- stove top
Ingredients
- 1 cup light Karo syrup
- 1 cup granulated sugar
- 1½ cups peanut butter see notes
- 6 cups Crispy rice cereal see notes for vegan friendly ideas
- 1 cup vegan chocolate chips see notes
- 1 cup vegan butterscotch chips see notes
Instructions
- Butter (with vegan butter), a 9×13 baking pan. Measure out the rice cereal and peanut butter. Set aside. You are going to need to move fast once the sugar and corn syrup starts cooking and won't have time to measure them.
- In a large heavy-duty pot, stir together the sugar and corn syrup. Heat on medium-high just until it ALMOST starts to BARELY boil. The important part is to dissolve the sugar and NOT to boil the mixture. In fact, boiling this sugar mixture will cause unpleasant hard treats that will break your teeth This should take 2-3 minutes once the mixture starts to heat. I have a gas stove and so it's almost immediate. An electric stovetop will naturally take long from start to finish.
- As soon as the sugar has melted and you see signs of boiling around the edges, REMOVE FROM HEAT. Add the peanut butter and with a sturdy wooden spoon stir well and quickly till it melts.
- Working quickly, stir in the rice cereal. You really will need to work quickly before the mixture gets hardened, making it impossible to stir in the cereal without mashing it.
- Immediately turn into the prepared casserole dish. With the back of the spoon, pat down the best you can.
- This will be very hot. As soon as it is bearable to touch, butter up your hands and smoosh down the best you can, pushing it to fill the corners and make an even top. You will have about one inch of clearance from the top of the cooked mixture to the top edge of the casserole dish.
- Set aside while you prepare the topping. Add both flavors of chips to a microwave-safe bowl. Microwave first in 2 one-minute increments, stirring well each time. If you still need to melt more after two minutes then microwave in ten-second increments, stirring after every time.
- Pour the melted chocolate topping over the top of the still-warm treats. Spread evenly. While it is still warm and melty, I like to add sprinkles to the top. I have also added crushed peanuts.
- Allow to cool for a couple of hours until the chocolate is no longer melty before cutting. I like to set mine in a cool part of the house. If you are impatient you can place in the refrigerator – but not for very long or they will harden too much to easily cut- just long enough for the chocolate to harden.
- These tend to harden when exposed to air. After cutting the bars, make sure they are tightly wrapped.

Hi – i was thinking about trying these but have question about the PB. I totally understand these are not health food – how could they be with 1 cup karo – but you also say to use a PB that tastes good to me. But that is a natural PB. So why can’t i use that? all the other ones taste yucky to me and i don’t want to have to buy a jar just for this recipe. So why do you emphasis NOT using a natural PB? thanks.
Hello, I appreciate your question. The reason I didn’t recommend using natural peanut butter is that I personally have never used it so I can’t guarantee the outcome. Natural peanut butter likely has less salt and less sugar than more processed peanut butter does and so that will affect the flavor. It honestly might be fine and if you are used to a little less salt and sweet then you might prefer it. If you do decide to try this then I’d definitely like to know what you thought! Thanks again for the question, Cindy
PS – Just so you know, this recipe uses one and a half cups of peanut butter so if you do decide to use the processed peanut butter then get a small jar – you won’t be wasting that much.