Homemade vegan burger buns are flavorful, and soft, and are perfect to serve with your favorite vegan burger or sandwich. They are made with only a few natural ingredients. No hard-to-pronounce ingredients. And no second-guessing what’s in your sandwich bun and questioning if it’s actually vegan or not. It’s so satisfying to know that you made it yourself!
While vegan hamburger buns are perfect to make for your vegan burgers like sweet potato black bean burgers and a juicy sweet Hawaiian burger, you can think outside the box when you are making your vegan sandwich recipes too!
These made-from-scratch vegan sandwich buns are perfect when I’m trying to contain the messy flavorful goodness of a vegan grinder sandwich or crunchy BBQ chickpea salad sandwich. These homemade vegan buns are a little more substantial than the typical vegan burger or sandwich roll you can buy at the store and are perfect for holding all the juicy (messy) fillings together!
Why make burger buns from scratch?
Have you ever made homemade hamburger buns before? It’s easier than you might think! If you consider made-from-scratch homemade meals as a labor of love, then you’ll enjoy making these hand-crafted vegan burger buns from scratch too!
If you’ve followed me for any amount of time, then you know that I’m all about saving effort and time and making shortcuts when I cook. And to be honest, at the end of a long day, this working mamma is NOT going to be elbow deep in dough just to make vegan burger buns when she can buy them at the store!
Because yes, it's easy to find vegan bread and buns at the store when you read your ingredients. Just make sure to read your labels.
Those labels should definitely be void of eggs and dairy, right? But what about the enzymes? And the diglycerides and lectin? It can get a little bit fuzzy when they start adding other ingredients. If you are a die-hard level 50 vegan then you will want to read this article by Go Nanas about vegan bread. Fortunately, with most store-bought and bakery bread we are okay. Most of the time…
But there is another reason I’m willing to give up a Sunday afternoon for vegan bread baking (including these yummy vegan buns). There is just something cathartic and satisfying about taking a few cups of flour, some water, and yeast and making something so fantastically delicious, so soft and chewy, with that freshly baked bread aroma that brings me back to my grandmother’s kitchen stool every time!
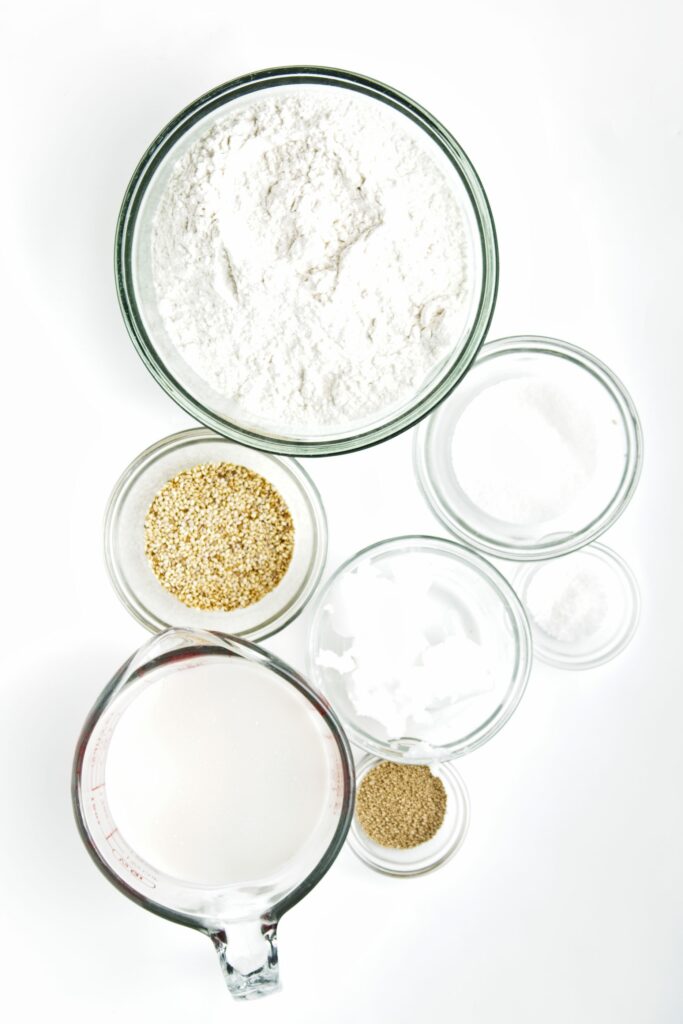
Ingredients needed to make your own homemade vegan burger buns
- non-dairy milk – I prefer oat milk for its neutral flavor.
- granulated sugar – Use organic if avoiding bone char.
- active dry yeast – Don’t use fast-acting/quick yeast for this one. Save that one for the bread machine. Also, check the expiration date and make sure your yeast is fresh.
- coconut oil – You will be melting the coconut oil. You can use virgin or refined coconut oil.
- all-purpose flour – You will be using three and a half cups for the recipe plus a little more for kneading
- salt
- optional: sesame seeds, poppy seeds, or everything bagel seasoning
- You will also find parchment paper or a silicone baking mat for baking useful.
How to make vegan hamburger buns
The exact ingredients with measurements can be found in the recipe card below along with more concise abbreviated instructions. Read on for more details, tips, and tricks so that you will feel confident making this recipe.
First steps: Proof the yeast
You want to make sure the yeast is active and working before you bother with all of the mixing, kneading, and rising of your vegan buns recipe.
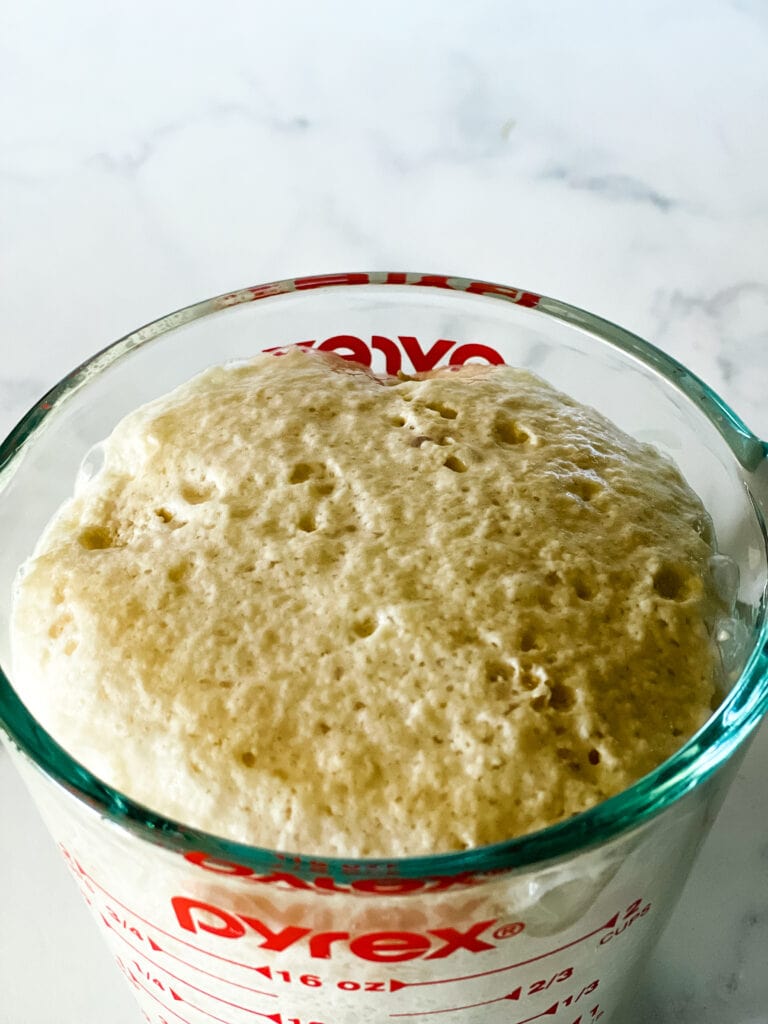
Measure out the oat milk (or another plant milk of choice) into a two-cup liquid measuring cup. Heat the milk to very warm – but not super hot – no more than 110°F. I heat my oat milk in the microwave in 30-second increments. Use a thermometer if you are not absolutely sure what “warm but not super hot” milk means. (An experienced bread maker will know!)
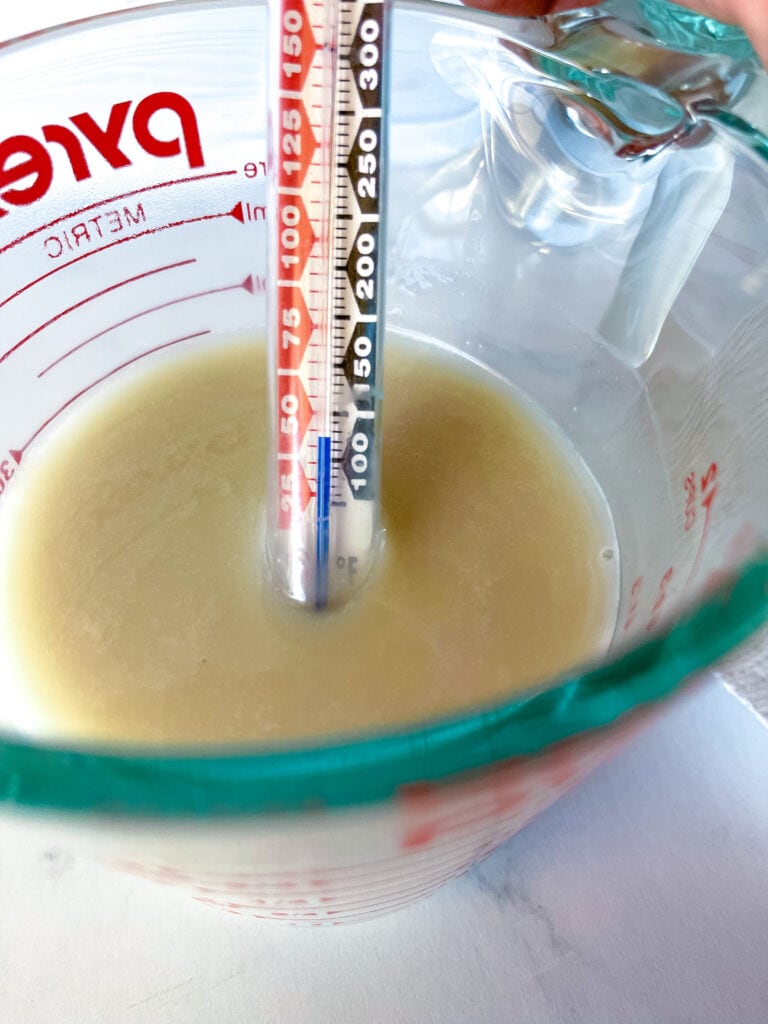
Add the sugar to the measuring cup with the milk and stir to dissolve the sugar. Sprinkle the yeast on top of the milk and set aside to get foamy, for about 10 minutes.
Next steps: Measure the flour and prepare the other ingredients
At this point, I melt the coconut oil and set it aside. The coconut oil will be added along with the milk/yeast mixture.
How to measure flour
Honestly, the most accurate way and best practice for measuring flour for baked goods is to weigh the flour. It’s what professional bakers and more civilized home cooks do. I’m no professional baker…
The problem with measuring the flour with measuring cups is that we tend to pack in the flour, thereby measuring too much. This leads to unsatisfyingly heavy baked goods.
According to the King Arthur Ingredient Weight Chart, one cup of all-purpose flour weighs 120 grams. So multiply that by 3.5 and you’ve got 420 grams by weight. This would be the civilized and more accurate way to measure your flour and would ensure a properly light hamburger bun.
For those of us who are less civilized in our baking, we can get it pretty close by using the “lighten and measure” method. (Okay, I just made that up.) This is the way my grandmother taught me to measure flour.
First, “lighten” the flour in its container by stirring and fluffing with a fork. You will be measuring the flour using this lightened flour.
Next, you need to measure out the amount of flour needed for the recipe (three and a half cups) but don’t just cram your measuring cup into the flour, pack it in, and pull it out or you will be using too much flour.
Instead, I use a large spoon, scoop, or smaller measuring cup to carefully remove some of the lightened flour. Then I shake it into my one-cup measuring cup. When the flour is slightly above the level of the cup, I take a knife and cut cut cut along the top to loosen it, and then with one swipe, remove the excess flour. I now have a perfectly measured cup of flour.
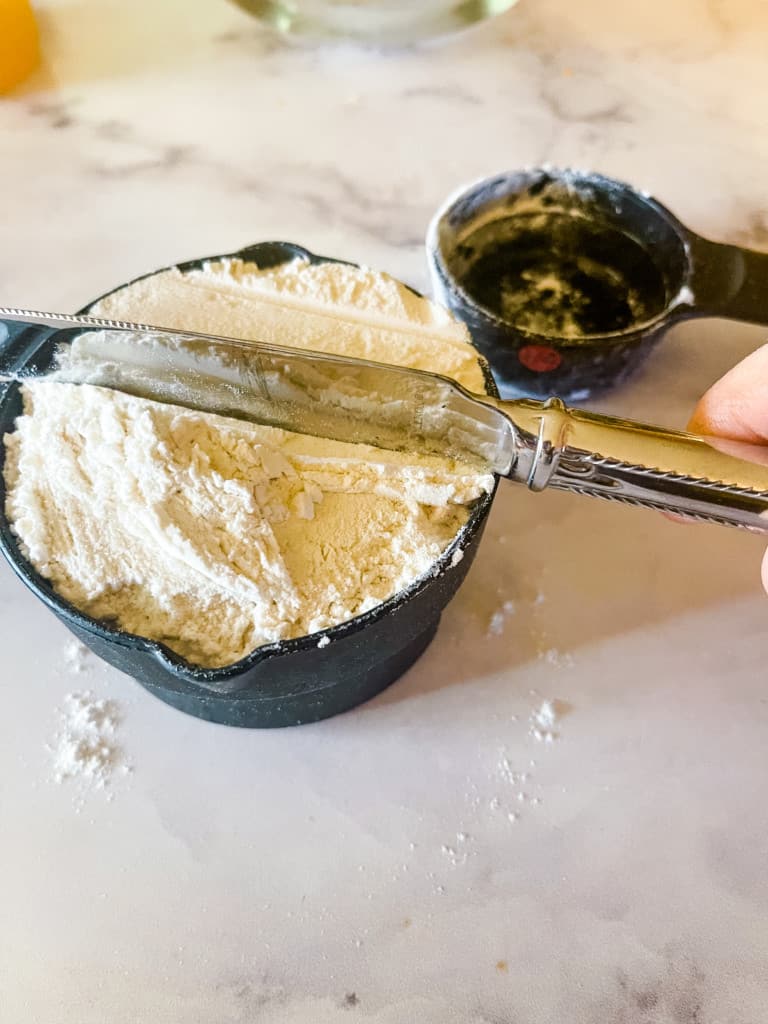
Dump the measured cup of flour into a large bowl and repeat for the second and third cups. You will also need to use a half-cup measuring cup for the last half of a cup. (Since you are measuring three and a half cups of flour.)
Now add the salt and stir around well to mix it in before adding the yeast mixture and the melted coconut oil.
Mixing and kneading
Now that your flour has been properly measured and the yeast proofed, you can mix and knead the dough. Add the activated yeast/oat milk mixture and melted coconut oil and stir to combine everything until a sticky dough forms. I start out mixing with a spoon, but would you believe that I usually have to reach in and mix the dough with my hands?
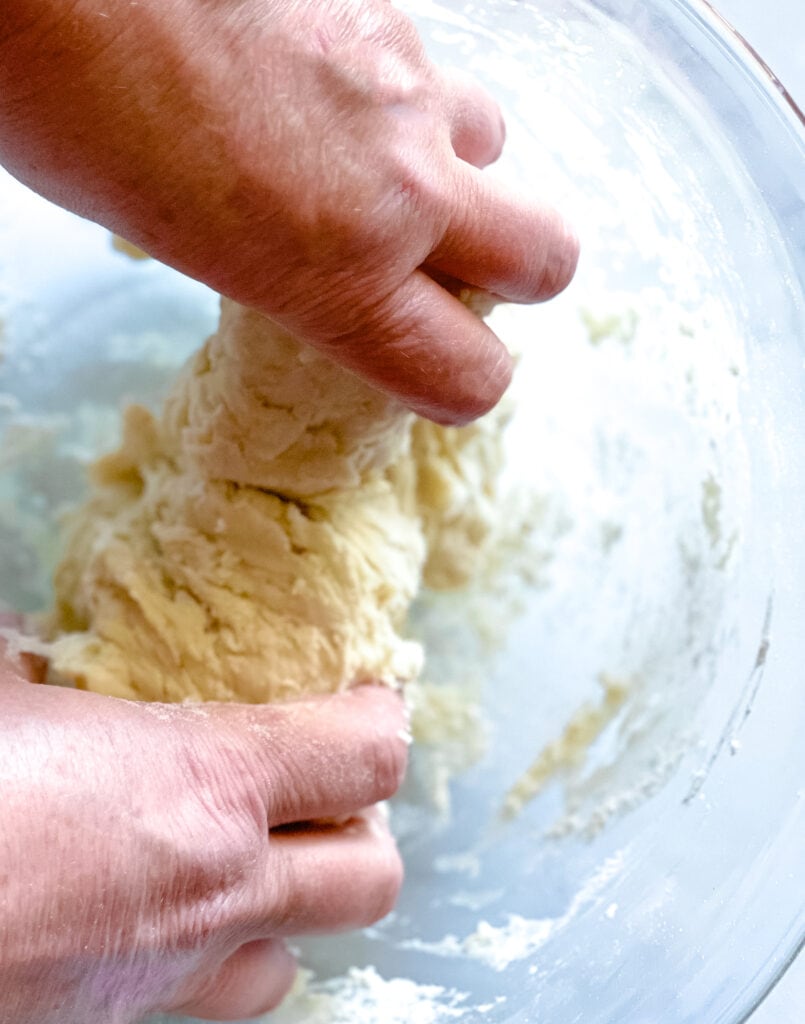
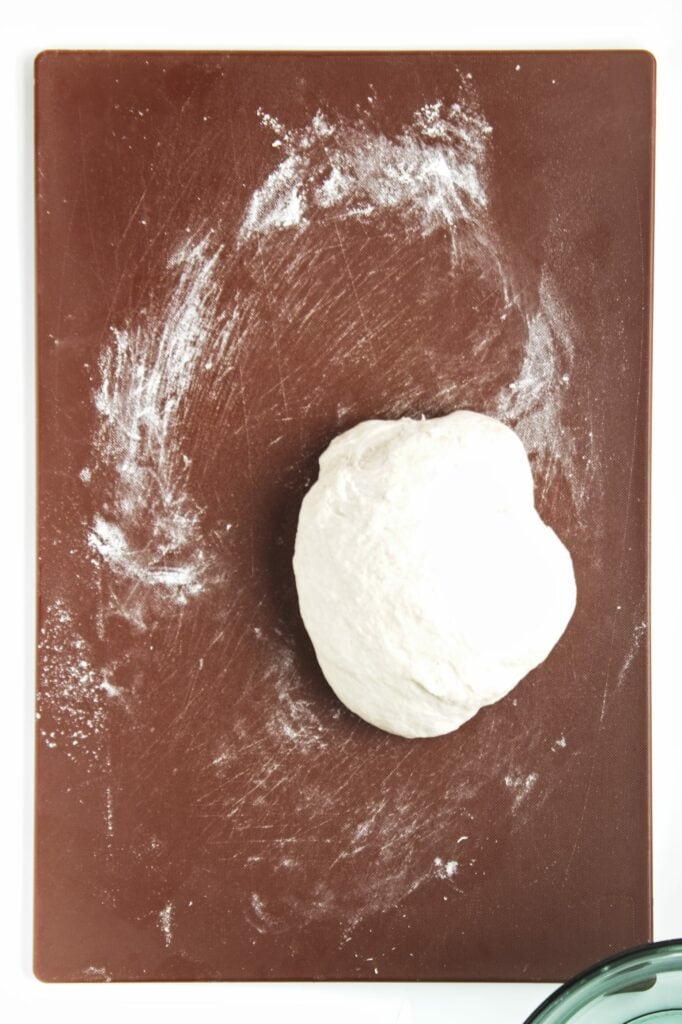
Turn out the dough on a lightly floured surface. Start with using one tablespoon of flour for the surface. You don’t want to use more than necessary because the flour you use will mix in with the dough. Too much flour will make a heavy hamburger bun.
Add up to one more tablespoon of flour if the dough is sticking to your hands when kneading. Knead for 8-10 minutes until smooth and soft, but still a little sticky. The harder you knead and the more pressure you apply with your kneading, the lighter your buns will turn out. Kneading develops the gluten. We need to knead!
If you are new to kneading bread dough, this youtube video by King Arthur Flour showing how to knead dough is very informative. When you have finished kneading, the dough will be silky, smooth, and firmish.
The first rising
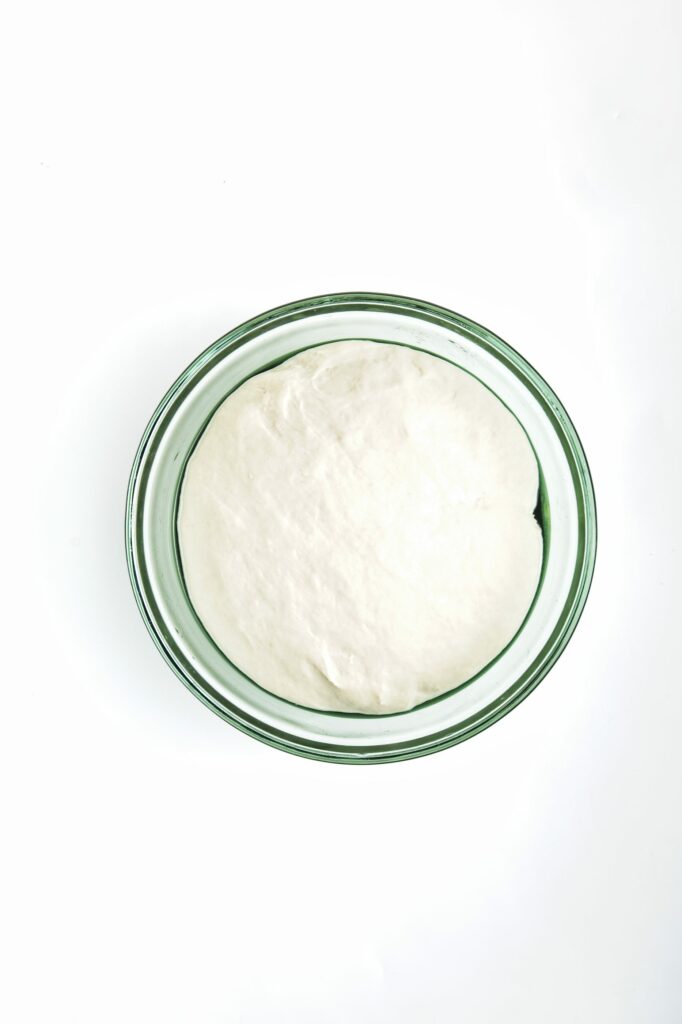
Now it’s time to let your kneaded dough rest and rise. Place the kneaded dough in an oiled bowl and cover it with a piece of plastic wrap or a slightly damp dishcloth. Place it in a warmish spot in your kitchen, away from drafts, and allow it to rise until it has doubled in size. This will take about an hour. If your kitchen is cooler then it might take up to an extra 30 minutes.

Shaping the buns
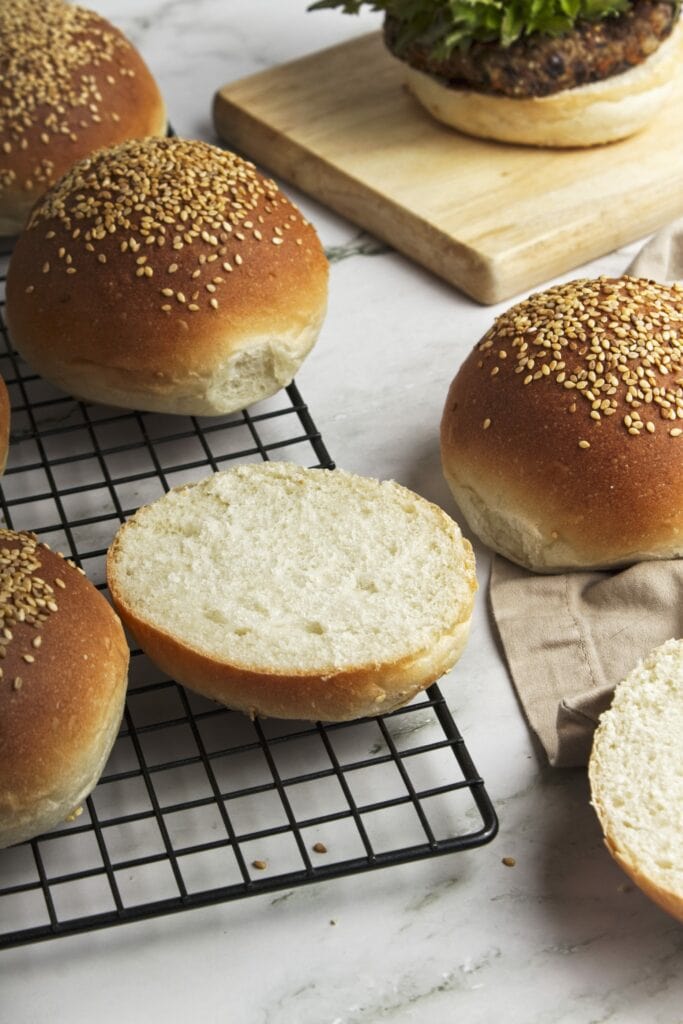
Once the dough has doubled in size, it is time to shape the vegan burger buns. At this point, you need to decide how many buns you want to make which will be determined by how large you want your buns to be. This recipe makes eight smallish buns which will work for small burgers and sandwiches. If you are wanting jumbo-sized buns (like I used for my vegan grinder sandwich), then plan on making six buns. For vegan slider buns, plan on making 10-12 buns. Ten is about the right size for sliders in my opinion. Or you can make twelve cute mini-sized sliders.
Turn the dough out onto a floured surface. Again, don’t use too much flour. I sometimes work on parchment paper or a silicone mat for bread kneading. Shape your dough into an even rectangle or square and cut it into eight even pieces.
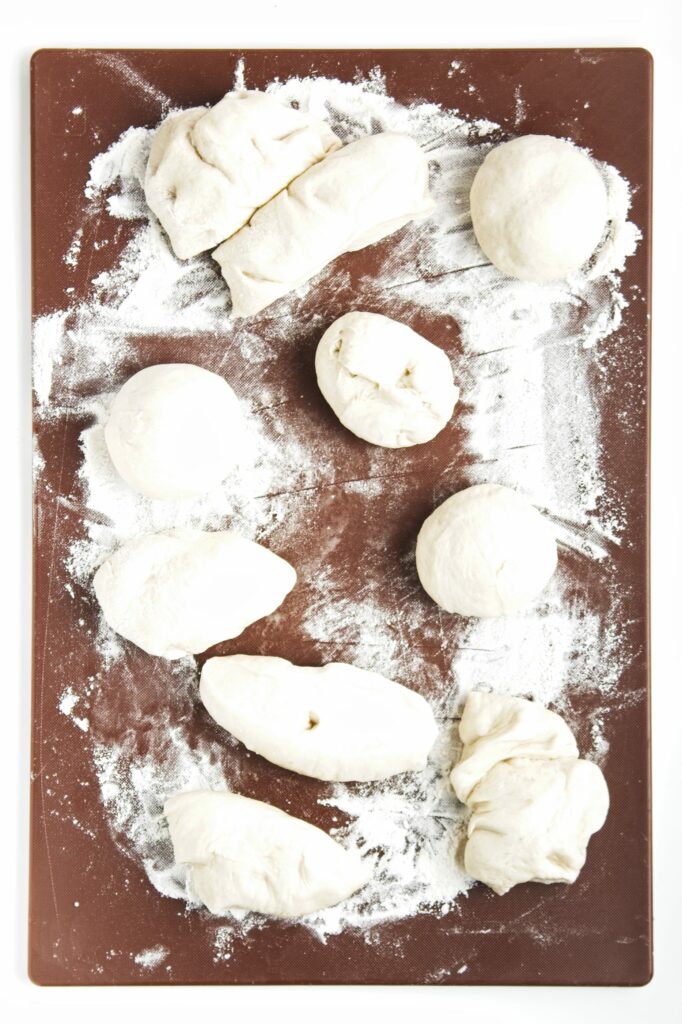
Now shape your buns by tucking the edges into the center and rolling each piece into a ball. Repeat with the remaining dough and place them on a parchment paper-lined baking sheet.
The final rise
Once you have shaped your dough into balls, set the dough balls on a parchment-lined baking sheet and cover the dough balls with plastic wrap or a damp towel and allow to rise again until 1.5x the size. This will take about 30-40 minutes.
During this second rise, I preheat my oven to 385°F. Make sure that your oven rack is in the center position.
How do you know if your buns have risen enough and are ready to bake?
If you are new to bread baking and are not sure your buns have risen enough, you can do the poke test to see if your dough is ready. Basically, you need to give your dough a poke with your finger. If the dough springs back super fast then it is not yet ready. Check again in a few minutes.
If the dough springs back slowly then you should be ready to go. But if it never springs back then you waited too long. Bummer. I’d bake them anyway and see. But it’s best to start testing early so that that does not happen.
Baking your homemade vegan burger buns
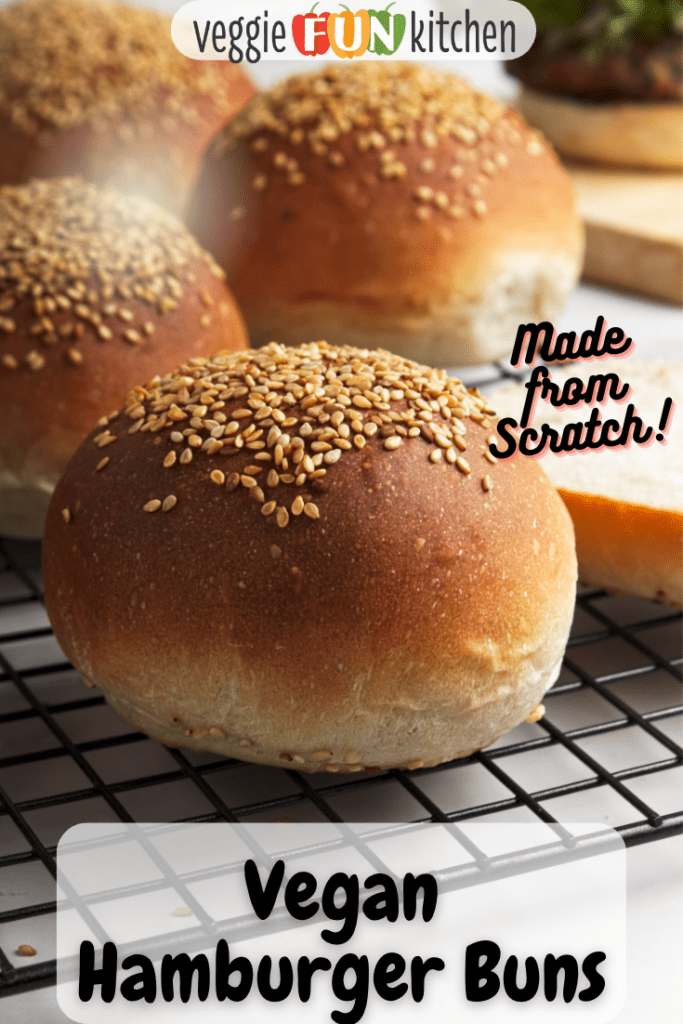
Once the dough has risen for the second time, brush each roll with a little more plant milk. Sprinkle or gently pat on the sesame seeds or other toppings if you are using toppings.
Place the baking sheet with the burger buns in the oven and bake for 18-22 minutes, until well browned on top and firm all down the sides. Don’t be fooled by quick browning on top, the milk makes this happen faster. I lift a tester bun and check the sides to make sure it isn’t still doughy.
Cooling and Serving
Remove the buns from the oven and allow to cool completely. Once they have cooled enough to handle, I move the baked burger buns to a wire rack to completely cool.
Once cooled you can cut the buns in half and fill them with your favorite vegan sandwich filling or burger. Place any leftover buns in a plastic bag and secure the opening tightly. Because these homemade burger buns don’t have any preservatives, you will need to consume them within two days.
You can freeze any buns that you won’t use in a freezer bag. Allow the frozen buns to come to room temperature while sitting on a countertop – still wrapped in plastic.
The printable recipe card for vegan burger buns
Did you love this recipe?
Want to share the love? It would be great if you could leave five ⭐️ ⭐️ ⭐️ ⭐️ ⭐️ stars and even a comment. Did you know that this will help Google to find this recipe when others are looking for something similar? Thanks, Cindy

Vegan Burger Buns
Equipment
- your muscles and hard work
Ingredients
- 1 ¼ cups oat milk or other non-dairy milk
- 2 Tablespoons granulated sugar
- 2 ¼ teaspoons active dry yeast
- 3 Tablespoons coconut oil melted
- 3½ cups all-purpose flour plus more for kneading
- 1 ½ teaspoons salt
- optional: sesame seeds, poppy seeds, everything bagel seasoning
Instructions
- Heat the milk to very warm – but not super hot – no more than 110°F. Use a thermometer if you are not absolutely sure.
- Dissolve the sugar into the milk. Sprinkle the yeast on top of the milk and set aside to get foamy, about 10 minutes.
- Melt the coconut oil and set aside.
- Measure out the flour into a large bowl. It's important that you either weigh the flour or "lighten" it when measuring. See the blog post and the recipe card notes. Add the salt.
- Add the activated yeast/oat milk mixture and melted coconut oil and stir to combine everything until a sticky dough forms.
- Turn out the dough on a lightly floured surface. Start with using one tablespoon of flour for the surface. Add up to one more if the dough is sticking to your hands when kneading. Knead for 8-10 minutes until smooth and soft, but still a little sticky.
- Place in an oiled bowl, turn the dough ball so that it is oiled on all surfaces, and cover with plastic wrap or a damp cloth and allow to rise until doubled. This will normally take about 60 minutes as long as the room temperature in your kitchen is not too cool and is draft-free.
- Turn the dough out onto a floured surface and cut it into 8 even pieces.
- Tucking the edges in to the center, roll each piece into a ball. Repeat with the remaining dough.
- Set the dough balls on a parchment-lined baking sheet and cover the dough balls with plastic wrap or a damp towel and allow to rise again until 1.5x the size, about 30-40 minutes. Do the poke test (see notes).
- During this second rise, preheat the oven to 385°F
- Once the dough has risen, brush each roll with a little more plant milk. Sprinkle or gently pat on the sesame seeds or other toppings if desired.
- Bake for 18-22 minutes, until well browned on top and firm all down the sides. Don’t be fooled by quick browning on top, the milk makes this happen faster. Also check the side.
- Remove from oven and allow to cool completely.
- Cut in half and filled with your preferred patty or sandwich servings.
Hi Cindy. Hope all is well in your world!!
Trying this recipe today. I’m trying to find a recipe to make sandwiches. As per my wife’s needs, the bread has to be sturdy and not fall apart, soft not chewy, organic, and healthy.
My previous try’s have been, well, not like that. Too small, bad texture,
Underdone/overdone.. you get the picture! Fingers crossed!! I’ll let you know!! Anita
Oh my the pressure is on! I sincerely hope she enjoyed this one:)
Hi do you think it will work with Gluten Free Measure For Measure Flour King Arthur baking company ?
I’m not a gluten free expert at all – but I think that’s what the flour is made for.