Soft, nutty, tender-chewy — and baked right in the bread machine.
Once this peanut butter bread starts baking in the bread machine, the whole place takes on that cozy, nutty smell that feels a little nostalgic. Kinda like the peanut butter toast you made as a kid, only warmer and somehow better. It’s the kind of aroma that makes people poke their head into the kitchen just to ask what’s going on.
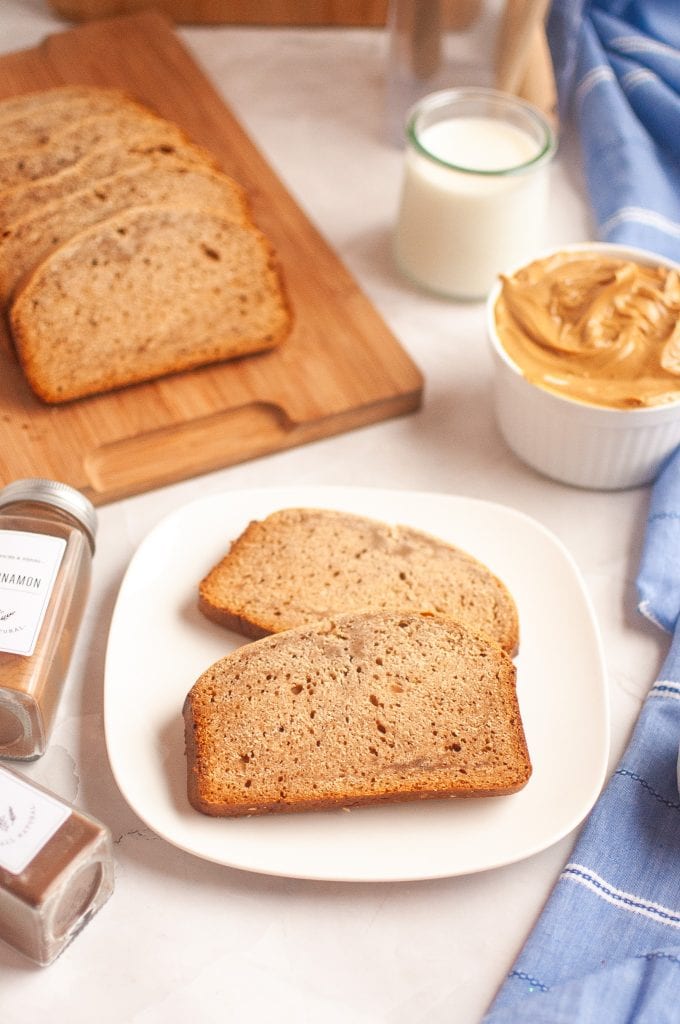
And the best part? This is a yeasted bread machine loaf, so it practically makes itself. No kneading, no guesswork. Just add the ingredients, press start, and let the machine do the heavy lifting. It rises tall, slices beautifully, and makes the kind of toast that absolutely begs for a swipe of peanut butter or jam. If PB-on-toast is your love language, this loaf delivers.
Bread maker bread really is the easiest kind. Just add the ingredients, press start, and let the machine handle the magic. Over time, making bread for my family has become one of those things "mom" does when the kid's come home for a visit. We’ve had fun experimenting with all kinds of flavors: a savory olive oil herb loaf for soups and pasta nights, a soft yeasted banana bread that fills the house with cozy sweetness, and a yeasted pumpkin loaf (spread with a little pumpkin orange jam) that tastes like the holidays. Each one is a little different from plain white bread, but they’re all surprisingly simple and always a hit!
Why This Bread Works
Peanut butter adds incredible flavor, but it can make dough heavy. In fact, enough to keep it from rising the way a good loaf should. That’s where the peanut powder comes in. It packs in all the peanut flavor without the extra fat, so the bread stays light, tender, and still unmistakably peanutty. A little maple syrup and brown sugar bring just the right sweetness and moisture, and the cinnamon, allspice, and nutmeg give this loaf a warm, cozy aroma that lets you know something good is baking.
Why You’ll Love This Vegan Peanut Butter Bread
- It smells like comfort while it bakes.
- The texture is soft but sliceable like real bread, not cake.
- The peanut flavor comes through without being cloying.
- Your bread machine does almost everything for you.
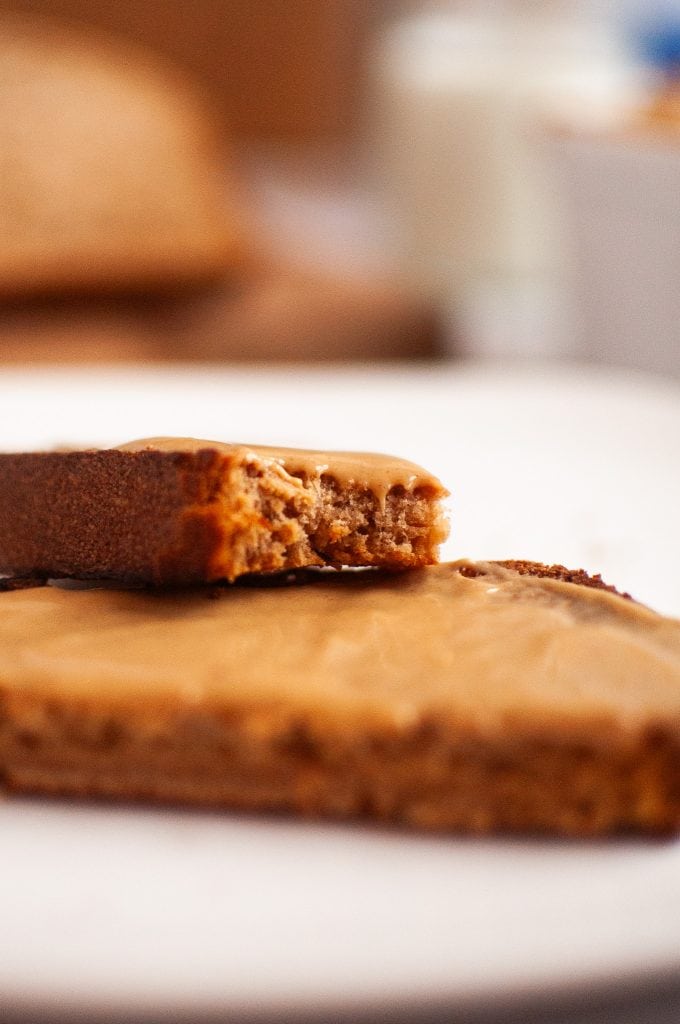
- Enjoy it toasted, spread thick with jam, layered with banana slices, or used to make the most nostalgic PB sandwich ever.
Ingredients for yeasted peanut butter bread
The detailed recipe card is below, but this section walks you through the key ingredients, why they matter, and how to make swaps if needed.
- Unsweetened plant milk, warmed – Soy or pea protein works best for rising.
- Creamy peanut butter, melted – No-stir varieties mix in easiest.
- Vegan butter, melted – Adds softness and moisture.
- Brown sugar – Sweetness + tenderness.
- Maple syrup – Deepens flavor + keeps crumb soft.
- Salt & vanilla – Balance and warm aroma.
- Maple extract (optional) – Makes the peanut flavor pop.
- Bread flour – Higher protein = better rise and structure.
- Peanut powder (PB2-style) – Big flavor, no heaviness.
- Cinnamon, allspice, nutmeg – Cozy background warmth.
- Rapid-rise yeast – Designed for bread machines = reliable lift.

Step-by-Step instructions for bread machine peanut butter bread
The exact ingredients with measurements can be found in the recipe card below along with more concise abbreviated instructions. Read on for more details, tips, and tricks so that you will feel confident making this recipe.
Steps one and two: the wet ingredients
Warm the plant milk just until comfortable to touch — not hot. Melt the peanut butter and vegan butter gently. I use the microwave for all three.
Add the warmed ingredients to the bread machine along with the maple syrup, vanilla, maple extract, brown sugar, and salt. Sprinkle the brown sugar in loosely so that it doesn’t clump.

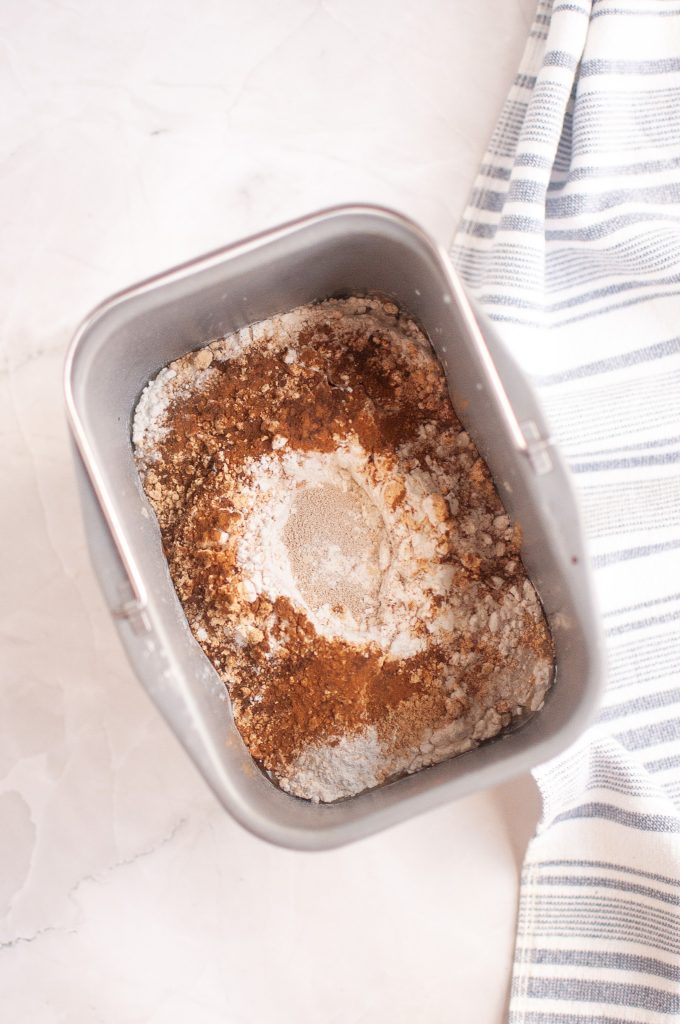
Step three: The dry ingredients
Measure flour using spoon-and-level method (see below) so that the dough doesn’t get heavy from using too much flour. Add the flour on top of the liquid. Sprinkle the peanut powder and spices evenly. Make a small well and add the rapid rise yeast last. Dry on top is key for bread machine yeast.
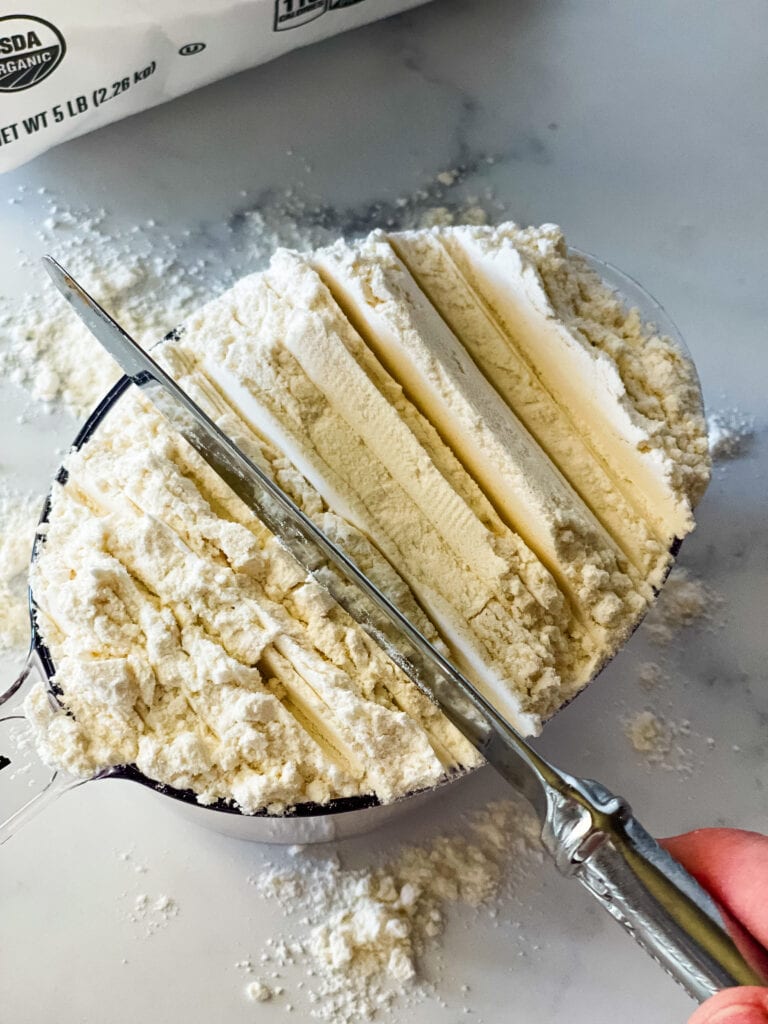
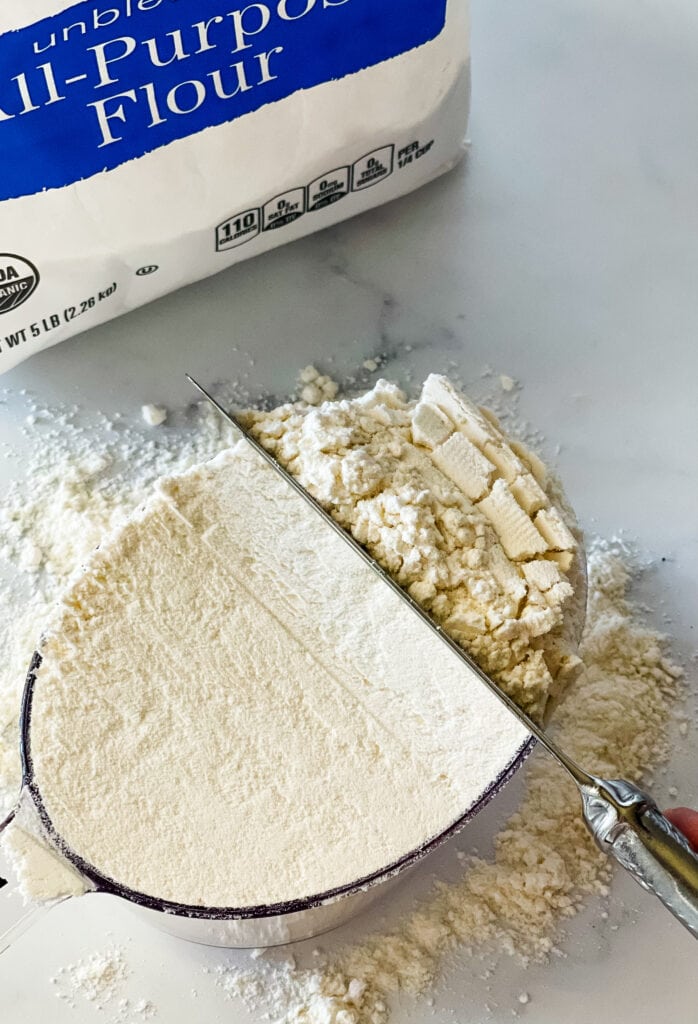
Accurately measure the flour
For precision in baking, weighing flour is the gold standard as it ensures consistent results. The weight of flour can vary significantly based on factors like humidity and measuring techniques.
However, if you don’t have a scale, the “spoon and swipe” method—lightly spooning flour into a measuring cup and then leveling it off with a flat edge—can offer a more accurate measurement than scooping directly. While weighing remains ideal, the spoon and swipe method is a reliable alternative for achieving better accuracy in your baked goods.
- First “lighten” the flour by stirring it about with a spoon to get some air into it.
- Next, take a spoon or smaller measuring cup and scoop out the lightened flour.
- Then shake the lightened flour into the measuring cup. You’ll be shaking the flour in the measuring cup until the level of the lightened flour is a little bit above the level of the measuring cup.
- Next, take a knife or other flat implement and cut the top of the flour all the way across the measuring cup.
- Finally, with one swift movement, use the same knife to swipe away the excess.

Step four: Bake
You’ve done all the work. Now time to sit back and relax and let your bread machine finish the job for you! Select Basic/White Bread, Medium Crust, Medium Loaf (about 2 lb). Start cycle and let it bake. You don’t have to touch it again!
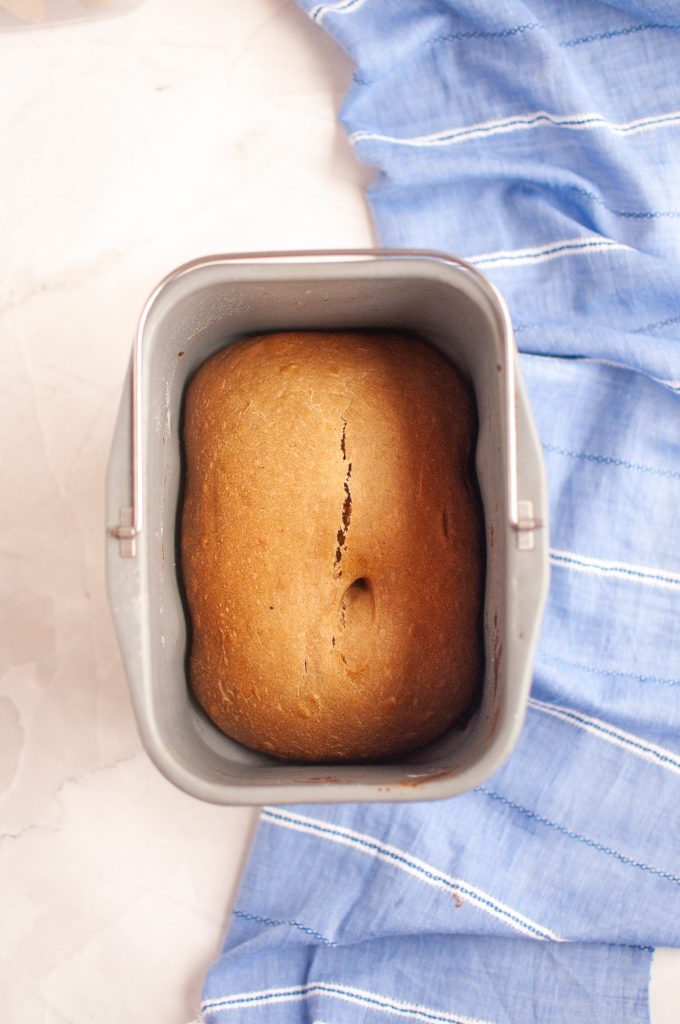
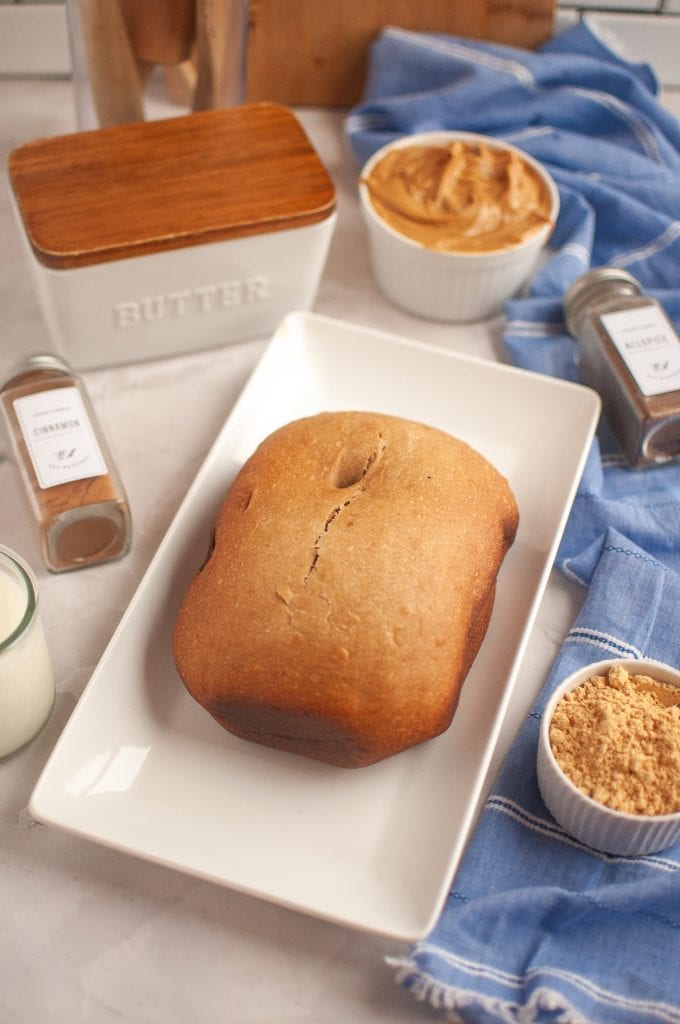
The best step – cool and slice!
Once finished, lift the loaf out, cool at least 30 minutes, then slice. Warm bread may crumble, so patience is rewarded (even though it’s hard).
Serving Suggestions
- Toast it + smear with your favorite jam or pumpkin butter.
- Make a PB + banana sandwich. (Childhood on a plate!)
- Serve with sliced fruit and coffee with a little pumpkin spice creamer for breakfast.
- Drizzle with maple syrup and sprinkle flaky salt (trust me!)
- Turn it into French toast (And no, I haven’t tried this one yet but would love to know if you do!)
Notes & Pro Tips
- Use room-temp peanut butter to avoid clumping.
- Bread flour gives the best structure — all-purpose works in a pinch, but the loaf will be softer + shorter.
- If your loaf doesn’t rise well, check yeast freshness and flour measurement accuracy.
- Leftovers keep 2–3 days at room temp or 5 days in the fridge; always toast to revive flavor.
Final Thoughts
Warm, nutty, slightly sweet, and unbelievably comforting — this bread is everything we love about peanut butter, baked into a sliceable loaf. Whether you spread it with jam, grill it into French toast, or stash half the loaf for late-night snacking (no judgment here), it turns a simple PB craving into something special.
The printable recipe card
Did you love this recipe?
Want to share the love? It would be great if you could leave five ⭐️ ⭐️ ⭐️ ⭐️ ⭐️ stars and even a comment. Did you know that this will help Google to find this recipe when others are looking for something similar? Thanks, Cindy
Equipment
- bread machine
- microwave oven
Ingredients
- 1 cup unsweetened plant milk, warmed soy or pea protein recommended
- ¼ cup creamy peanut butter melted
- 1 tablespoon vegan butter melted
- ⅓ cup packed light brown sugar
- ¼ cup pure maple syrup
- 1 ¼ teaspoon salt
- 1 teaspoon pure vanilla extract
- ¼ teaspoon maple extract see notes
- 2½ cups bread flour measured correctly
- 3 tablespoons peanut powder such as PB2
- 1 teaspoon ground cinnamon
- ½ teaspoon allspice
- 1 pinch ground nutmeg
- 1¾ teaspoons rapid-rise yeast bread-machine yeast
Instructions
- Melt the vegan butter, Melt the peanut butter. Warm the plant milk.
- Add to the bread-machine (BEFORE the flour, spices, and yeast): heated plant milk, melted vegan butter, melted peanut butter, maple syrup, vanilla, maple extract brown sugar, and salt. You'll be adding the spices and peanut powder on top of the flour. It's very important that salt is added at this step though. (Sprinkle or spoon to evenly distribute the brown sugar – you don't want a a big clump dumped in.)1 cup unsweetened plant milk, warmed, ¼ cup creamy peanut butter, 1 tablespoon vegan butter, ⅓ cup packed light brown sugar, ¼ cup pure maple syrup, 1 ¼ teaspoon salt, 1 teaspoon pure vanilla extract, ¼ teaspoon maple extract
- Measure the bread flour correctly using the lighten, spoon, and level method. (See blog post.) Add the flour on top of the wet ingredients. Sprinkle the peanut powder, ground cinnamon, all-spice, and nutmeg evenly on top of the flour. Make little well in the center of the flour mixture and sprinkle the rapid-rise yeast on top of that.2½ cups bread flour, 3 tablespoons peanut powder, 1 teaspoon ground cinnamon, ½ teaspoon allspice, 1¾ teaspoons rapid-rise yeast, 1 pinch ground nutmeg
- Choose the basic/white bread cycle, medium crust, and medium-sized loaf (about 2 pounds).
- When the cycle finishes, remove the loaf from the pan. Cool on a wire rack for at least 30 minutes before slicing.
Notes
- Using both peanut butter and peanut powder ensures bold flavor without heaviness.
- The peanut butter and vegan butter need to be melted before adding the the bread machine. This ensures an even mix-in. This recipe was developed with creamy no-stir natural peanut butter, but with added peanut oil, salt, and sugar – so not entirely “natural”.
- Do make sure to measure your flour correctly (see blog post) and to use bread flour. Bread flour has more protein, which helps the dough rise higher and gives the loaf its chewy, bakery-style texture. All-purpose flour can work in a pinch, but the bread may turn out softer and a little less structured.
- Do make sure to use rapid-rise/bread machine yeast. This recipe was developed for it and using regular yeast will not give the same results.
- Store at room temperature up to 2 days or refrigerate up to 5 days. Toast slices before serving for the best peanut-butter aroma.
- The maple extract is a late edition to this recipe and adds a depth of flavor. If you have it on hand then use it. If you don’t, and don’t think you will ever use it again then leave it out.