If you’re looking for a simple yet effective way to make vegan icing for cookies, Karo syrup icing offers a great alternative to the more tricky vegan royal icing. Clear corn syrup acts as an ideal base for creating smooth and glossy icing making it a convenient choice for any vegan home baker. Whether you’re decorating sugar cookies or adding a sweet drizzle to oatmeal treats, this easy-to-make vegan icing with Karo syrup is a reliable and delicious option that comes together in minutes, ensuring your baked goods are both eye-catching and inclusively sweet.

The Perfect Vegan Icing Recipe
I love watching YouTube videos and TikToks from the expert cookie decorators seemingly effortlessly icing their beautiful cookie creations that are more works of art than anything else. I can watch and appreciate for hours. But can I actually do this cookie decorating magic myself? Heck no! Vegan royal icing is super tricky. I’m working on it but have not yet perfected it. And the decorating skills? Never have I ever….
Cookiers we are not, but it doesn’t mean we don’t have fun trying! In my house we love to make cut-out sugar cookies for every holiday and have a blast making our creations with vegan buttercream and this easy Karo syrup icing. Even if they aren’t the most beautiful works of art, we think they are pretty special and super yummy too.

Make no mistake, this icing is going to go on smooth like royal icing but is NOT going to give you the same design abilities that royal icing would. It will not dry as hard or stiff as royal icing does and it’s not as easy to make swirls and designs. I personally like the flavor a little better and the softer texture when fully dried. But for the fancy royal icing designs, you’ll need to make actual (vegan) royal icing. Recipe to come…
Ingredients needed to make super easy vegan icing for cookies…and more
- powdered sugar
- warm water
- light corn syrup – Karo is my brand of choice. I know there are store brands and they might be fine. I’ve never used them though.
- vanilla extract – Clear vanilla extract is best if you can get clear vanilla extract because it won’t change the colors of your icing.
- butter extract – If you don’t have butter extract don’t let that keep you from making this icing! Most Karo syrup icing recipes don’t use it. I do because it gives this vegan icing a little boost of flavor. I use it in my vegan buttercream frosting too. Just sub in vanilla extract if you don’t have it – but consider buying it for a future cookie making time. You won’t be sorry!
- pinch of salt – Again, most corn syrup icing recipes don’t call for the pinch of salt but I think it helps with the flavor. I say a pinch because the smallest measuring spoon – one-eighth a teaspoon – is just a little too much salt.
- gel paste food colorings – Gel food colors are recommend because they are less likely to change the consistency of your icing the way liquid food colorings might.
- tip-less icing bags – You’ll definitely need icing bags and all the expert cookiers use tipless icing bags so that’s what I’m using. I think it matters a little less with this corn syrup recipe though than it would for an actual royal icing recipe.

Instructions to make easy vegan corn syrup icing
The exact ingredients with measurements can be found in the recipe card below along with more concise abbreviated instructions. Read on for more details, tips, and tricks so that you will feel confident making this recipe.
Combine the water, corn syrup, vanilla extract, butter extract and salt. Whisk everything together until well combined. You might need to add a few drops of water later to get the right consistency but for now go with the fourth cup recommended.

Step 2: The powdered sugar
Place the powdered sugar in a larger bowl and add the liquids to the powdered sugar. Whisk together until all of the powdered sugar has been incorporated.


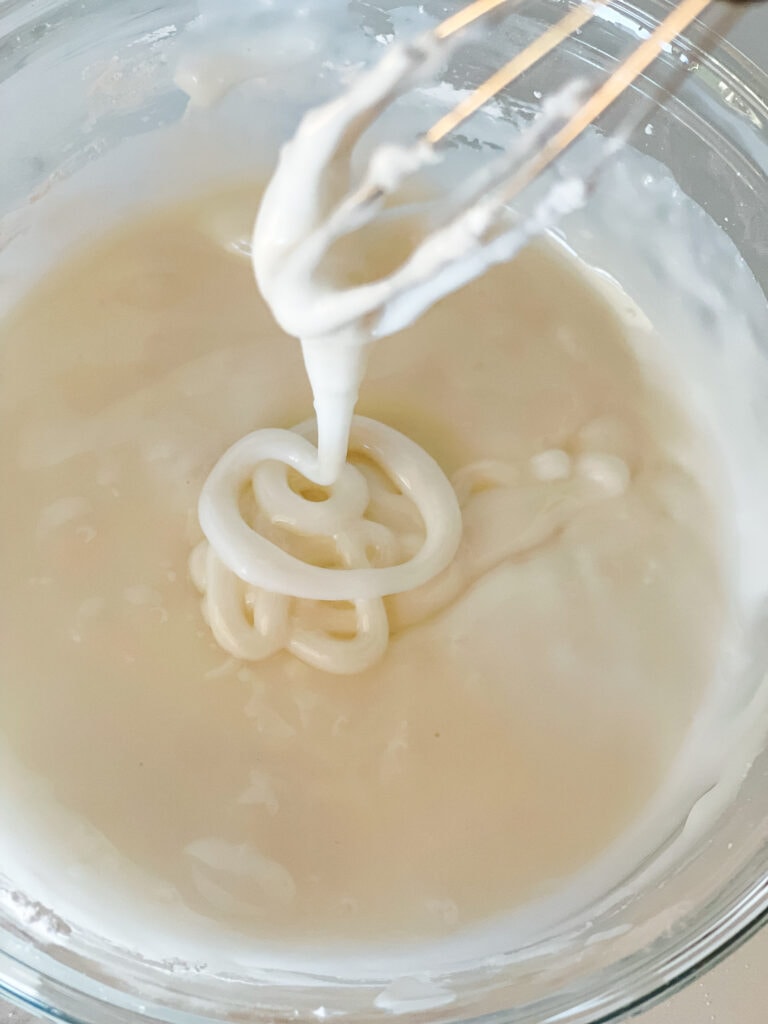
Step 3: Getting the consistency just right
Check the consistency of your karo syrup icing. Raise your whisk (or spoon) and let the icing fall to the bowl and start counting (one potato, two potato…). The dripping icing should be absorbed in about five seconds. If it immediately absorbs into the mixed icing then you’ll need to add more powdered sugar. If it takes longer than five seconds to absorb then add a little water – literally just a few drops at a time.

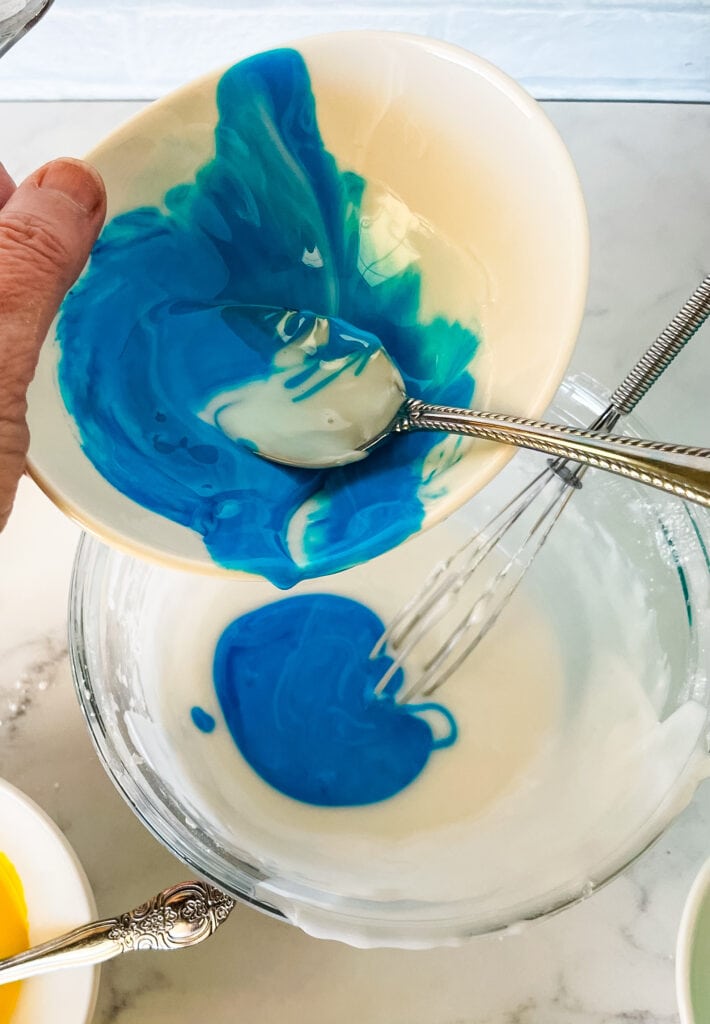
Time to color your vegan icing!
Portion out small amounts of the white icing into bowls. Add the tiniest bit of gel food coloring. Mix well and check the color. It’s better to start with a small amount of food coloring and add more if needed because it’s pretty impossible to take away the color once it’s added.
If you accidentally add too much food coloring then it’s better to add a small amount of colored icing to white icing. I always reserve about half of the icing and leave it white just in case I do this.
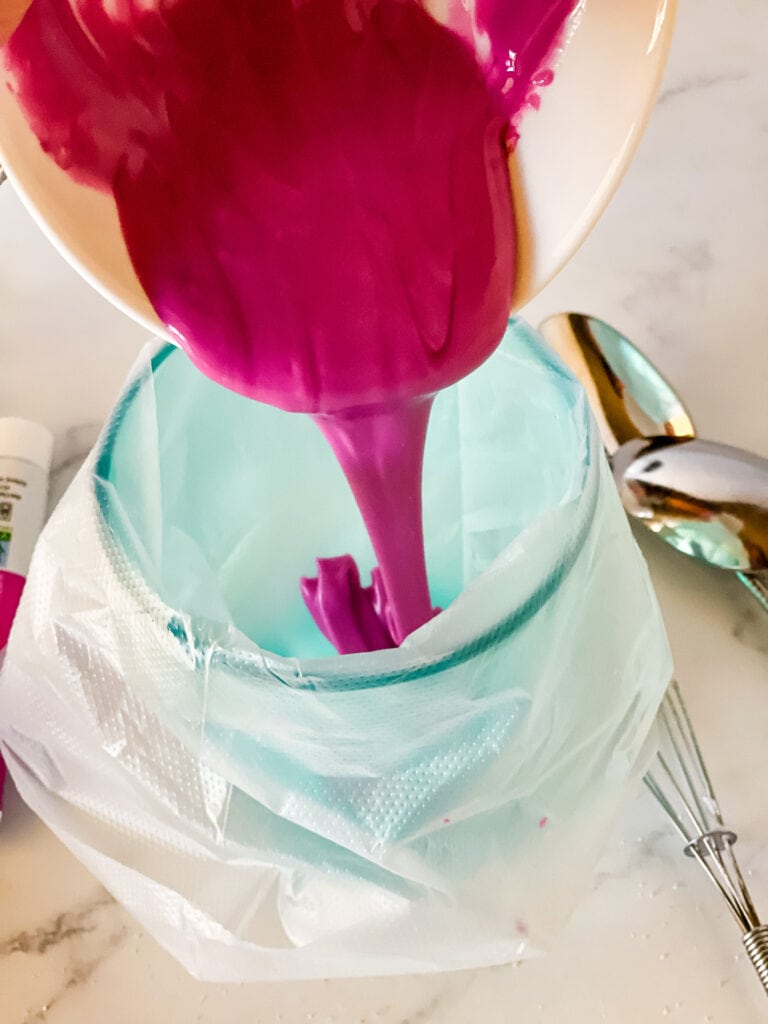
Tips for working with the icing bags
All of the expert cookiers recommend tipless icing bags – which probably matters more for actual royal icing than for this recipe. But this is what I use too.
Next, add the icing to icing bags for decorating. I used to make a real mess of things till I saw my daughter do this nifty trick. Open the icing bag over a glass or other small round open container and then spoon or pour your icing in the opening. Then remove it and tie the top when you’ve finished adding the icing. Brilliant for no mess or fuss!
Another hint for working with the icing bags is that you snip only the small tip get the icing to flow out. You can always snip more but you can’t put any material back once it’s been cut. If I have accidentally cut too much from the tip then I just make a new bag of icing.
When you are finished with one particular color but know you will be using it again, place in back in the glass upside down with the tip facing upward for that you won’t loose any icing from the tip. Then when you are ready to use that color again, just take the bag out to use. Again, no mess and no fuss.

Some more icing tricks I’ve learned to make cookie decorating easier and more fun
Remember that this is not royal icing and won’t behave the same way as royal icing will. This icing takes forever to dry but dries with a softer consistency than royal icing does so I consider that a win! But there are a few mistakes I’ve made along the way.
Dry your cookie flat
Make sure your cookie is entirely flat during the setting and drying process or the wet icing will slide under the dryer crust and cause funny bumps and dips. I had set this cookie on the edge of a plate at an angle while it was drying.

Outline with a thin tip
You will want to outline the cookie with a thin tip or opening in the icing bag. Go all the way around the cookie to make a border/outline. This will hold the icing icing in and prevent it from falling down the side of the cookie when you flood the icing on top in the next step.

And if you want to do a fancy sprinkle border like on the star cookie above, while the icing is still wet, carefully turn it oven onto a plate of sprinkles and gently press around the border icing on the cookie.

Let your border completely dry before flooding
Once your icing border is completely dry you can snip a larger hole in your icing bag and flood the top with icing. Remember above how I recommended keeping your icing bag upside down in a glass to keep for later use? This would be the later use. It takes a couple of hours for the icing border to completely dry.

And what happens if you don’t let the icing border completely dry?
If your icing border does not completely dry then the new icing you flood onto the top of the cookie will be too heavy for the weak wet border and it won’t hold. Look at the sides of the stocking and mitten cookies. Can you tell I was a little impatient?

Tips for Preserving Your Icing
Keeping your vegan icing in prime condition takes a little know-how. Store it airtight; this prevents unwanted dryness. Use plastic wrap pressed directly onto the surface of the icing before sealing the container. This trick helps maintain moisture and keeps your icing ready for cookie decorating adventures.
Should you find your icing has started to crust over you can still save it. A few drops of water stirred in gently could bring it back to its best consistency.
Maintain freshness by storing the covered icing at room temperature if you plan to use it within a day. Otherwise, pop it into the fridge for extended life, making sure it’s snugly sealed. When the time comes to re-use, let it sit at room temperature for a bit, then stir and assess the texture, adding water as needed to softly revive it.
Show me your cookies!
Like I said, I’m no expert cookie crafter, but I do really enjoy the process…and the tasty end result. We do the best we can with it and don’t fret it our decorated cookies aren’t Pinterest picture perfect. You can do the same! I urge you to enjoy the process and please show me your fun decorated cookies. I’ll be you make some pretty fantastic ones!
The printable recipe card
Did you love this recipe?
Want to share the love? It would be great if you could leave five ⭐️ ⭐️ ⭐️ ⭐️ ⭐️ stars and even a comment. Did you know that this will help Google to find this recipe when others are looking for something similar? Thanks, Cindy

Vegan Icing for Cookies
Ingredients
- 3 cups powdered sugar
- ¼ cup warm water
- 1 Tablespoon light corn syrup Karo
- ¾ teaspoon vanilla extract
- ¼ teaspoon butter extract see notes
- pinch of salt
- gel food colorings recommended
Instructions
- Use a small bowl to combine all of the liquids. Add the pinch of salt¼ cup warm water, 1 Tablespoon light corn syrup, ¾ teaspoon vanilla extract, ¼ teaspoon butter extract, pinch of salt
- Place the powdered sugar in a larger bowl and add the liquids to the powdered sugar. Whisk together until all of the powdered sugar has been incorporated.3 cups powdered sugar
- Check the consistency. Raise your whisk (or spoon) and let the icing fall to the bowl. The fallen icing should be absorbed in about five seconds.
- Portion out small amounts into bowls. Add the tiniest bit of gel food coloring. Mix well and put into icing bags. See blog post for hints.
- Cover tightly until use. If if starts to dry and crust then you can try to revive it by stirring in a few drops of water.
